

Doubles at AdeptiCon is the premier Bolt Action event. Doubles is a special format that brings forth the best Bolt Action imaginable. With over 80 players battling it out over three rounds, it’s guaranteed to be an incredible showcase of both hobby and generalship. I completely failed to capture the spirit of the games and the incredible armies on display in photos; thankfully, much more skilled photographers than I were on the scene, and there are tons of pictures floating around various Bolt Action groups. Do yourself a favor and seek them out. Especially Caleb & Kory’s Best Painted winning Finns and Aaron & Oliver’s astounding Player’s Choice winning Free French and Partisans in Italy.
The full event rules are available, but here is a quick overview:
- Teams of two players.
- Teams must be composed of nations that allied during World War II.
- Teams are 1,600pts max, split however players wish.
- Teams are 20 Order Dice max, split however players wish. Each player will have their own Order Dice in the bag.
- Teams can have any number of Platoons:
- At least one Player’s force must include a Rifle Platoon.
- The other Player may replace their mandatory Rifle Platoon with a Recce Platoon or an Engineer Platoon.
- Maximum of 1 Armored Platoon per Team.
- Maximum of 1 Artillery Platoon per Team.
Our Force
The Battle of Arras, May 21, 1940
By mid-May, desperate to slow the German advance through France, the BEF launched an assault at Arras. The attack found initial success as the light German AT Guns were unable to penetrate the heavy armor of the Matilda II. The British tanks continued to close on the German lines and it was not until Rommel himself ordered direct fire from the 88mm guns that the BEF began to falter. At close range, the Matildas stood no chance and were ripped apart by the 88s. All across the battlefield, the same results repeated. Matilda tanks gained an initial edge from the German shock at seeing their shells bounce off of the British armor, but then determined 88mm gunfire tore them apart. Lacking tank support, the British infantry had to withdraw.
Although the BEF failed to achieve their objectives, and suffered irreplaceable losses, the audacity of the attack forced the OKW to consider further Anglo-French counterattacks and paused the Panzer advance. This pause made the evacuation of the BEF at Dunkirk during Operation Dynamo possible.
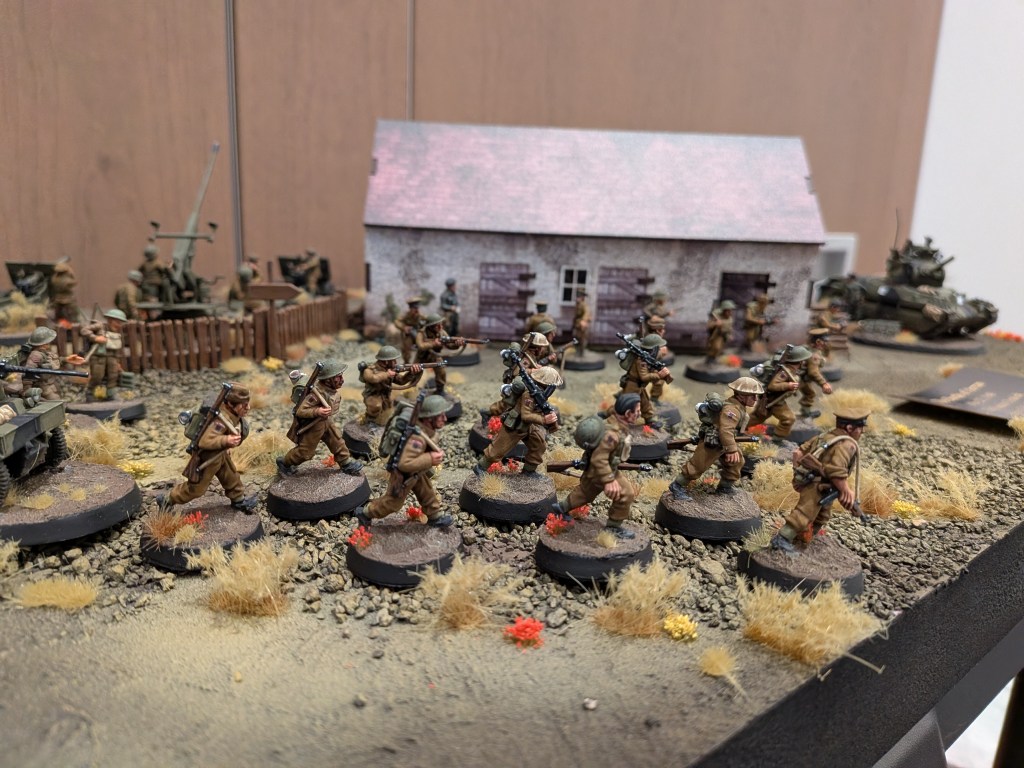
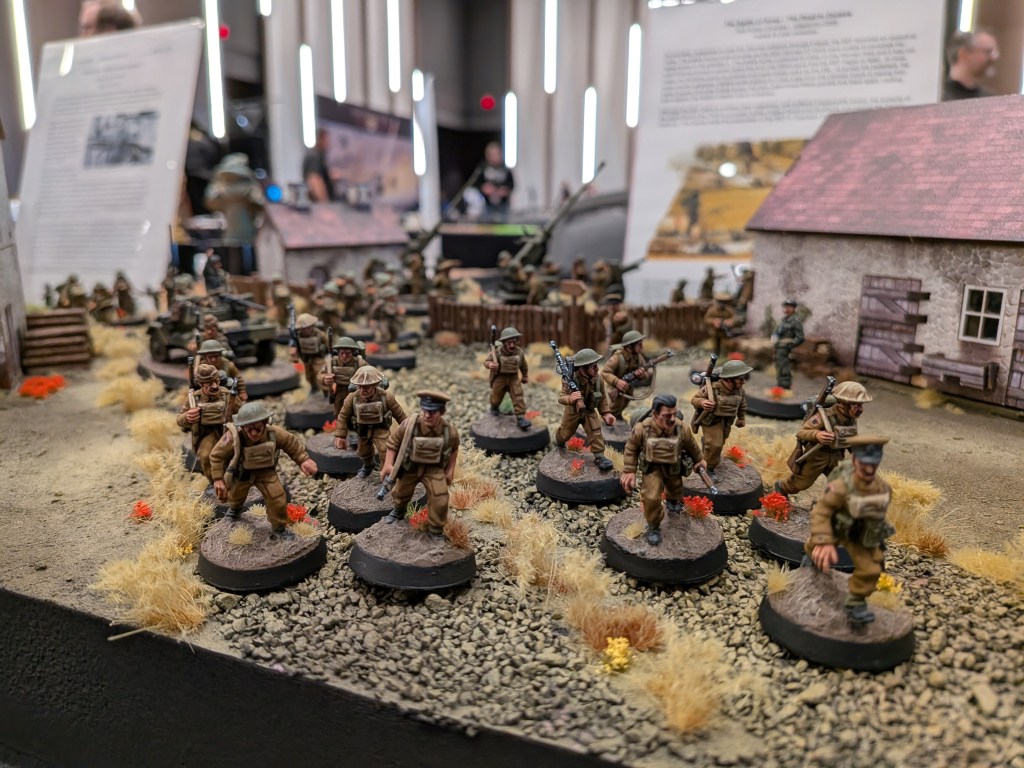
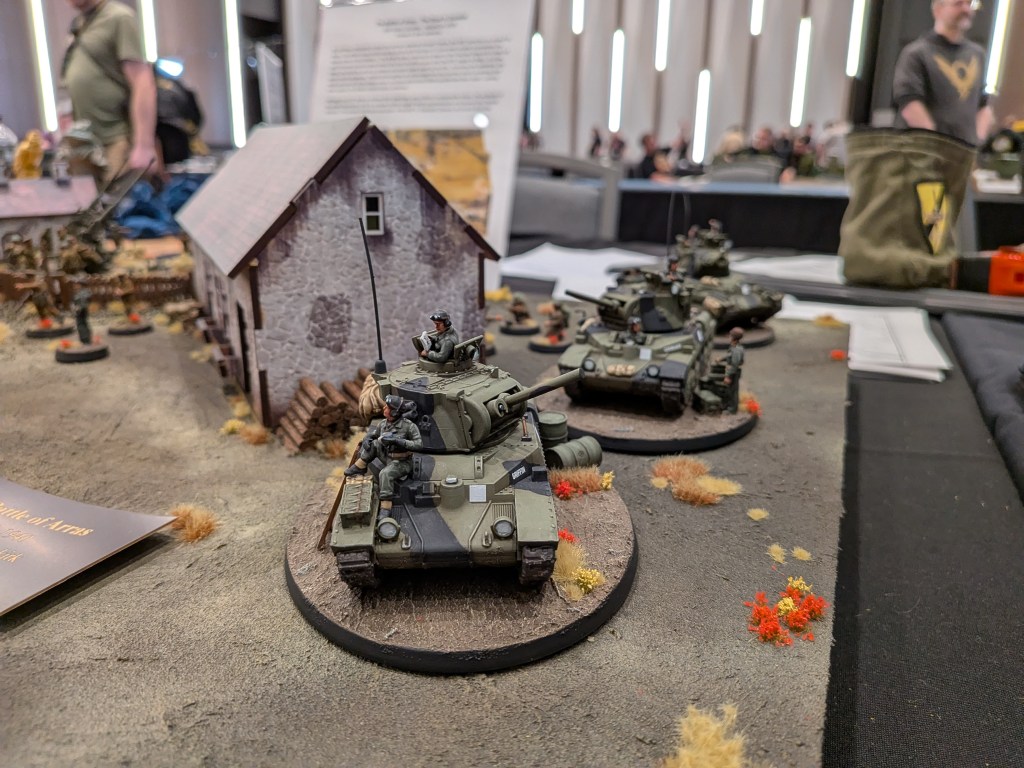
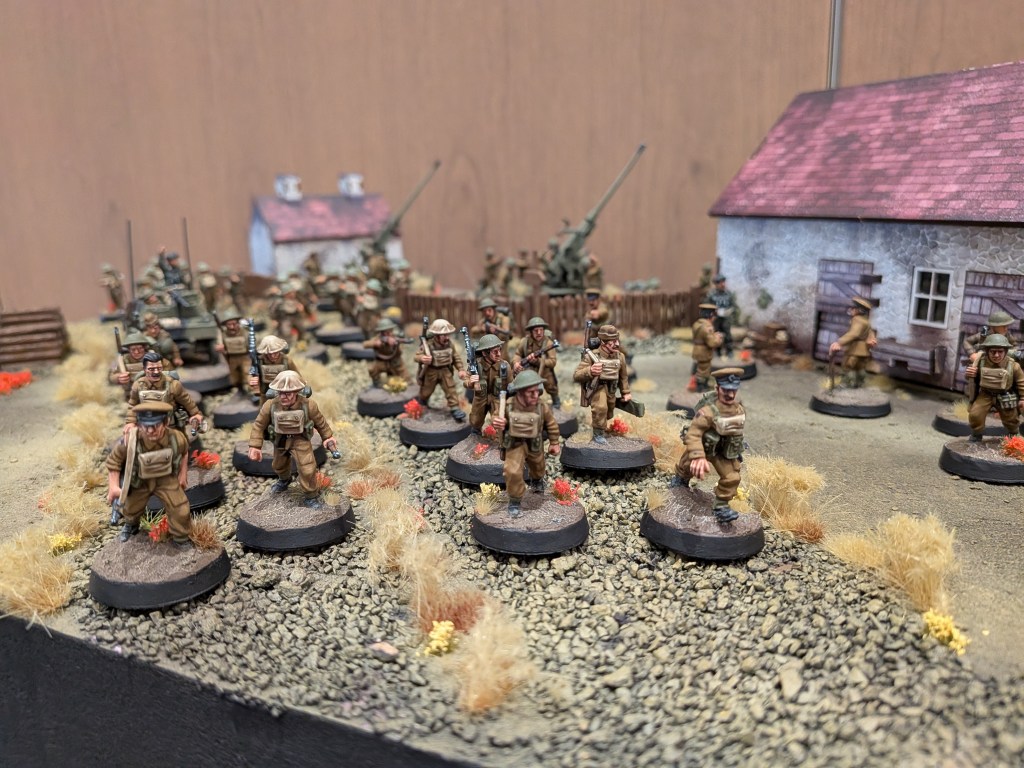
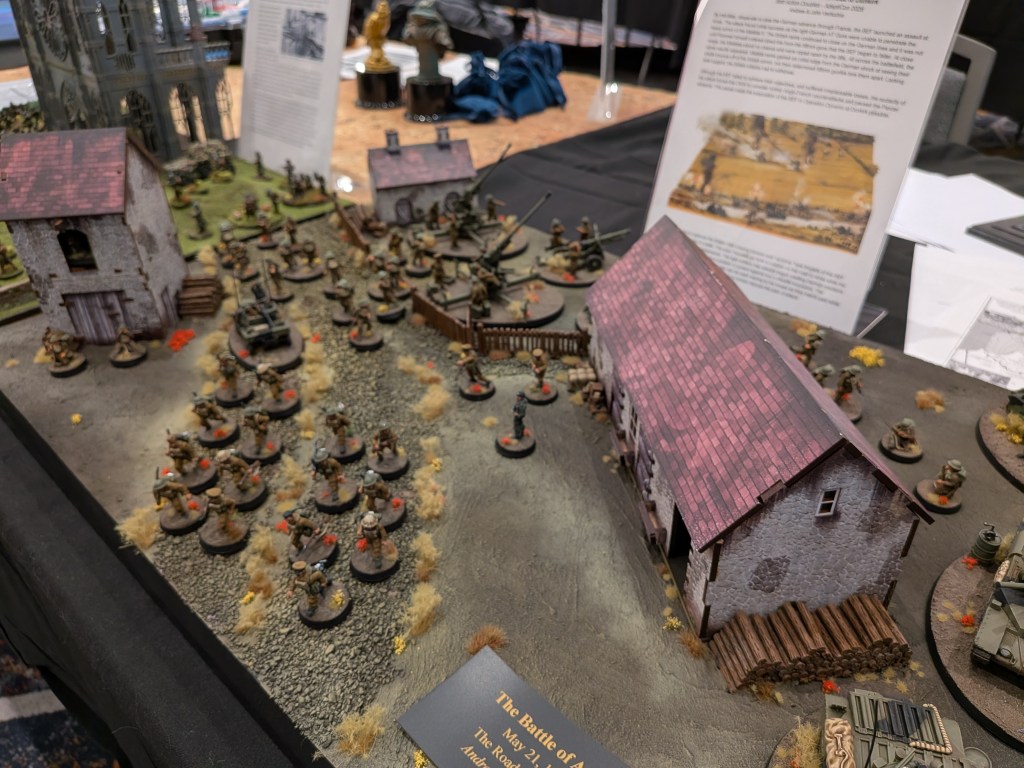
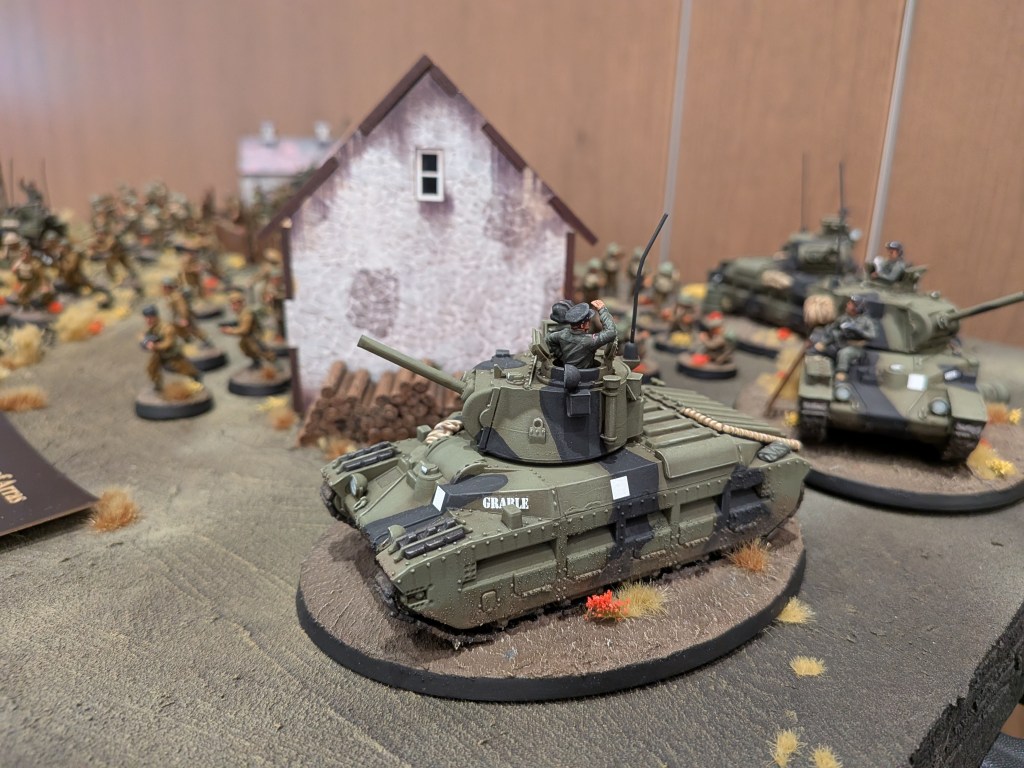
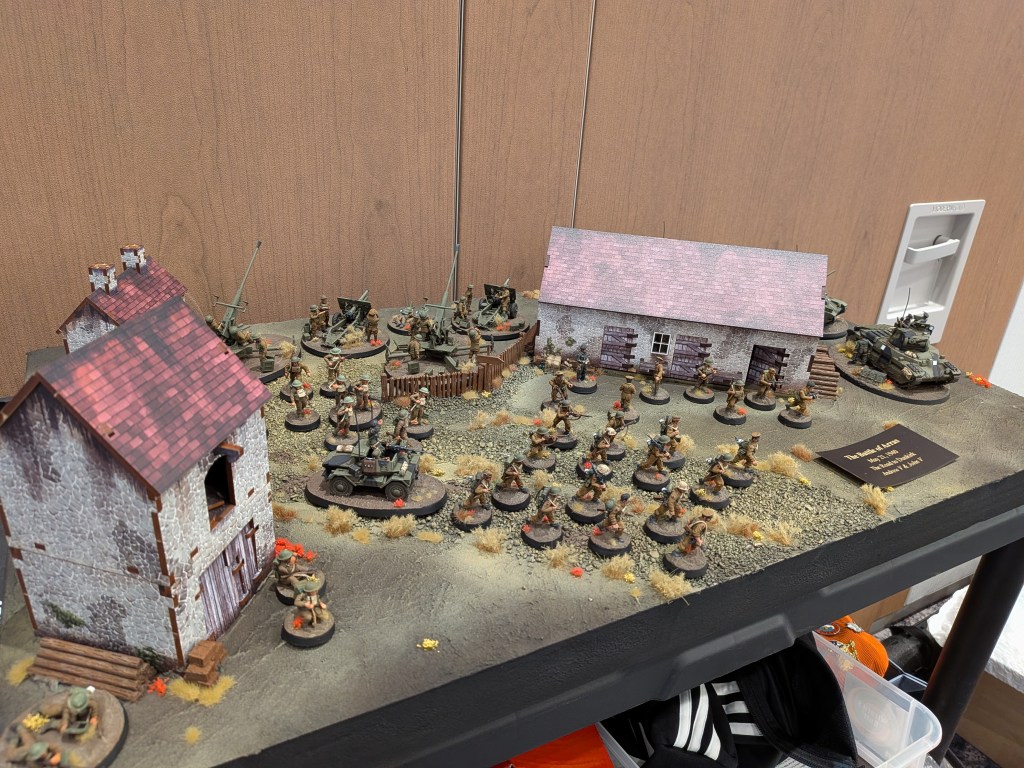
This year, we based our Doubles force on the British Expeditionary Force at the Battle of Arras in May 1940. This was a part of the wider French campaign and was a direct precursor to the evacuation at Dunkirk. Our display captures the British 50th Infantry Division and 1st Army Tank Brigade of the BEF in mid-march on their way to battle. The stoic Tommies go forth in column on the road to Arras while the three Matilda II undergo maintenance. The light artillery has already begun shelling German positions in the distance, and the Bofors are in position to protect against any Luftwaffe incursions. The Commander of the 1st Army Tank Brigade can be seen waving to his troops as they march past, while the officers gather outside an abandoned barn to further discuss the plan of attack.
Andrew’s BEF infantry are mostly Wargames Atlantic British Expeditionary Force with a few Warlord bits thrown in. Careful consideration was made to only use marching poses, and a few conversions were required to make sure the infantry are in motion. The Platoon Commanders are from Woodbine and Stoessis Heroes. The three Matilda II tanks are from Warlord Games with crew from Warlord, Perry, and Rubicon. All the crew are modeled “at ease” as they wait for orders to move out once the infantry is in position. The Dingo Scout Car carrying the Platoon Commander is from Rubicon. John’s BEF are entirely 3D printed from the Studio Historia For King & Country range. Everything from the infantry to the Bofors AA and the 25-pdrs. The display board features a few Micro Art Studio Normandy buildings and about four full packs of Gamers Grass tufts and flowers.
Andrew’s BEF – Infantry & Armor
| Rifle Platoon | |
| Platoon Commander – Regular – 30 Pistol – (1) Guards – 1 | 30pts |
| Rifle Section – Regular – 7 men – 70 NCO SMG – 4 x1 LMG – 15 Guards – 7 | 96pts |
| Rifle Section – Regular – 8 men – 80 NCO SMG – 4 x1 LMG – 15 Guards – 8 | 107pts |
| M3 White Scout Car – Regular – 68 Armor 7 Transport 8 Pintle-mounted, forward-facing HMG | 68pts |
| Armored Platoon | |
| Matilda IIC – Regular Armor 9 Turret-mounted Light Howitzer with coax MMG Slow Command Vehicle | 165pts |
| Matilda II – Regular Armor 9 Turret-mounted Light AT Gun with coax MMG Slow | 155pts |
| Matilda II – Regular Armor 9 Turret-mounted Light AT Gun with coax MMG Slow | 155pts |
| BEF Total – 7 Order Dice | 776pts |
John’s BEF – Infantry & Artillery
| Rifle Platoon | |
| Platoon Commander – Regular – 30 Pistol – (1) +4 extra men – 40 x2 SMGs – 8 Guards – 5 | 82pts |
| Rifle Section – Regular – 8 men – 80 x1 LMG – 15 Guards – 8 | 103pts |
| Rifle Section – Regular – 8 men – 80 x1 LMG – 15 Guards – 8 | 103pts |
| Rifle Section – Regular – 8 men – 80 x1 LMG – 15 Guards – 8 | 103pts |
| Forward Observer (Artillery) – Regular – 75 +1 extra man – 11 Guards – 2 Infiltrator | 88pts |
| Boys AT Rifle Team – Regular – 25 Guards – 2 | 27pts |
| Light Mortar Team – Regular – 30 Guards – 2 | 32pts |
| Artillery Platoon | |
| Platoon Commander – Regular – 30 +1 extra man – 10 Guards – 2 | 42pts |
| Light Artillery – Regular – 65 Guards – 3 Gun Shield AT Shell | 68pts |
| Light Artillery– Regular – 65 Guards – 3 Gun Shield AT Shell | 68pts |
| 40mm Bofors Gun – Regular – 50 Guards – 4 | 54pts |
| 40mm Bofors Gun – Regular – 50 Guards – 4 | 54pts |
| BEF Total – 12 Order Dice | 824pts |
Game 1
Key Lime Positions vs Zack & Giuseppe (Italians)
Nothing like a Game 1 Grudge Match to get Doubles started! John and I had a fantastic game against Zack at Doubles last year, and we wanted to run it back. Zack and Giuseppe brought a lovely combined arms Italian force with a wide mix of different armor, infantry, and support teams. Everything from Bersaglieri to the terrifying Semovente 90/53 (Super-heavy AT Gun on an Armor 8, Open-topped chassis). It’s always a joy to see 1600pts of glorious Italians arrayed on the field of battle.
The Mission – For this mission, we placed d3+4 objectives markers on the table. No VPs for kills or leaving the table. Capturing and holding the objectives was all that mattered. Each objective held was worth 1 VP at the end of the game. In a great Doubles twist, an additional 1 VP was scored if an objective was controlled by a unit from both players on a Team. It wouldn’t be enough just to hold the objectives; you had to hold them with your teammate.
Andrew’s Highlight – Those bonus VPs on the line for having units from both players on an objective were critical to our strategy. But here’s the thing: my three Matilda IIs are Slow. They are big body tanks with only a 6″ movement and a long way to go in order to capture an objective. So imagine my disappointment watching these iconic AFVs fail three Order Tests over the course of the game, resulting in them driving backwards away from the enemy. And if that wasn’t brutal enough, one of them even backed up off the table and fled the field of battle!
John’s Highlight – As was the case when we played against Zack last year, this was a very close game where the outcome was uncertain until the final moments. At various points, I thought for sure we would lose. But as so often happens in games of Bolt Action, unexpected things happened that turned the tide. A daring Outflanking maneuver by our BEF infantry was a risky gambit, but our units were able to contest a crucial objective and survive long enough to prevent the Italians from scoring those points. The careful coordination of our units to maximize points was critical, despite some unfortunate Order Tests from Andrew’s Matilda tanks!
Result – Win
Game 2
The Breakout vs. Ben T & Zach D (British)
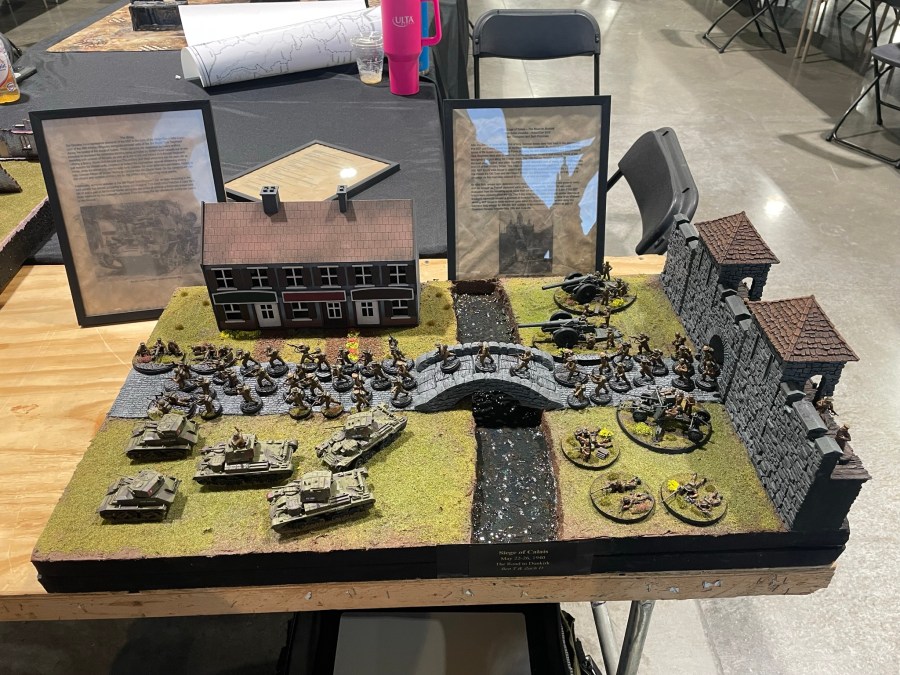
What’s this? An inter-club match? Ben & Zach went with the Siege of Calais (get a look at that display board above) as their theme, and not only were they also playing BEF, their force was very similar to our own. It was almost a full mirror match! This was going to be interesting.
The Mission – In The Breakout Teams scored VPs for getting units into the four scoring zones. Each scoring zone was worth more points as they got closer to the enemy table edge. If you ended the game with units from both players in a zone and there were no enemy units, you scored double the VPs. So, you needed to get units deep into enemy territory, stop your opponent from doing the same, and make sure you kept some of your units back to block the double score opportunity. It was a well-designed and chaotic mission that was a challenge to play (in a good way).
Andrew’s Highlight – It was an artillery battle of legendary proportions. We had two Bofors Heavy ACs and two Light Howitzers. They had one Bofors and two Heavy Howitzers. The first few turns were a continuous exchange of battery and counter-battery fire up and down the table. Neither Artillery Observers managed to call in their strikes (and thank goodness for that). Even without the addition of multiple Artillery Bombardments, the table became a blasted hellscape with HE Templates of every size flying every which way. You rarely see this sheer amount of firepower on a single table, and it was a sight to behold.
Through the clouds of acrid smoke, our units jockeyed for position. To our complete surprise, at the end of Turn 5, when the smoke finally cleared, the game ended in a 30-30 draw. In no small part to the heroics of John’s Platoon Commander and their almost suicidal run into enemy territory.
John’s Highlight – It doesn’t get any closer than that! All four players were bewildered when we tallied up the final score and realized we were dead even. This was another back-and-forth game with heroics from both sides and lots of artillery fire trying to make an opening. Towards the end of the game, it was time to make some Hail Mary moves to try and rack up points, and I hurled my two-man Platoon Commander unit deep into enemy territory. This was a suicide mission, but I deemed it a worthy sacrifice to prevent enemy units from crossing into the next scoring zone. Much to everyone’s surprise, the Commander withstood a hail of gunfire, including facing down Point-blank shots from a Vickers tank, and managed to survive. This unit scored extra points for us and blocked additional points for Ben & Zach. This moment was one of several that would have changed the outcome had the dice rolled differently.
Result – Draw (30-30)
Game 3
Silence Those Guns! vs Joe V & Jackson H (French)
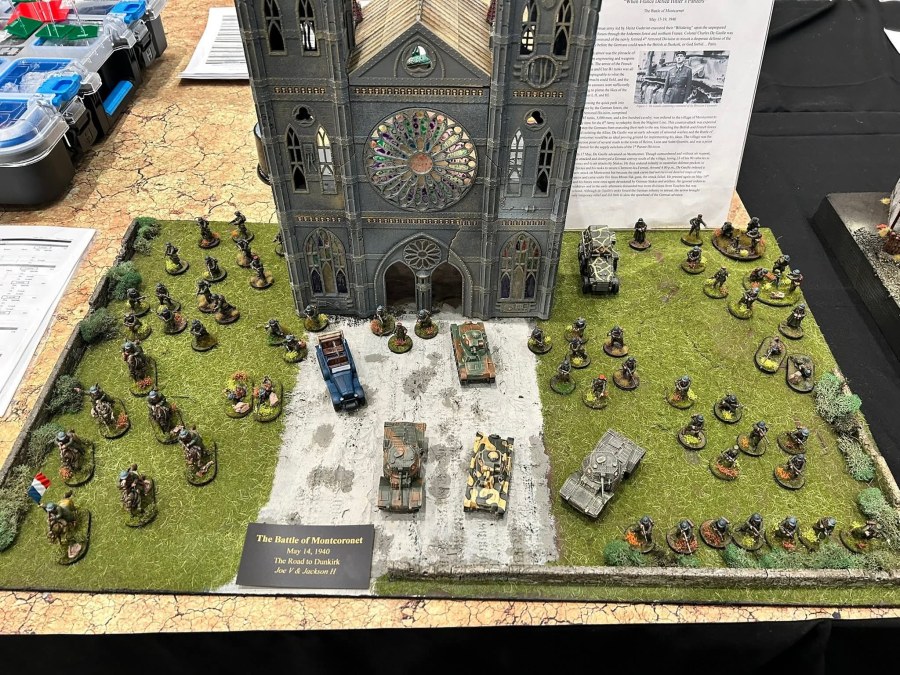
Game 3 was another inter-club match! This time against Joe & Jackson’s French. Their Battle of Montcornet-themed force (with another impressive display board) was a glorious sight on the table with multiple Tanks, Armored Cars, half-tracks, Cavalry, and infantry squads of all flavors and styles, all rallied under the French flag.
The Mission – Oof, this was a tough one. Silence Those Guns! was a kill point mission with bonus points awarded for destroying Mortars, Forward Observers, Spotters, and Artillery. Good thing we didn’t have many of those units in our list! Oh … wait. We have a bunch of those units in our list … uh oh. We were in trouble from the jump. Too much Artillery and not enough terrain to hide them. By the end of Turn 1, we were already digging ourselves out of a hole.
Andrew’s Highlight – Not many highlights to call out for the BEF. Our guns went cold, and we couldn’t get anything started. Joe & Jackson played aggressively with their Cavalry and Armored Cars. Charging the Vet Cav onto the table with a deep Outflank, right into our gunline. The Panhard ACs dodged AT fire from my Matildas and closed within point-blank range to pierce the heavily armored British tanks. I tried a desperate late-game maneuver with the White Scout Car against a French Half-track and missed with all the HMG shots. A tip of the cap to Joe & Jackson, they piloted their French with dash and élan – they made de Gaulle proud!
John’s Highlight – Our work was cut for us in this mission. With how our lists were constructed, our opponents had more opportunities to rack up VPs than we did, but Andrew and I are never ones to shy away from a challenge. Jackson & Joe are both skilled commanders, and they were able to take advantage of the mismatch.
A highlight (or more accurately, lowlight) for me was my Bofors hitting multiple shots against a lone Platoon Commander who managed to shrug off all of the damage and stay standing. Firing HE against a single infantry model is never the most effective use of that weapon, but it was one of the few opportunities we had to score extra points so I had to try. Alas, the Frenchman hugged to his cover and lived to tell the tale.
Result – Loss
Final Thoughts
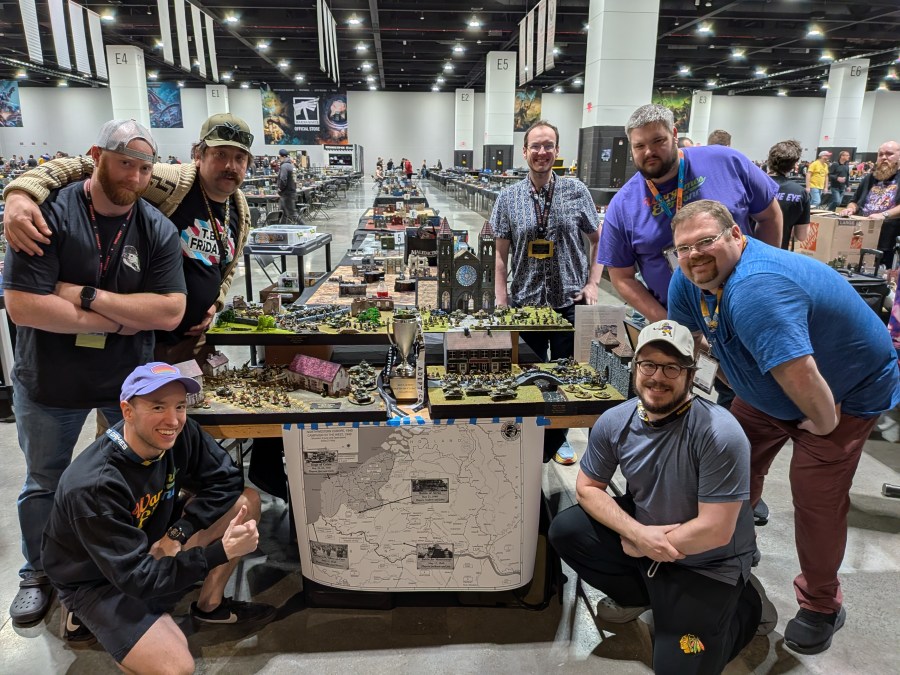
I’ve said it before, and I’ll say it again – Bolt Action Doubles is the best. Full stop. And this was especially true in 2026 because we managed to wrangle four separete teams teams together under one Club banner and delivered a fully realized group project – The Road to Dunkirk. The road was longer and bumpier than any of us expected, but it all came together in the end. TOs Sam and Shane once again delivered on all fronts and ran one hell of a tournament. There were 42 Teams at the event, and the energy was at an all-time high. It felt like every Team understood the objective of Doubles – bring the noise and showcase your hobby. For another year, Doubles at AdeptiCon remains the pinnacle of Bolt Action. – Andrew
This was my fourth time playing Doubles, and it remains the highlight of my Bolt Action calendar every year. My expectations for the event are always high, and they are always exceeded. Big shoutout to the TOs, all of the players, and my generous teammate Andrew, who helped make up for my procrastination by putting the finishing touches on some models the day before the event. All three of our games were well-fought with exceptional opponents. You can’t ask for more from a day of gaming. We’ve already started preparing for next year, and I can’t wait to play again in 2027. – John
More AdeptiCon 2026 coverage:
