

Over 16 missions, Joe & Andrew will battle through the full campaign – each trying to secure victory in a desperate fight for control of Fortress Budapest.
After some much needed R&R, our two Commanders have returned to the front. With the Campaign tied at 4 points each, the fate of Budapest hangs in the balance. Would Andrew be able to continue to Axis winning streak? Or would Joe’s Soviets manage to achieve a smashing victory and break into the city? It’s time for Game 9 – Withdrawal Across the Danube!
This city fight mission was played on a 4×4′ at the home of Campaign: Fortress Budapest – Michigan Toy Solider. As this was another urban battle, both Andrew (the Defender) and Joe (the Attacker) could select Siege Assets for the game. Andrew started the game with Street Barricades and then added in Frontline Aid Post. Joe started with Preliminary Bombardment and selected Big Push. Andrew built his force using the steadfast Budapest Pocket Defenders (as in Game 8) and Joe used the deadly Urban Assault Group.
Both players had to secure the three street barricade Objectives by moving Infantry or Artillery within 3″. At the start of Turn 4, Andrew could remove one of the Objectives. In addition, at the start of every Turn (besides the first), Andrew had to remove one unit from play to show those units falling back in good order to the other side of the Danube. Joe was granted a free Airstrike to represent the Soviet control of the skies.
Andrew had to deploy his entire force within 12″ of the Axis table edge. Joe went with 100% First Wave. No Reserves.
Our Commanders could score VPs by:
- Soviets:
- 1 VP per enemy unit destroyed
- 3 VP per Objective captured at the end of the game
- Axis:
- 1 VP per enemy unit destroyed
- 3 VP per Objective captured at the end of the game
The Pre-Game
The Axis Strategy
We are back! The Christmas Truce turned into the New Years Truce and turned into the Winter Truce but after an almost three month break we have returned to decide the fate of Budapest. Needless to say, I was hyped. Maybe a bit too hyped. As we shall see, both my pre-game strategy and approach to this mission were not as well thought out as they should have been. I planed to bunker down on each of the three Objectives and force Joe to walk across the city towards my dug-in defenders.
I had one dedicated assault unit, the Flamethrower-packing Pioneers who would act as a serious roadblock for any Soviets that tried to rush too far forward. I knew the StuH 42 had some serious stopping power and any Soviet unit caught within it’s open sights was going to have a bad time. My biggest concern was Joe’s habit of brining all the indirect fire support. If he got hot with those indirect rolls, I would be in big trouble.
I was excited for the mission and thought the mission special rules looked really interesting. As the defender, getting the chance to remove one of the three objectives from the table at the top of Turn 4 and thus preventing Joe from capturing it was a very interesting idea. The Fighting Withdrawal rules mean that I could remove depleted units from the field of battle and they would not count as kills for Joe. Not bad! Wait…what’s this? I must remove a unit at the start of every Turn? Oh no. – Andrew
The Soviet Strategy
After a short stay in the Gulag to make sure I was still a loyal and fervent believer in the glory of global communism, the long awaited “Christmas Truce” has finally ended! Between real life, the holidays and tournament playtesting, Andrew and I hadn’t played since early November. This was a big game with the balance of the Campaign up for grabs. Andrew had clawed back and we were tied at 3-3-2, but he had the kill advantage by 8! Looking to drive the fascists from Budapest, and under extreme pressure from Marshall Malinovsky and Comrade Stalin, I sent my forces in…
With another brutal 4×4 match in the city, and a lack of Transports, pushing up to grab the objectives would be tricky. Especially when using the open ground/streets rules which gives +1 Pen to any Wound rolls to units caught in the open. I brought the same list as I did in Game 8. Again, as in Mission 8, my Siege Asset would be Big Push – a free squad identical to the cheapest currently in my list.
My strategy was for the three Light Howitzers to pummel the Axis defenders that would inevitably be sitting on the backline Objectives behind the barricades. The ZiS gun would deal with any armor Andrew would bring (he loves his StuH-42!) The Guards and Flamethrower squads would push up the middle, being able to flex to either side if necessary, and the Flamer could deal with pretty much anything. The two x12-man SMG Squads would push up the left and right flanks, hoping to force an assault against some pesky Germans. – Joe
The Game
Deployment

- The full Axis force deployed and steadied themselves for the incoming Soviet Preparatory Bombardment.
- The building with the blue roof between Objective 1 and Objective 2 was designated the Frontline Aid Post and provided a 6″ Medic bubble to all Axis units.
- Axis deployment from left to right:
- StuH 42
- German Veteran Grenadiers
- Med. Mortar
- German Veteran Grenadiers
- Hungarian Assault Pioneers
- Lt.
- Replacement Honved Division Section
- No Soviet units started on the table, all would arrive via First Wave.
- The Preparatory Bombardment rained down across the Axis positions. Every unit except the Mortar took Pins and the Lt. took a direct hit – killing his buddy.
Turn 1

- The Soviet First Wave arrived in overwhelming fashion. The sheer number of assets Joe moved onto the battlefield was staggering:
- x2 12-man SMG Squad
- x3 Light Howitzers
- ZIS-3
- x2 Guards Squads
- Lt
- Flamethrower Team
- Joe wasted no time rushing his troops towards the objectives. With the Fighting Withdrawal rules in play, Joe knew the Axis defense would deplete by one unit each Turn even without any Soviet aggression.
- No units were killed during Turn 1 but some long-range Axis LMG fire sent a few Pins down range and the Pioneers moved up and into the ruins hoping to hunker down and stem the oncoming assault.
Turn 2

- The first of the Axis defenders was forced to retreat from the field via Fighting Withdrawal. Andrew removed the Lt.
- Three Soviet Light Howitzers and the Zis-3 fired indirectly across the Axis defenders. Luckily for Andrew, all the shots missed. But at the end of Turn 2, there were four Axis units all being ranged in on.
Turn 3
- Lots of action on Turn 3!
- Before the start of the Turn, Andrew removed the Honved Division for Fighting Withdrawal.
- Axis Med. Mortar landed a hit on one of the Soviet Light Howitzers and blasted it off of the table. First kill to the Axis!
- Joe advanced his Flamethrower Team up through the ruins to roast the Pioneers. Unfortunately for Joe, not only did the Flamethrower miss, it also ran out of fuel and was removed from the game.
- With vengeance in their eyes, the 12-man Soviet SMG Squad rushed out of a building and assaulted the Pioneers holding the ruins. Even though the Axis unit killed five of the assaulting Soviets it was not enough. The 12 Tough Fighters decimated the Pioneers, killing them to a man.
- The Zis-3 took up an AT opportunity – fired and hit the StuH 42 but bounced the shell and only dealt a Pin.
Turn 4

- Another Turn, another Axis unit removed from the table per Fighting Withdrawal. This time was the Med. Mortar Team. Additionally, the right Objective was removed and could no longer be scored by either side.
- The free Soviet Airstrike arrived and a Strafing Run peppered the Grenadiers on the right. Although 11 hits were scored, somehow, the unit survived!
- The StuH 42 took another hit from the Zis-3, now had three Pins and rallied.
- The Soviet forces sounded a general advance and pushed up to collapse around the remaining Axis defenders.
Turn 5
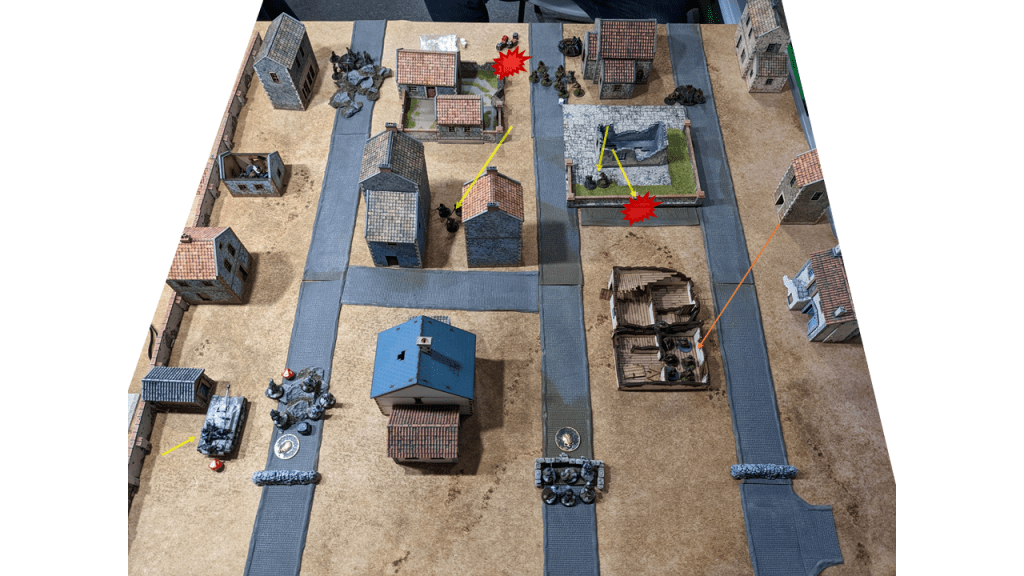
- Sadly we forgot to snap a photo – but it wasn’t pretty.
- Andrew removed the StuH 42 for Fighting Withdrawal leaving two Axis defenders on the table.
- On the first Order Die of the Turn, Joe rushed the 12-man SMG Squad into an assault against the five remaining Grenadiers holding the left Objective. The Germans killed four of the Soviets but it was not enough. The Grenadiers were removed from the game leaving a single unit on the middle Objective for the Axis.
- One the middle Objective the last remaining unit of Grenadiers fell to withering combined fire from the Guards and SMG Squad. After two rounds of shooting, the final Axis unit was removed from the table.
| Soviet VPs | Axis VPs |
|---|---|
| 9 | 2 |
Soviets: 2 Objectives and 3 unit kills | Axis: 2 unit kills
Final Result – Soviet Win
The first blowout of the Campaign! The seven point margin of victory is by far the biggest win so far. Will the Soviets capitalize on this crushing victory?
The Post-Game
The Axis Conclusion
So that didn’t work. Let this be a lesson to all commanders out there – read the mission. And then, read it again. The previous game had gone so well for my small, elite Pocket Defenders that I figured I could just run it back for Game 9. Boy was I wrong. Rolling up with just seven Order Dice for a mission that required me to withdraw a unit at the beginning of every turn was not a good idea. To put it a different way, if Joe killed none of my units, I would have ended Turn 7 with one unit left on the table. One. And that’s only if Joe’s Soviets were completely ineffective!
I was actually in pretty good shape until Turn 5. My forces were holding the two remaining Objectives but again, I was forced to remove a unit at the start of the Turn and I simply did not have enough forces on the table to make up for the units withdrawing each turn. If I had read the mission more closely I would have arrived to the game with a list of at least 10 units. That way I’d still have enough troops to cover the Objectives at the end of Turn 7.
My failings as a commander were not the fault of the mission. Let me be clear, this mission was awesome. It is a fantastic and interesting twist on an Attacker/Defender game and I’d love to get it another play. Joe played it incredibly well. His Soviets had some serious ground to cover but he didn’t rush in blindly. He held back his forces just outside of my effective range knowing full well that I’d have to pull troops out of the game each turn. And then, with enough plenty of time to spare and my defenders almost depleted, he threw his SMG troops forward and wiped the defenders off the table. It was a strong Soviet showing that has put Joe back in the lead. – Andrew
The Soviet Conclusion
These 4×4 city matches are so incredibly fun/stressful it’s insane. The City Fighting rules and Siege Assets are also bonkers, adding them in makes the games so unique and challenging and fun, it’s honestly some of the most fun Bolt Action I’ve ever played. This mission threw both of us for a loop when we read that the Axis player must remove one unit at the beginning of Turn 2 onwards. Honestly this tilted the game heavily into the Soviet players advantage. So much so that I doubt Andrew or anyone who is as seasoned as him for that matter could win as the Axis.
But that being said, I feel like even if he didn’t have to have a Fighting Withdrawal, my strategy was sound. If he had stayed at the barricades, my Howitzers would have gotten him. If he pushed into the city, then my Howitzers and mass of infantry would have hit him from multiple angles. The only thing I was unhappy with is the performance of my Flamethrower Team. Second game in a row it missed its only shot, but as a bonus this time it ran outta fuel and fled the table -_-
But even fighting with both hands tied behind his back, Andrew still bloodied my forces and forced an extremely close game. I can’t wait for the madness of Game 10, a massive battle with huge implications for the Campaign! As always thank you to my amazing opponent and and a huge shout out to the amazing Michigan Toy Soldier for graciously hosting our games over the past ~10 months. – Joe
| Soviet Campaign Score | Axis Campaign Score |
|---|---|
| 5 | 4 |
| 4-3-2 | 3-4-2 |
| Soviet Campaign Kills | Axis Campaign Kills |
|---|---|
| 35 | 42 |
Game 8 – Street Fighting in Pest | Game 10 – Operation Konrad I

I agree, those 4’x4′ games look pretty intense. A great game and thanks for the report.
LikeLike