

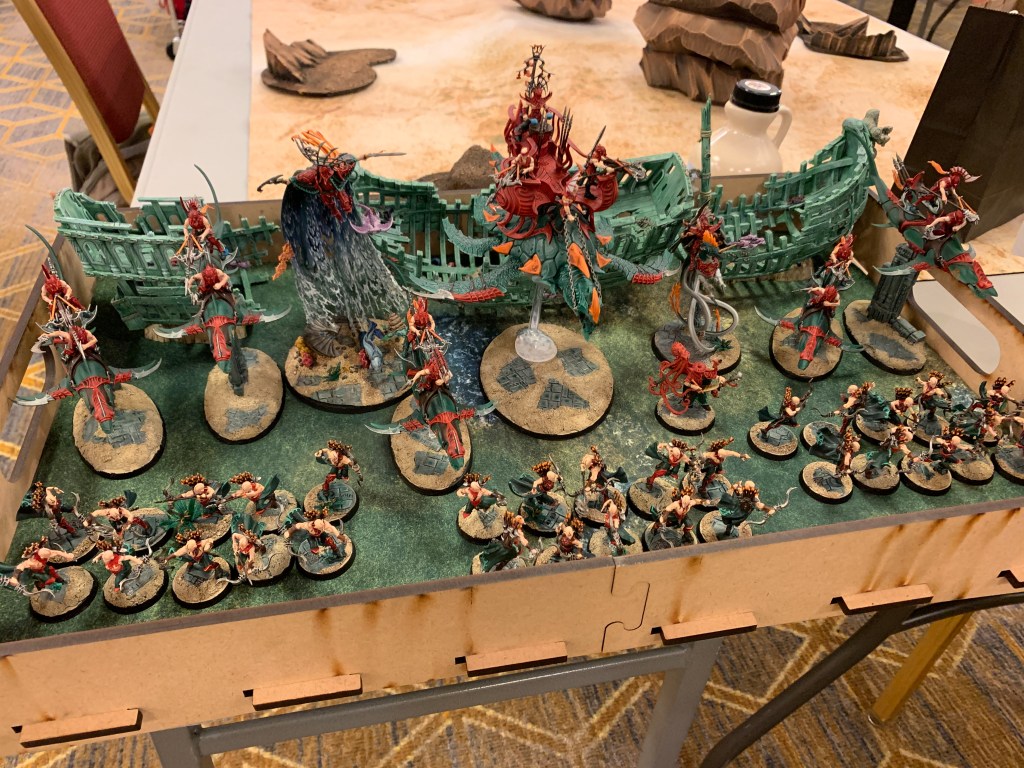
The Army
For those that read my previous event recap, Armour Con, this army will be familiar but includes a few new additions. I had this display board planned at the previous event but did not have the time to execute it then. This is the completion of that project. There are also tweaks to the army list that showcase more of the models in my collection.
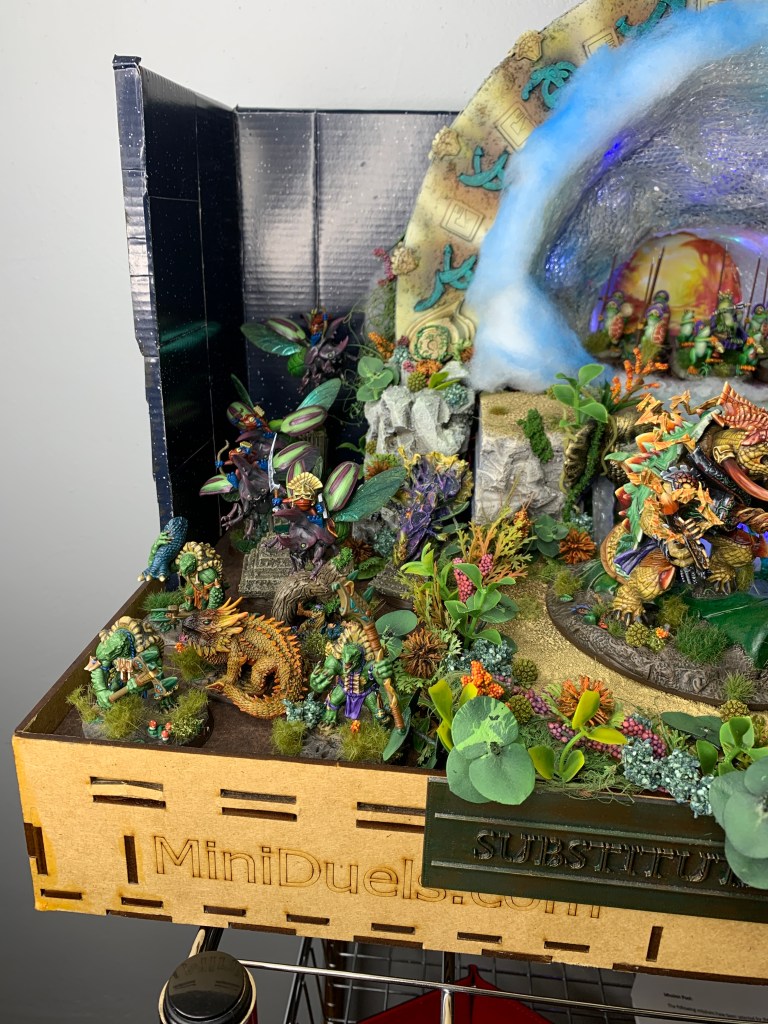
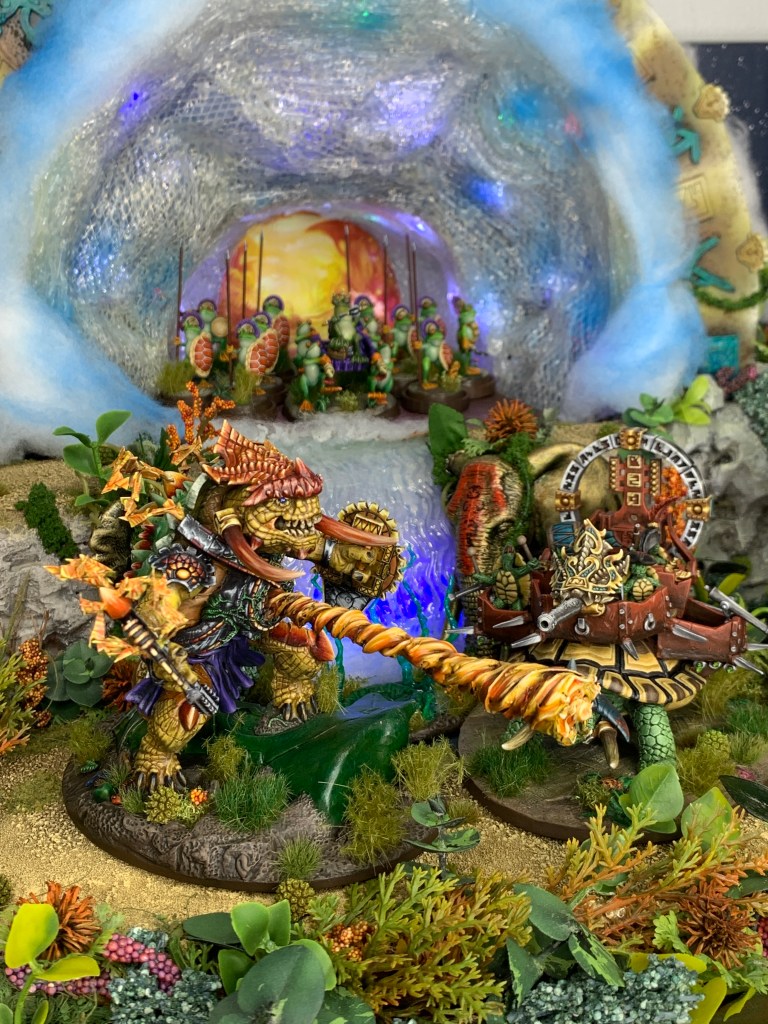
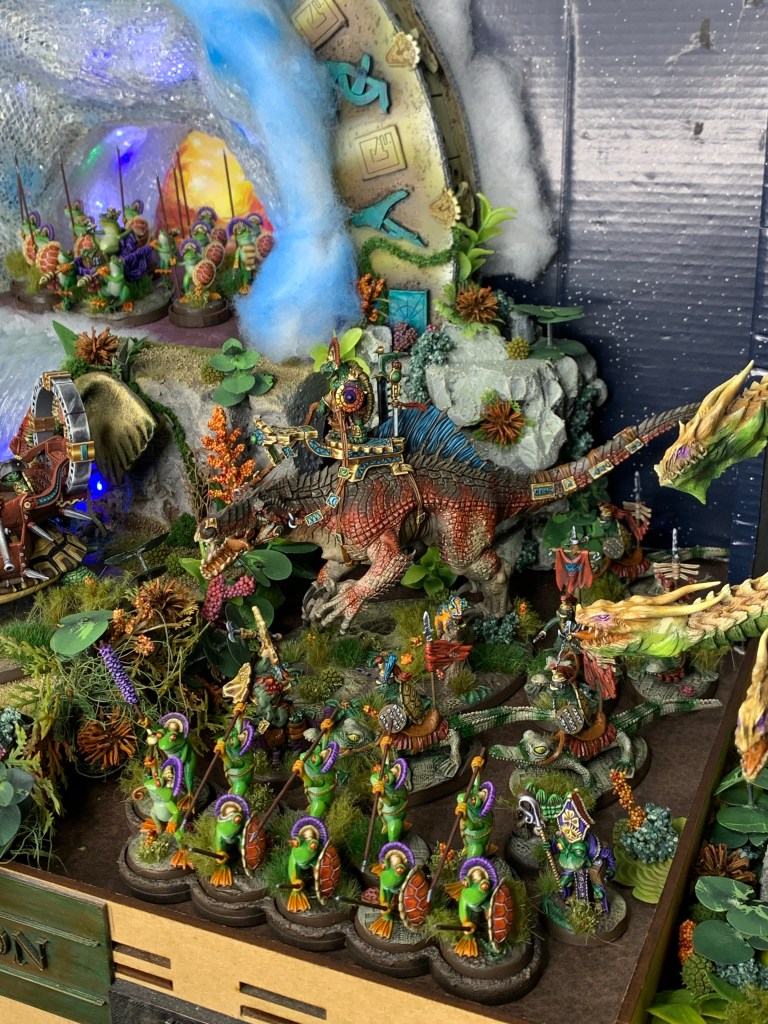
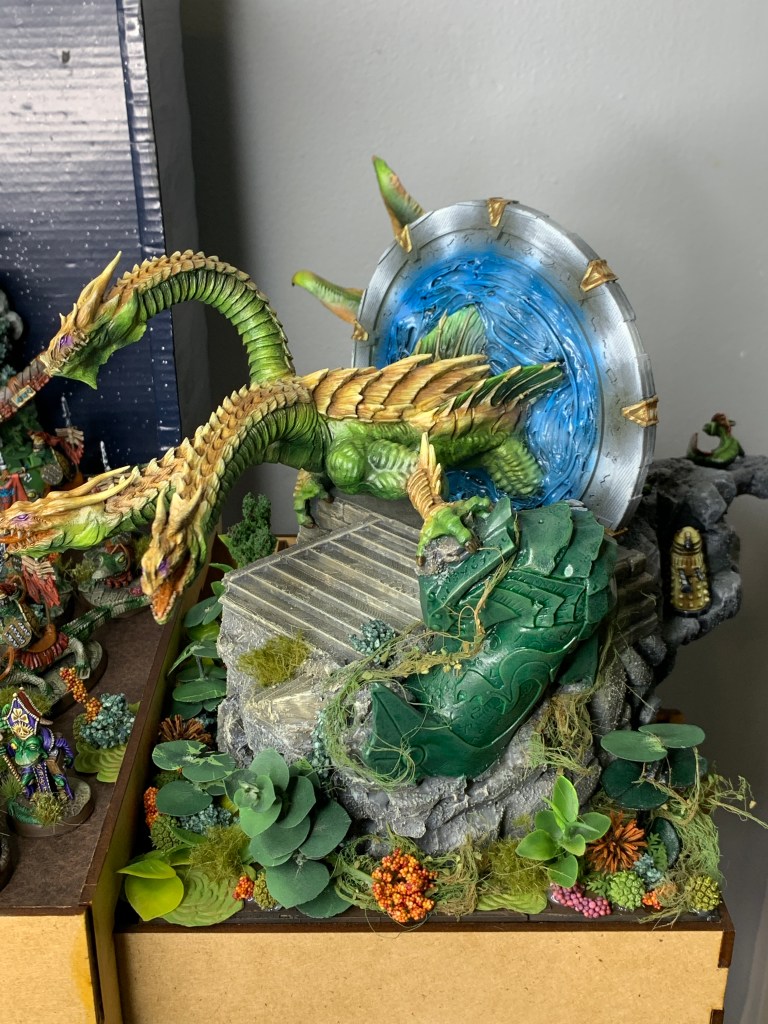
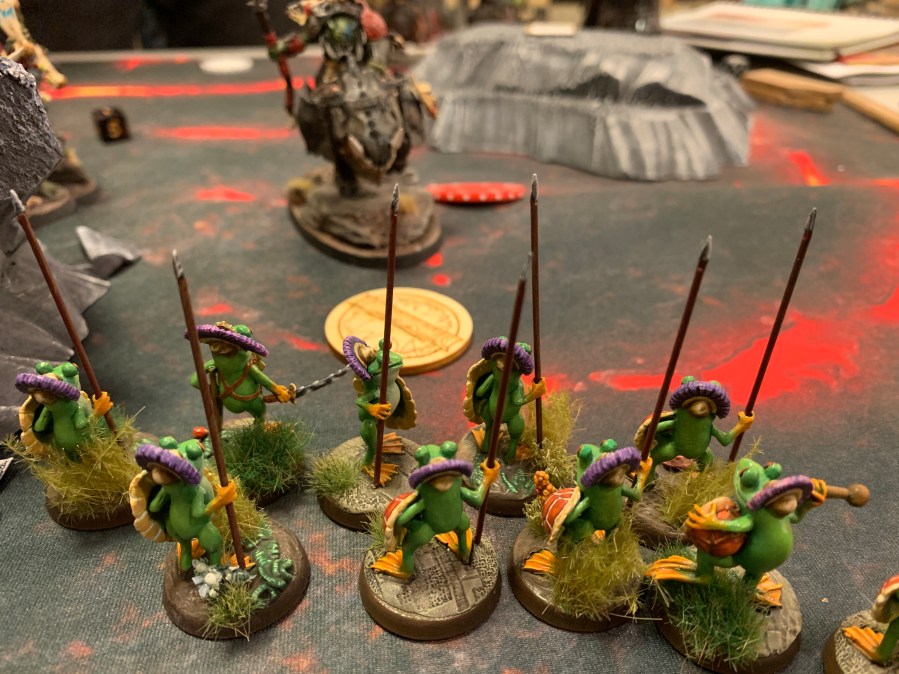
I swapped out Lord Kroak for the Royal Amazon Frog Skinks, Turtle Kroxigors, Giant Terradon Beetles and the King Frog. I also finished the faction terrain, the Realm Shaper Engine, and my custom built Bastiladon – Bowser Magma Pants. All in all, I ended up painting around 1,000 points (half the army) in one and a half months. Looking back, that was wild.
General notes:
- Players Armies must pick a Grand Strategy in their army list and get bonus points for completing it at the end of a battle. I chose Beast Master: Keep at least one monster alive.
- During each turn, players chose Battle Tactics and must try and complete them for bonus points on top of scoring objectives.
- Most missions involve a couple objectives placed either across the width of the table or corner to corner.
- For deployment, players take turn deploying units. Whoever finishes first gets the option to take the first turn or give the first turn.
- Everwinter terrain – all tables had eight terrain pieces, three along either long edge that gave cover, and two in the center that were impassable. This created a mountain pass so to speak right down the center of the tables.
Day One
Game One – First Blood vs. Zachary (Sylvaneth)
Game One! First Blood involves three objectives, equal split diagonal, corner to corner. Deployment zones were opposite corners, small foot print. Zachary’s army was a rarely seen Sylvaneth (considered “not good” in the current meta) and to top it off he brought the giant beetle queen, Alarielle, clocking in at almost half of his total points. He set up his Wood Elf Trees middle of his board edge and clustered the army inside and around that (providing cover saves). Alarielle was sitting on my left flank. I laid out a castle deployment around my Realm Shaper Engine. I also made some garbage choices and had my support Heroes on opposite sides of where they should be, and deployed my Engine outside my deployment zone, so I could not immediately put a Wizard inside it to have Turn 1 attacks.
Highlights from the game:
- I fell into my personal trap of choosing the secondary objective to run three monsters … but then failed to cast the “run and shoot” spell so my shooting couldn’t do anything.
- Zachary YOLO’d Alarielle right at my left side and put some hurt on my Bastiladon with her powerful shooting attack.
- Double turn theme: He was able to get the double turn to start Turn 2 (went last Turn 1 and then first Turn 2) and that allowed him to kill my Bastiladon before it ever got a shot off as well as put the hurt on my support heroes.
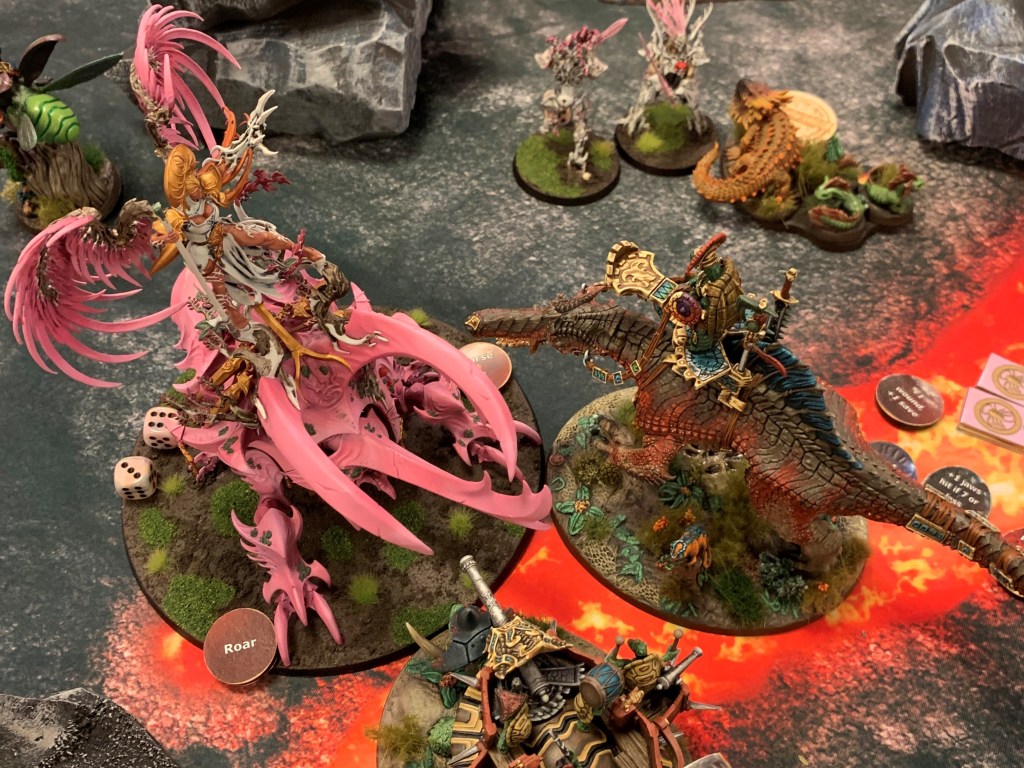
- I countered back and moved my T-Rex, Triceratops and flame-throwing Salamander in. This killed the beetle queen which put me at a false sense of accomplishment.
- I moved some cavalry up the right flank to secure that objective so I was sitting on 2/3.
- Then he was able to start his big spell. This was the whole premise of the army. A magic spell that dealt Mortal Wounds (unsavable damage) to all units within 9 inches. The number of wounds possible was based on the total spell cast die roll. Say he rolled a 10 to cast, he would roll 10 dice and 5s or 6s dealt a wound. But, the wizard also had a spell that let him keep adding +2 to their base value every turn. So this would turn into 14+ dice being rolled against every unit within 9 inches.
- Me having seen this happen for a turn, decided to obviously wade into that and continue to cluster my whole army in the middle of the table thinking I could outlast it.
- It didn’t happen.
- Me having seen this happen for a turn, decided to obviously wade into that and continue to cluster my whole army in the middle of the table thinking I could outlast it.
- Fun randomness: We had three of those double turns go back and forth throughout the game. It is rare for it to even happen once in most games …
Result – Loss
Zachary was a great opponent, and it was an exciting game. Each of those double turns flipped momentum back and forth. The game stayed close and tense. I really messed up deployment and took for granted a “weak” army. It was great seeing a lesser played army on the table. A common theme in the weekend was when I stuck to my game plans, it went well, anytime I tried to get clever, change the plan, or be sneaky, it blew up in my face.
Game Two – Teutonic Interference vs. Mega Gargants
This mission involved three objectives placed along the center line, width wise. Each turn a d3 would determine which was the Primary Objective and thus be worth more points. The Giant army was three Megas, and two little Giants. They set up clustered in the center of there board edge. I put my Engine in the center and went heavy left flank with most of my damage pieces, which was opposite the “weakest” of the three Mega Gargants. Turns out this was playing right into the Giants’ plan.
In general, a game against Giants means you have to kill one per turn-ish and play from behind to claw your way back in points. Giants count as between 15-20 models for objective reasons, so you cannot easily out number them.
Highlights from the game:
- On Turn 1 he sent one Mega to each objective. The Prime Objective landed on my far right (away from most of my troops) and next to the Mega that had a ward save … I resigned myself to losing those points and hoping it would move towards my left.
- So, I threw all my stuff at the weakest Mega on my left. Got it down to less than 10 wounds, then killed it on Turn 2.
- Flew the Engine of the Gods Triceratops on a buffed up Seal Team 6 attack run up the middle. Landed behind the middle Giant, his general, and charged in. Did enough damage to weaken him and get some pieces moved over. Killed him on Turn 4.
- That left one Giant on the right. On Turn 5, I could only bring a couple models to bear. Came down to the last activation, in the last combat, in the last turn. But the Giant lived. Barely.
Result – Loss
Another great opponent and exciting game! Tight all the way till the end. Turns out him sacrificing the weakest Giant was all part of a plan that I walked into … Got stuck in combat and out of position. Giants won the long game.
Game Three – Savage Gains vs. Jared (Orruks)
Jared brought two Mawcrushers and Ork Boar Riders. All ready to charge in with their new Army Book! Savage Gains has four objectives, arranged in a diamond formation. The one in the enemies deployment zone is worth more and the one in no man’s land is worth more than the one in your deployment. Jared deployed both Mawcrushers in the middle, and a unit of Pig Riders on either flank. I went with a castle in the center of my edge as far back as I could to avoid getting run over …
Highlights from the game:
- The Mawcrushers ran straight up the gut and charged into my lines. The Boars came up and sat on the two objectives in no mans land.
- The Mawcrushers hit my lines and cleared some screens but could not take down my General. I hit back on my turn and did some damage to one of these Ork monsters.
- Turn 2 I won the roll off and got the double turn. This let me put my entire army into the Crushers and took them out.
- Once the those Ork monsters were dead I was able to clean up the board and get a pretty solid win.
Result – Win
Jared did what Orruks do and YOLO’d. I got the double turn and got to flip the assault. If he got the turn, it would have been probably exactly the opposite result. Orks gonna Ork. A third great opponent. I’m really lucking out!
Day Two
Game Four – Survival of the Fittest vs. Jake (Deepkin)
I was stoked. Got to play against one of the lists I hoped to. The cookie cutter version of this army involves a lot of the Eel cavalry. But Jake brought a bunch of archers and five sharks with harpoons on their backs! It was very cool. He was also a former Team USA AoS member and has been around the event scene.
The mission was Survival of the Fittest. Same corner to corner set up of three objectives, but this time our deployment was almost the whole corner of the table, split diagonally. I set up in what seems like my safe move of a tight castle on my back edge. They shooting attacks on his army were intense and I did not know what to make of them. He split his archers evenly to be able to cover all three objectives.
Highlights from the game:
- He forced me to go first and I just went for it. I charged up the left flank with screens out front, and I moved the Bastiladon right up the gut to stand in the murder valley and plug the gap. I left the third objective open.
- On Jake’s turn he moved up and deleted a lot of my screens and front line units. I was not surprised or worried at that point. My key pieces survived the first barrage.
- He got the double turn, so that was a second round of shooting to have to withstand … but still, my monsters held.
- Here is that forgetting the plan part. I thought I would get sneaky and move my big Triceratops over to the far right objective and further committed to the left. This left the center super weak and mopped up. Then he could split his army to clean up the flanks.
- Had I kept pushing the center and committed to it, my monsters had the damage and staying power to win the attrition.
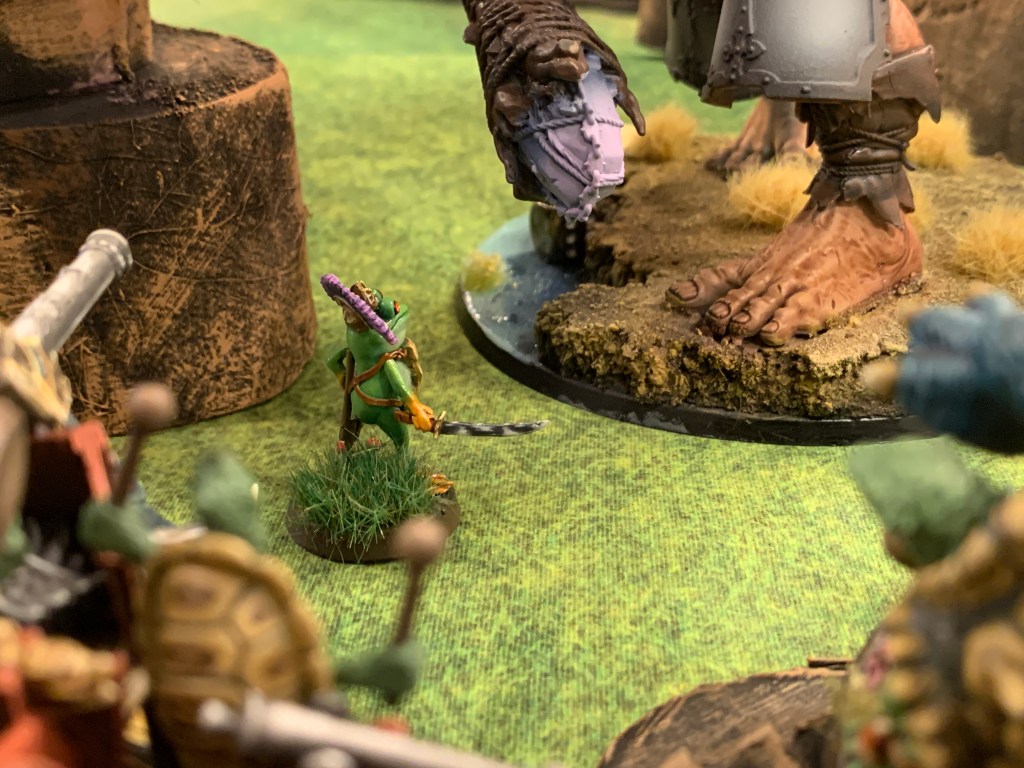
- Last fight of the game saw my sole surviving Kroxigor engage his General, a support type character with a pet octopus and we were both down to our last wound, and the octopus poked him in the eye and killed my warrior. MVP octopus.
Result – Loss
Great game and it was back and forth for a bit, but then I decided to be sneaky and not keep to the plan. While playing against new armies offers a tough learning curve, it is always something new and exciting.
Game Five – Feral Foray vs. Logan (Cities of Sigmar)
Logan brought a combined armies style army from the Cities of Sigmar (the old Empire) book. A mix of shooty Dwarves, tough Elf front line, Human casters and a Phoenix monster. We of course we both at the bottom of the field and just having a good time. The mission involved three objectives in each of our board halves. If you took control of an enemies objective, you could burn it down for extra points. He brought a magic spell that made a teleporting bridge. It would allow him to cross the bridge in one spot, and then deploy those models at the other side of it 18 inches away. Basically, teleport shooty dwarves and a wizard that shoots chain lightning directly in front of my army …
Because of this, I set my army up completely out of range of this possibility even forgoing controlling some objectives to stay safe.
Highlights from the game:
- Turn 1 saw Logan YOLO his Phoenix directly into my front lines. Me, assuming it was a way to tie me up and keep from moving countered it on my turn to bring it down. But he had an alternative motive. Since I did not expect this I did not a solid front line, and a corner of my Realm Shaper Wngine, currently housing my wizards for protection, was within reach to touch. Since we resolve bonus monster charge abilities before combat, he was able to destroy my terrain piece!
- When a terrain piece is destroyed, units inside could get hurt. Just don’t roll a 1 …
- So, I then proceeded to roll a 1 for my King Kermit wizard and he died outright. Took a big piece of rock to the face.
- Now I was down my powerful caster and leadership generator for the game, as well as the terrain pieces power to shoot attacks out of a terrain piece anywhere on the board.
- At this point his whole army was in the middle of the table between those two impassable terrain features, so I began circling around and we attacked each other from both sides.
- I was ahead on points and objective control but losing the model count game.
- It came down to my T-Rex surviving for the last turn to grab the last objective in his zone. A 29-27 finish on victory points.
Result – Win
A great way to end the event with another exciting game. I don’t particularly enjoy playing that many shooty Dwarves, they are super nasty! Props to Logan for going for the big play in Turn 1 and getting it. If that did not happen I think the casting power of my wizard and terrain feature would have ripped up his large units. He had a lot of large blocks of troops and I have some really great anti-horde abilities. It made for an exciting game that was back and forth.
Results and Recap
Finished 24/44 players with a 2-3 record and managed to take Best Painted!
There was a bunch of great hobby with myself and another vampire army going to tie breaker. Players voted and the winner took Players Choice and other got the Best Painted.
The Everwinter Grand Tournament was a great event. The player base, level of hobby, prize support, organizing, and good vibes was 10/10 ribbits. Looking forward to more events and already thinking about new list variations!
