
Get caught up with the Mission 1 Recap.
Introduction
Welcome back warlords to our second installment of our 5th Edition Warhammer 40,000 campaign. Mission 2 is Force Supremacy. This mission is again Dawn of War deployment with objectives being the deciding factor. The winner of this battle will become the Attacker in Mission 3, and with a draw in Mission 1, it’s time for the teams to pull out all the stops to gain an advantage. All of our games were played at Griffon’s Lair in Pittsburgh, PA. Shout out to the store staff and we wish them best of luck as they go through the store closing. We figured a last hurrah would be some quality games at the store.
| Team Imperium & Xenos | Team Chaos | |
|---|---|---|
| Cole (Grey Knights) | vs | Jason (Chaos Space Marines) |
| Evan (Necrons) | vs | David (Chaos Space Marines) |
| Jackson (Ultramarines) | vs | Ron (Chaos Daemons) |
Cole (Grey Knights) vs Jason (Chaos Space Marines)
Jason’s Summary
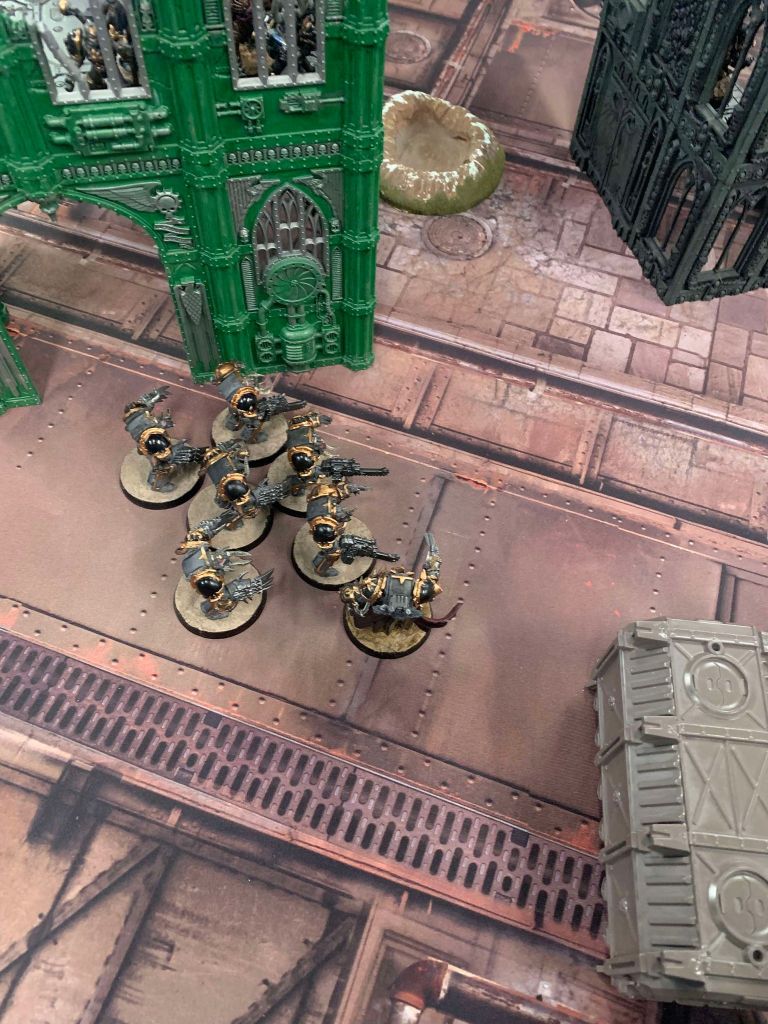
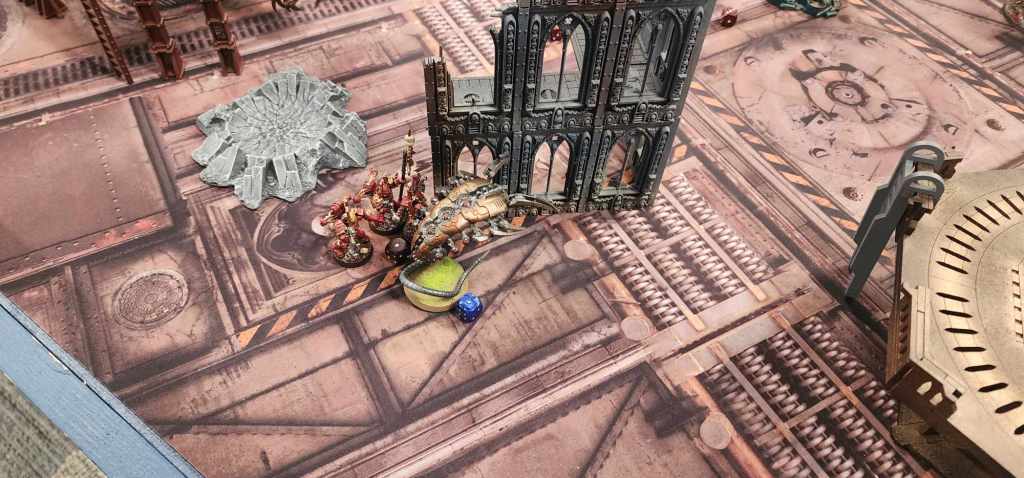
Deployment: In the ruined city, both the Grey Knights and Black Legion forces placed their objectives high in wrecked buildings within their respective Deployment Zones. The Grey Knights deployed a Strike Squad spread out over the floor where their objective was placed. The Grey Knights Grandmaster deployed two five-man squads of Grey Knight Terminators and a Dread Knight directly across from the Black Legion’s building in a bid to take their objective in a frontal assault.
The Black Legion deployed a Rhino containing Champion Hellacks and nine of his fellow CSM on the ground floor of their objective’s building. A second Rhino filled with CSM awaited in a nearby alley. Lord Wulfterd and his Terminators waited in deep strike reserve. The Grey Knights have the initiative in the first turn.
Turn 1: The Terminators with the Grandmaster in tow approach the building. The Dread Knight sees the Chaos Rhino in the alleyway. And nails it with a direct hit with its Heavy Psycannon. The shot hits the fuel tank and the Rhino is ripped apart in fiery explosion. The five surviving CSM find themselves in a smoking crater that used to be their ride. Follow up shots from one of the GK Terminator squads fail to harm the CSM any further at this stage. “GET OUT!” Champion Hellacks orders his squad out of their Rhino and onto the second floor of building. The Rhino likewise takes up a defensive position on the ground floor. The remnant of the other squad takes cover in the opposite building. Hellacks’ men waste no time in opening fire on the Grandmaster’s Terminator squad. One warrior wielding a Plasma Gun kills the leading Grey Knight. A fusillade of Bolter fire causes no further casualties. But does force the remaining Terminators to remain where they stand.

Turn 2: In the second turn, the Grandmaster orders all guns to fire upon Hellacks and his men. The CSM withstand a literal hail of Storm Bolter fire from both squads of Terminators. Their armor even withstands fire from the Dread Knight’s gatling Psilencer. Only a direct hit from the Psycannon does any damage. And even then, only two CSM are lost.
Hellacks’ men and Rhino maintain their positions in the building. Their Rhino’s driver had wanted to ride up and take the fight to the enemy, but the Champion ordered him to remain and maintain fire support. The now five-man squad of CSM make their way up to the roof of the building they’d taken cover in. Lord Wulfterd had a decision to make. Hellacks was indeed holding the line, but could he continue to do so? Half of the other squad and their Rhino had already been eliminated. He could not take the Grey Knight objective with only the comparatively paltry firepower his Terminators had. The Grey Knights could be exceedingly deadly in melee. The decision of the CSM squads to only engage them at range seemed a sound one. But the Grey Knight Terminators need only to weather the storm, shoot down his warriors, climb the buildings, and claim the Black Legion objective. All the while he would have to contend with both the Dread Knight while the Strike Squad likewise shot down at him.
At that moment, he chooses to sacrifice the victory of claiming whatever treasure the Grey Knights had claimed in return for killing as many of the Imperials as he could. He dropped his squad behind a large set of cargo containers and out of sight of the Knights in the hope of at least drawing the Dread Knight away… Hellacks continued to rain hell down on the Grey Knights. His Plasma Gunner killed another of the Grandmaster’s Terminators. And his Rhino’s Havoc Launcher exacted a terrible price when the Banner Bearer was slain in its blast. Meanwhile, the survivor squad’s own plasma gunner brought down a Terminator from the other Grey Knight squad.
Turn 3: The third turn saw the Grey Knight Terminators continuing to fire into Hellacks’s squad. But again, their accursed armor withstood their shots. Even the mighty Psycannon was of no avail as its shot went wide of any targets. However, Wulfterd’s gambit had failed. The Dread Knight had only stridden away from him and toward Hellacks. He would have to chase after his targets. And he did exactly that. He and his Chaos Terminators broke into a flat run toward the closer squad of loyalist Terminators. Despite the future consequences this action would have.
Hellacks’ squad continued to trade fire with the Grandmaster’s Terminators. This time, the Aegis foiled the Plasma Gunner’s attack. Likewise, shots from Flamer, Havoc Launcher, and Bolter also proved ineffective at felling their Imperial foes. The survivor squad opened fire on the Dread Knight. Their Bolter shots also proved ineffective, though a shot from their own Plasma Gunner wounded the machine.
Turn 4: Turn 4 began with the Strike Squad firing upon the Chaos Terminators with Storm Bolters and their own Psycannon. One of them were nearly blown apart by the Psycannon, but was saved by the invulnerability granted by the Mark of Tzeentch. His brother at the front of the squad was not so lucky as he was gunned down by Storm Bolter fire from the onrushing squad of Grey Knights. The Chaos Terminators also survived fire from the Dread Knight. Lord Wulfterd would perhaps salvage something of his failed gambit just yet. Hellacks continued to hold the line against to much diminished firepower coming from the Grandmaster and his surviving men.
Four Grey Knight Terminators charged into Wulfterd and his followers with deadly helberds gleaming in the sun. Their weapons would find no purchase in their Chaotic foes. Instead, two of them would die being crushed by swinging Power Fists. These two Grey Knight Terminators would not last for long. One of them neatly avoided being sliced to death by Wulfterd’s lightning claw. Only for him and his brother to be Power Fisted to pulp. Triumphant Chaos Terminators advanced toward the Dread Knight. Meanwhile Hellacks kept up the fire against the Grandmaster. Not causing any wounds, but keeping him well in place. Likewise, the survivor squad fired again on the Dread Knight, but its armor and Aegis kept it from further harm.

Turn 5: The final turn saw more of the Grandmaster trading fire with Hellacks. Both sides not budging any further. The Strike Squad and the Dread Knight fired on Wulfterd and his followers. Another two of his men were slain, and he himself was badly wounded. But the Chaos Lord continued on. If he could not win, he would certainly try to kill. Lord Wulfterd and four of his Chaos Terminators charged at the Dread Knight. It swung its massive greatsword down in a blow that easily sliced him in half from his skull to his pelvis. The power of Tzeentch preserved him. Both still standing slices came back together as the massive blade pulled away. Wulfterd found himself perfectly whole. He and his men immediately fell upon the Imperial mechanized terror with Lightning Claw and Power Fist. Armor was ravaged. Subsystems were utterly smashed. The Dread Knight was driven to one knee. But still it remained functional. The power of the Emperor had likewise preserved the Dread Knight and its pilot, now clinging barely to life, through the Aegis.

This battle had, like the one before it, ended in a draw. With Imperial Reinforcements on the way, the Black Legion had to take only their own prize from the field leaving the remnant of the Grey Knight forces to do the same. Lord Wulfterd reflected on how such an outcome was sometimes acceptable, if not ideal, in the Imperium. The Great Powers on the other hand typically desired victory in full. And he’d allow it to exceed his grasp not once, but twice now. All in the desire to not fall fully into defeat. He began to wonder where such seeming mediocrity would lead him, even as he heard a strange laughter in his ears…
Result: Draw
David (Chaos Space Marines) vs. Evan (Necrons)
David’s Summary
Deployment: The scenario called for two objectives to be placed in our deployment halves of the table with the stipulation of being more than 24” from one another. After a roll off to determine table halves/deploying first, David won the roll-off placing the objective atop a Mechanicum Gantry structure. Evan placed his opposite atop one half of a landing pad. Evan attempts to steal the initiative but fails the roll, which marks Chaos Turn 1!
David’s Pre-Game Thoughts: My deployment concentrated on my right side of the battlefield. With the game being 1,000pts and most of the army moving as slow as it did, I wanted to rely on a concentrated push with Kharn and his Berzerkers in the Rhino to get the jump on Evan. However, my plans quickly unfolded when the Scarabs and Wraiths deployed across from me.
Evan’s Pre-Game Thoughts: I want to keep the Immortals camped on my home objective while everyone else gets close enough to focus fire on whatever David sends my way.

Chaos Turn 1: David’s first turn was characterized by attempting to push the right flank by bringing the Rhino and Chaos Dreadnought into position. Thankfully the lumbering Dreadnought did not have a fit of craze and functioned normally. The Chaos Rhino with its cargo of Kharn and his Berzerkers moved lightly backwards to make use of the Havoc Launcher’s template. However, in the shooting phase nothing of note occurred! The Obliterator fired a Plasma Cannon felling two Immortals, with one returning from Reanimation Protocols.
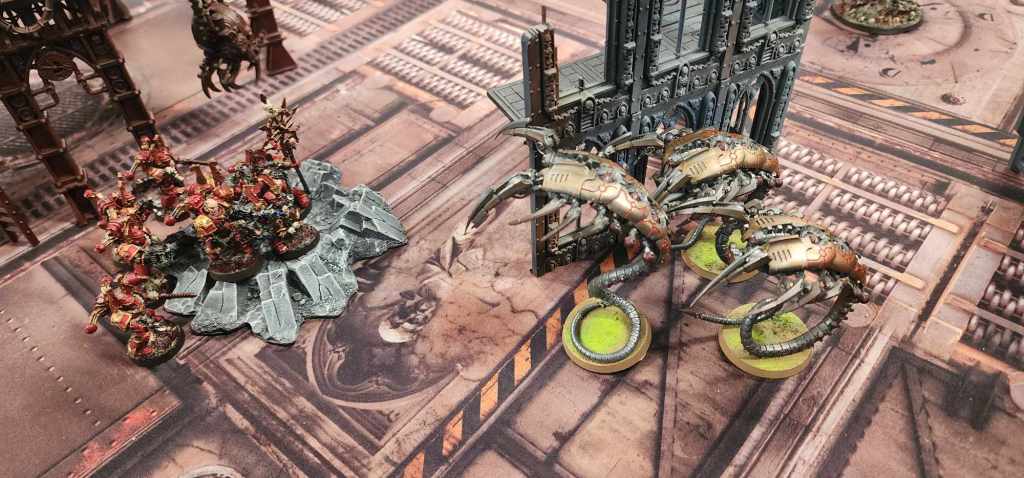
Necrons Turn 1: Evan moved his Scarabs and Wraiths to my Chaos Dreadnought and Chaos Rhino respectively. Then the unexpected occurred with his Cryptek teleporting a unit of 10 Warriors with it to try and break through the left flank! He rolled high on the 2d6 scatter but got the direct hit result on the dice. The Necron Shooting Phase saw no casualties sustained on the Forces of Chaos. The real damage occurred in the Assault Phase where the Wraiths charged the Chaos Rhino, utterly destroying it with multiple rending attacks each! One Berzerker was claimed in the ensuing 6” bubble of death, leaving only behind a crater with plenty of Khorne Berzerkers and Kharn left. The Scarab Swarm charged the Chaos Dreadnought but it didn’t go well as the Dreadnought is Initiative 4 and any attack was Instant Death inflicting no Armor Saves! David rolled his 4 dice scoring 3 hits, and then later 3 successful wounds for all three Swarms to die.
Chaos Turn 2: Turn 2 rolled on in with Kharn and his Berzerkers moving 6″ through the crater to get closer to the Wraiths. On the left side, the Plague Marines on the building with the tall spire moved to face the teleporting Cryptek and its Warriors to hunker down and return fire. The Chaos Dreadnought continued being Sane and moved towards another squad of 10 Warriors with their Lord. Turn 2’s Shooting Phase did not see any casualties done to the Necrons from the plasma or Obliterator’s fire. Kharn and the Berzerkers shot at the Wraiths, with Kharn rolling a 1 for Gets Hot! and earning a burn when failing the saving throw. But in the Assault Phase, David managed to charge both the Chaos Dreadnought into the Warriors and Necron Lord, and Kharn and his Berzerkers into the Wraiths.
Key Assault Phase: What David forgot about was the fact that the Wraiths were equipped with Whip Coils that reduce enemy Initiative down to 1 as soon as they were in base-to-base contact. The Wraiths swung into the Berzerkers failing to kill any but wounding Kharn. The Berzerkers and Skull Champion attacked before Kharn causing one of the Wraiths to die, thanks to the S10 Power Fist from a Furious Charged Skull Champ, and one to have one remaining wound. Tragedy struck when Kharn rolled 4 1s to hit out of his seven attacks, which meant four of his Berzerkers were slaughtered in a fit of rage. To make matters worse, Kharn couldn’t even wound the Wraith that stared him down. The Chaos Dreadnought managed to kill two Warriors but it didn’t matter as they stood back up with the 4+ Reanimation Protocols from the Lord’s Warscythe. The Necron Lord swung its Warscythe at the Dreadnought and dealt an Immobilized result on the walker!
Necrons Turn 2: Evan’s turn saw him moving the Warriors to spread out to avoid potential Blast Templates and the Destroyers gunning for David’s objective. The Necron Shooting Phase saw both the Warriors and Cryptek, and Immortals and Nemesor fire everything at the Plague Marine squad in the structure, only dealing a single casualty to them! Into the proceeding combat, the combat between the followers of Khorne and the surviving two Wraiths saw another effective stalemate with one Wraith and one Berzerker dying, but no betrayals occurred. The Chaos Dreadnought on the other hand tried to destroy the Necron Lord but failed to kill it thanks to its 4+ Invulnerable save. The Necron Lord took one swing of the Warscythe, silencing its insane occupant. Close combat continued to be tied up and the endurance of both the Necrons and followers of Nurgle took hold…Turn 3 would be the focal point of the match…
Chaos Turn 3: The Chaos forces did not move too far, other than the Plague Marines on the building moving closer to the Cryptek and the Warriors to get more visibility on them. The Plague Marines opened fire killing two of them, and they stayed down. Meanwhile the Obliterator fired a Lascannon at a Destroyer but failed to wound it.
Into the Assault Phase, Kharn and the surviving two Berzerkers withstood the Wraith but David decided to roll Kharn first, which saw the Skull champion and the surviving Berzerker betrayed by Gorechild’s hunger! But Kharn, reduced down to one wound from the fighting, managed to slay the last Wraith.
Necrons Turn 3: For Evan’s Turn 3, he moved the Necron Warriors and Lord towards the middle and they joined in shooting at the Plague Marines in the building. After three separate units shooting it, another marine succumbed to its injuries. The two Destroyers had continued floating up in the middle and unloaded on Kharn, finally disintegrating him.

Chaos Turn 4: All that remained of the forces of Chaos were the followers of Nurgle, albeit lower than starting strength, and the Obliterator. They all decided to stand still to try and get some better maximum range for shooting. The surviving Plague Marines of the building unloaded on the Cryptek-led Warriors killing him and three other warriors in a volley of Plasma fire, they failed to stand back up forcing a morale check which was passed. The at-strength Plague Marine squad unloaded their Plasma and Bolters on the Destroyers bringing both down in quick succession. The Obliterator fired a Plasma Cannon at the backline Warriors and killed two, but one reanimated.
Necrons Turn 4: Evan’s turn involved the Warriors and Lord to move up but we came to the realization that even with run moves, it wouldn’t have been possible to even get into range of contesting with either one of us. After Evan’s shooting phase, which only killed another Plague Marine we decided to call it as a draw.
Result: Draw
David’s Post Game Thoughts: The low points values with such a large board made it difficult to even attempt contesting Evan’s objective. Most of my army being footsloggers was a drawback here and I had to really think about Kharn’s Rhino positioning to get the most use out of him. Unfortunately, it didn’t pan out as expected given where the Wraith’s deployed opposite of them. At least next time, we’ll have more points to play with when Deffy scuttles out to play!
Evan’s Post Game Thoughts: I desperately need more high strength and low AP shots. My shooting was lackluster for the most part, but the combat was stellar from the Wraiths! … I need more of them.
Jackson (Ultramarines) vs Ron (Chaos Daemons)
Jackson’s Summary: Ron and I had our game a bit later than everyone else, so we knew that the series was tied with draws all around. The attacker advantage would fall to the victor of our game, and this would be one for the books.
Jackson’s Pre-Game Thoughts: Ron has been on a real winning streak through this 5th Edition resurgence and I knew to respect his Slaaneshi force with its fast hits and Rending Claws that could pierce through my armor. My list is all about shooting and doesn’t really handle combat well. I’m hoping if my armor can hold and rapid fire can stem his fast assault, I’ll be able to hold onto the objectives through the mid game and go for a late game push.
Ron’s Pre-Game Thoughts: The last time Jackson and I played, he had a crazy shooting force against my Daemons in an Apocalypse game … I have not forgotten the hundreds of Daemons slain by Radium Carbines and Galvanic Rifles. It’s time for Slaanesh to show you how easy power armor can be cut through. Mwahahah!
Deployment: Ron and I rolled up three objectives for our game and opted to place one in the center of the board, and one in each of our respective Deployment Zones. Ron deployed the Keeper of Secrets and two Daemonette squads, one on the home objective, and the other ready to go after my own objective. I deployed my Master of the Forge and two Scout squads high up in ruins hoping their position would buy me time from the inevitable assault. The rest of my force went into Reserves, per the mission rules. I opted for both my Sternguard squad and Tactical Squad split up into Combat Squads to maximize my scoring unit count. The Master of the Forge bolstered my home ruin to give me a 3+ Cover Save against his shoo… wait, Ron’s list has no shooting… maybe I’m going into this with a bad playbook…
Ron rolls to Seize the Initiative and fails… Ultramarines take Turn 1!
Turn 1: Jackson’s squads sit tight on their positions and pop some Sniper shots, killing 5 Daemonettes between the two squads. Ron’s Fiends and seekers Deep Strike and the Daemonettes move up in the Ultramarines’ zone early.

Ultramarines Turn 2: This mission, I learned that I played 5th Edition Reserves wrong in the first game against David. You roll for each unit in Reserve at the beginning of each turn starting on Turn 2 and on a 4+, they come in, Turn 3 is a 3+, Turn 4 is 2+, and Turn 5 is automatic. Rolling up, the first unit of Sternguard, my Flamer Tactical Marines, and the Vindicator come onto the board this turn to backup the Scouts and my HQ.
Tacticals use their Rapid Fire Bolters and kill the Seeker Squad. The Master of the Forge fires and the Sternguard use their Kraken Bolts for boosted range to kill a Fiend. The other Sternguard combine with the Scouts to kill another Fiend. The remaining Scouts kill one Daemonette. Wow… what a Shooting Phase! The Bolters are hot and I managed to stop Ron’s first punch into my zone. I am feeling good so far.

Daemons Turn 2: Ron, unphased by his casualties, continues his advance. The second wave of Deep Strike consisted of two Daemonette squads and two Feinds. One Daemonette squad Deep Strikes and Mishaps, causing a delay. The others are on target and are firmly controlling the middle of the table.
The Keeper of Secrets slams into combat and destroys five Sternguard. A squad of Daemonettes assaults my Master of the Forge with a whopping 28 attacks and claw through his armor as if it was paper… funny how little 2+ Armor Save helps when Ron rolls 6s. We shall avenge Octavius!

Ultramarines Turn 3: I roll up for my Reserves and to my shock, not a single unit enters the battlefield. That … hurts big time. Using what models I have fielded, I gotta make the most of it. The second Sternguard squad use their Hellfire Poison Rounds and knock out the Keeper of Secrets! The remaining Scouts do little to stop the Daemonettes now firmly in my Deployment Zone.
Daemons Turn 3: Ron continues the push as movement goes to the Assault Phase. The Feind and Daemonettes kill my Tacticals on my home objective. More Daemonettes scale the bolstered ruins to assault my Scouts and they kill them all.

Ultramarines Turn 4: Let’s roll up for Reserves. The Dreadnought fails to come in as Ron’s claws clench tighter around my forces. The Vindicator lines up a shot with its Demolisher Cannon and kills five daemonettes. Sternguard kill five more with shooting.
Daemons Turn 4: Ron’s Daemonettes and Feind charge the Sternguard and kill them outright. More Daemonettes charge my Missile Tactical Marines and surprisingly kill none. The Tacs punch back and kill the Daemons – a small moral victory for the Boys in Blue in this dark hour.

Ultramarines Turn 5: The Dreadnought, ever so late to the party, walks onto the table to find … very few of his battle brothers remaining! The Scouts on the opposite end of the board make a mad run for a potential late game objective grab.
The Vindicator fires again, but a poor scatter results in only one Daemonette falling. The Sternguard fire onto the bolstered ruins now overrun with Daemonettes (that now have a 3+ Cover Save, thanks Octavius! haha) and slay a few with their Dragonfire Bolts.
Daemons Turn 5: Ron’s Daemonettes charge my Scouts and manage to whiff with a whopping 20 attacks, and the Scouts punch back and kill four! So much for the neophytes – let’s get these guys in some Power Armor! Further whiffs on the combat from Ron bode well for a potential Turn 6 or Turn 7 roll as my heavy armor finally decided to show up, but the dice would not grant me my wish. Ron rolled to see if the game continued, and the dice came up with 1 – the game ends with a commanding victory for the Daemons.
Results: Chaos Victory
Jackson’s Post-Game Thoughts: Incredible … I really had no idea how quickly the Slaanesh forces could get up into my face! Also, bad luck on my Reserves rolls led to a struggle, but I was surprised at how much work my force could do even without support! My Sternguard continue to be my favorite unit to field due to their Special Issue Ammunition. Ron and I reviewed the game and I used every single different flavor of ammo that they have available to them – a rare feat indeed. I had a sound plan of turtle up then mobilize, but Ron’s quick attacks gave me little time to act on my plan while fighting off hordes of Daemonettes. Well played!
Ron’s Post-Game Thoughts: Post game it was probably one of the most fun games against Space Marines I have had in a while. It was very interesting seeing the Sternguard in action. I wish the Dread could have crushed some Daemons but his time will come. It was objectives, so I had that in the beginning and I was in fear of my poor Daemonettes getting sniped off the board but that didn’t happen. Frankly it was a good match and I would happily do it again. I also learned that an enemy Tech Marine can be my greatest ally. Overall fun game and a good learning experience for fighting tougher enemies like marines.
Overall Results
| Team Imperium & Xenos | Team Chaos | Result | |
|---|---|---|---|
| Jackson (Ultramarines) | vs | Ron (Chaos Daemons) | Chaos Victory |
| Cole (Grey Knights) | vs | Jason (Chaos Space Marines) | Draw |
| Evan (Necrons) | vs | David (Chaos Space Marines) | Draw |
With the games finished, two draws and a Daemons win meant that Team Chaos goes into Mission 3 as the Attackers. We’ll see what this advantage means for the mission.
Excited for Mission 3, we looked ahead to see what we were in for only to find … Objectives and Dawn of War … seriously? Three campaign missions back-to-back that have the same victory conditions is not what I call effective design. A quick conference with the players later and we decided to go for Annihilation (kill points) for Mission 3. New lists also mean we’ll see some new toys to take to the table. Stay tuned to see what everyone has been working on!
