

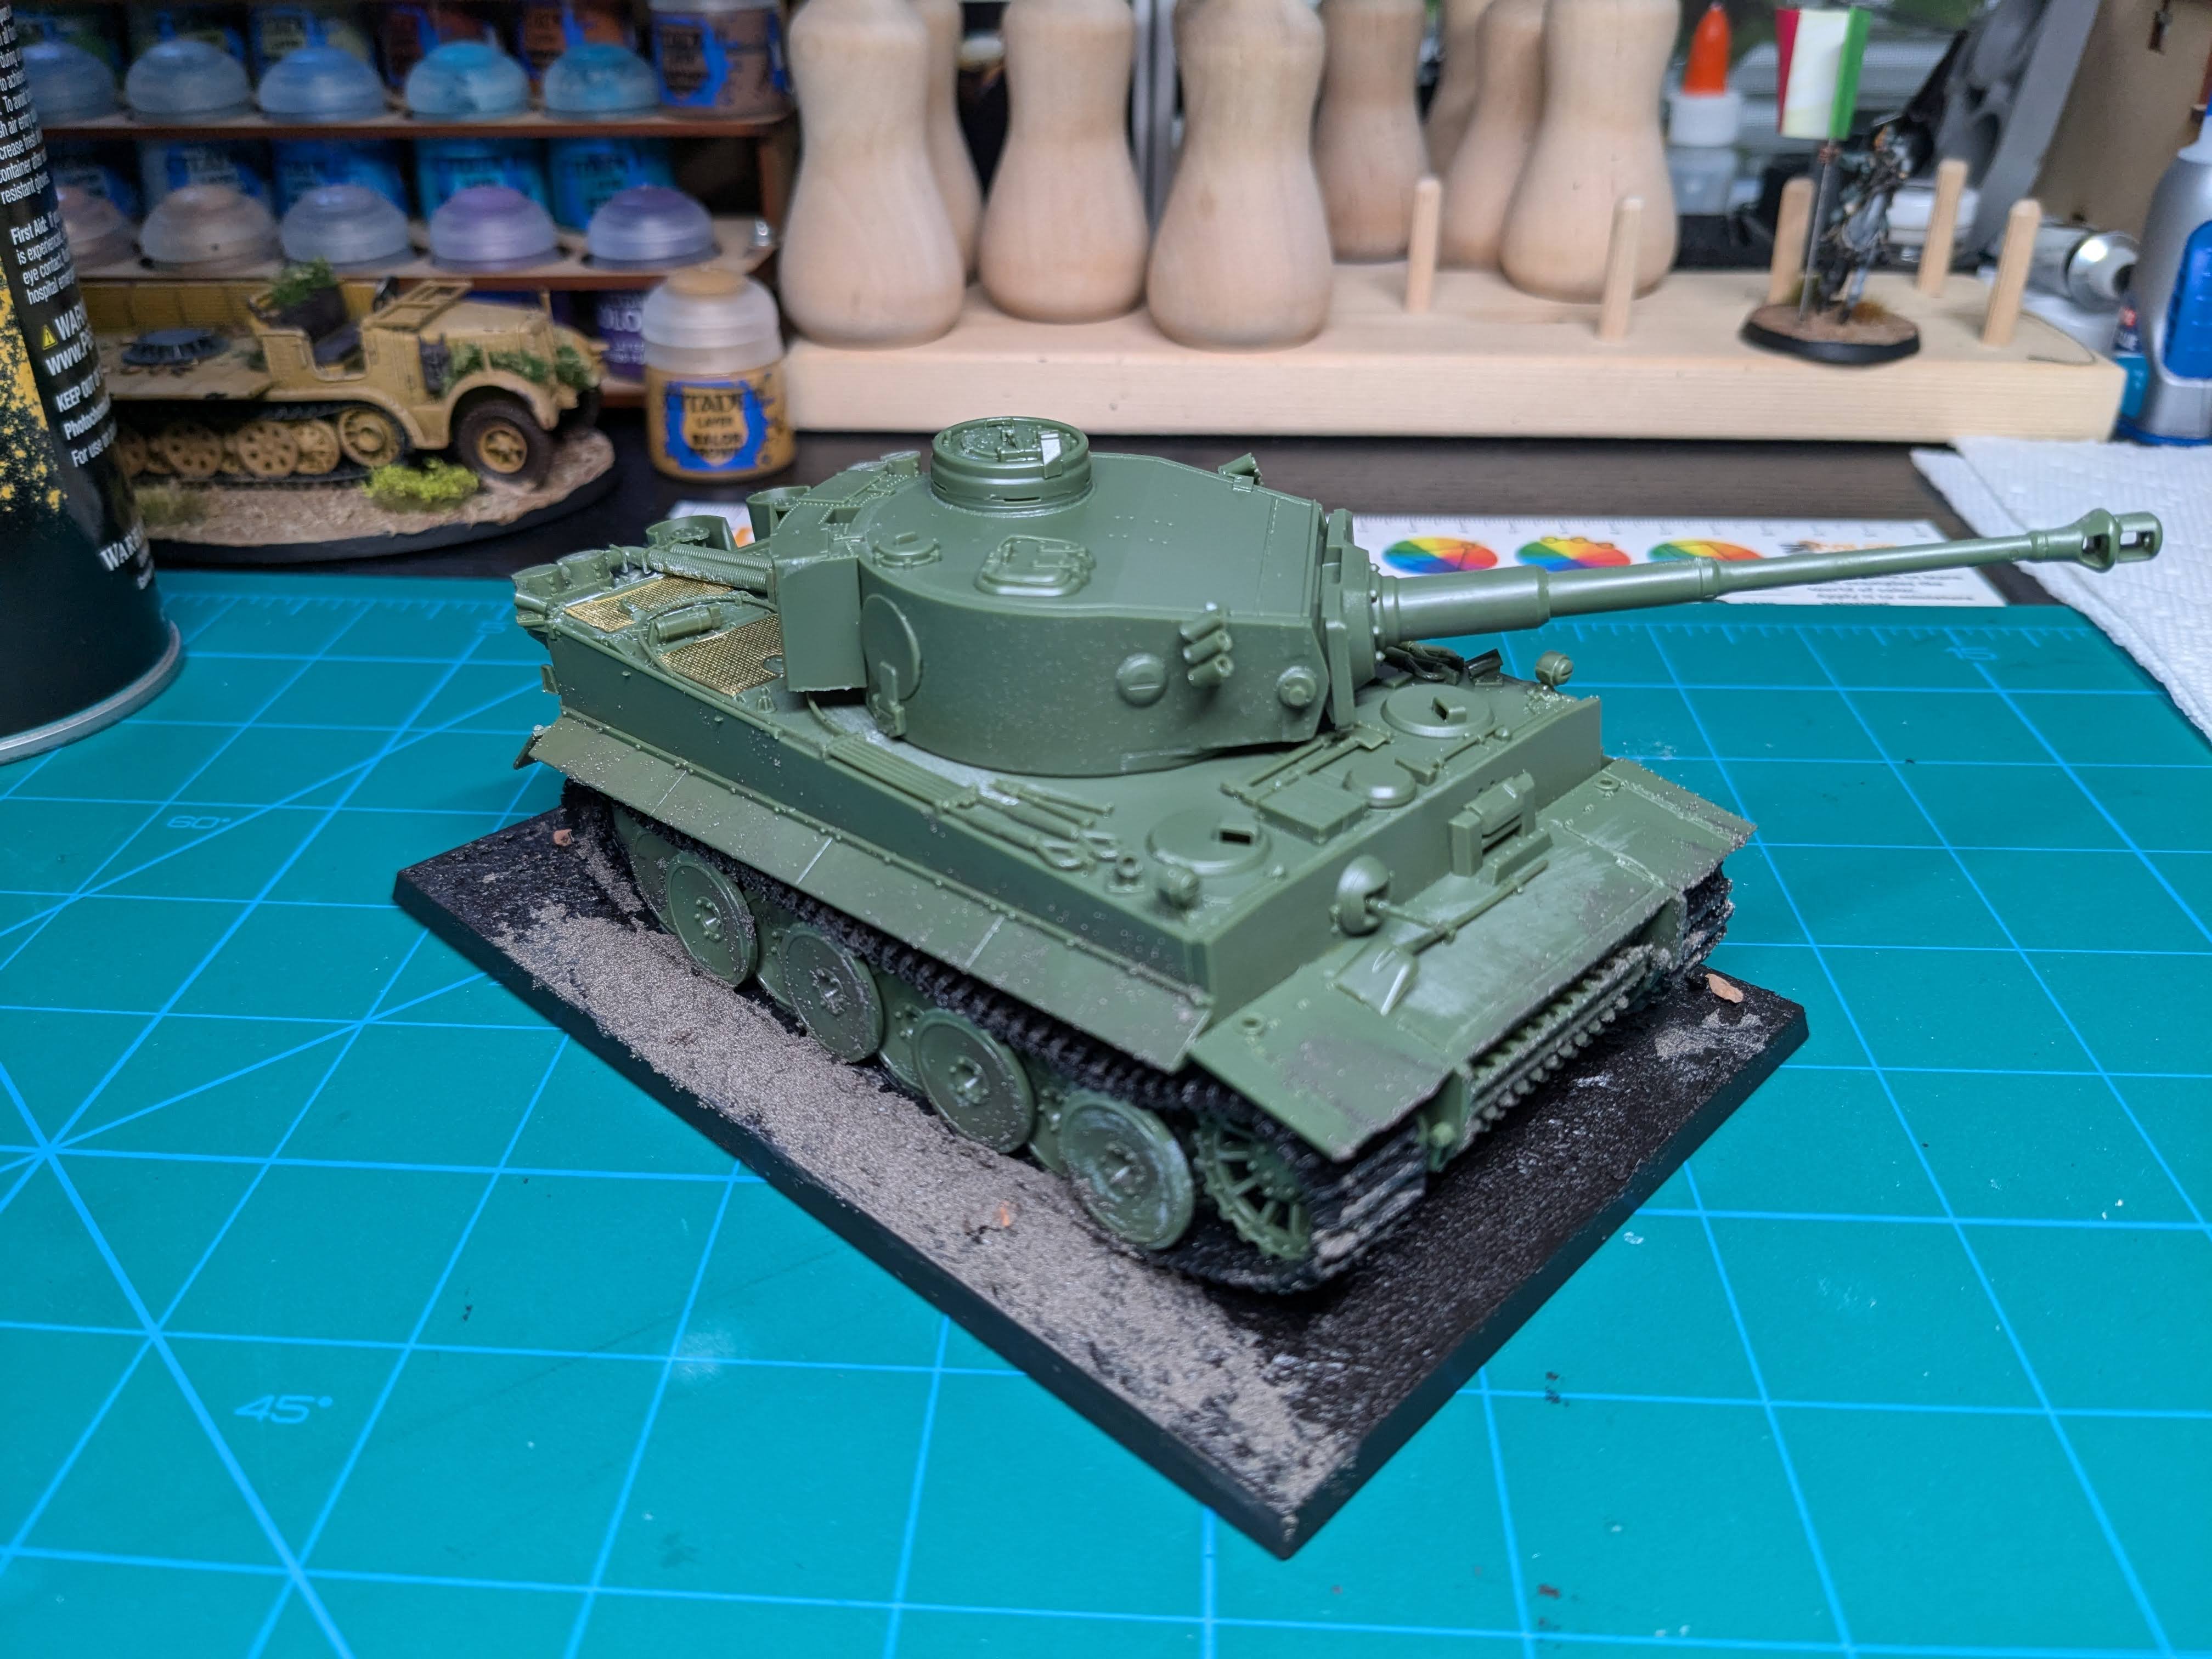
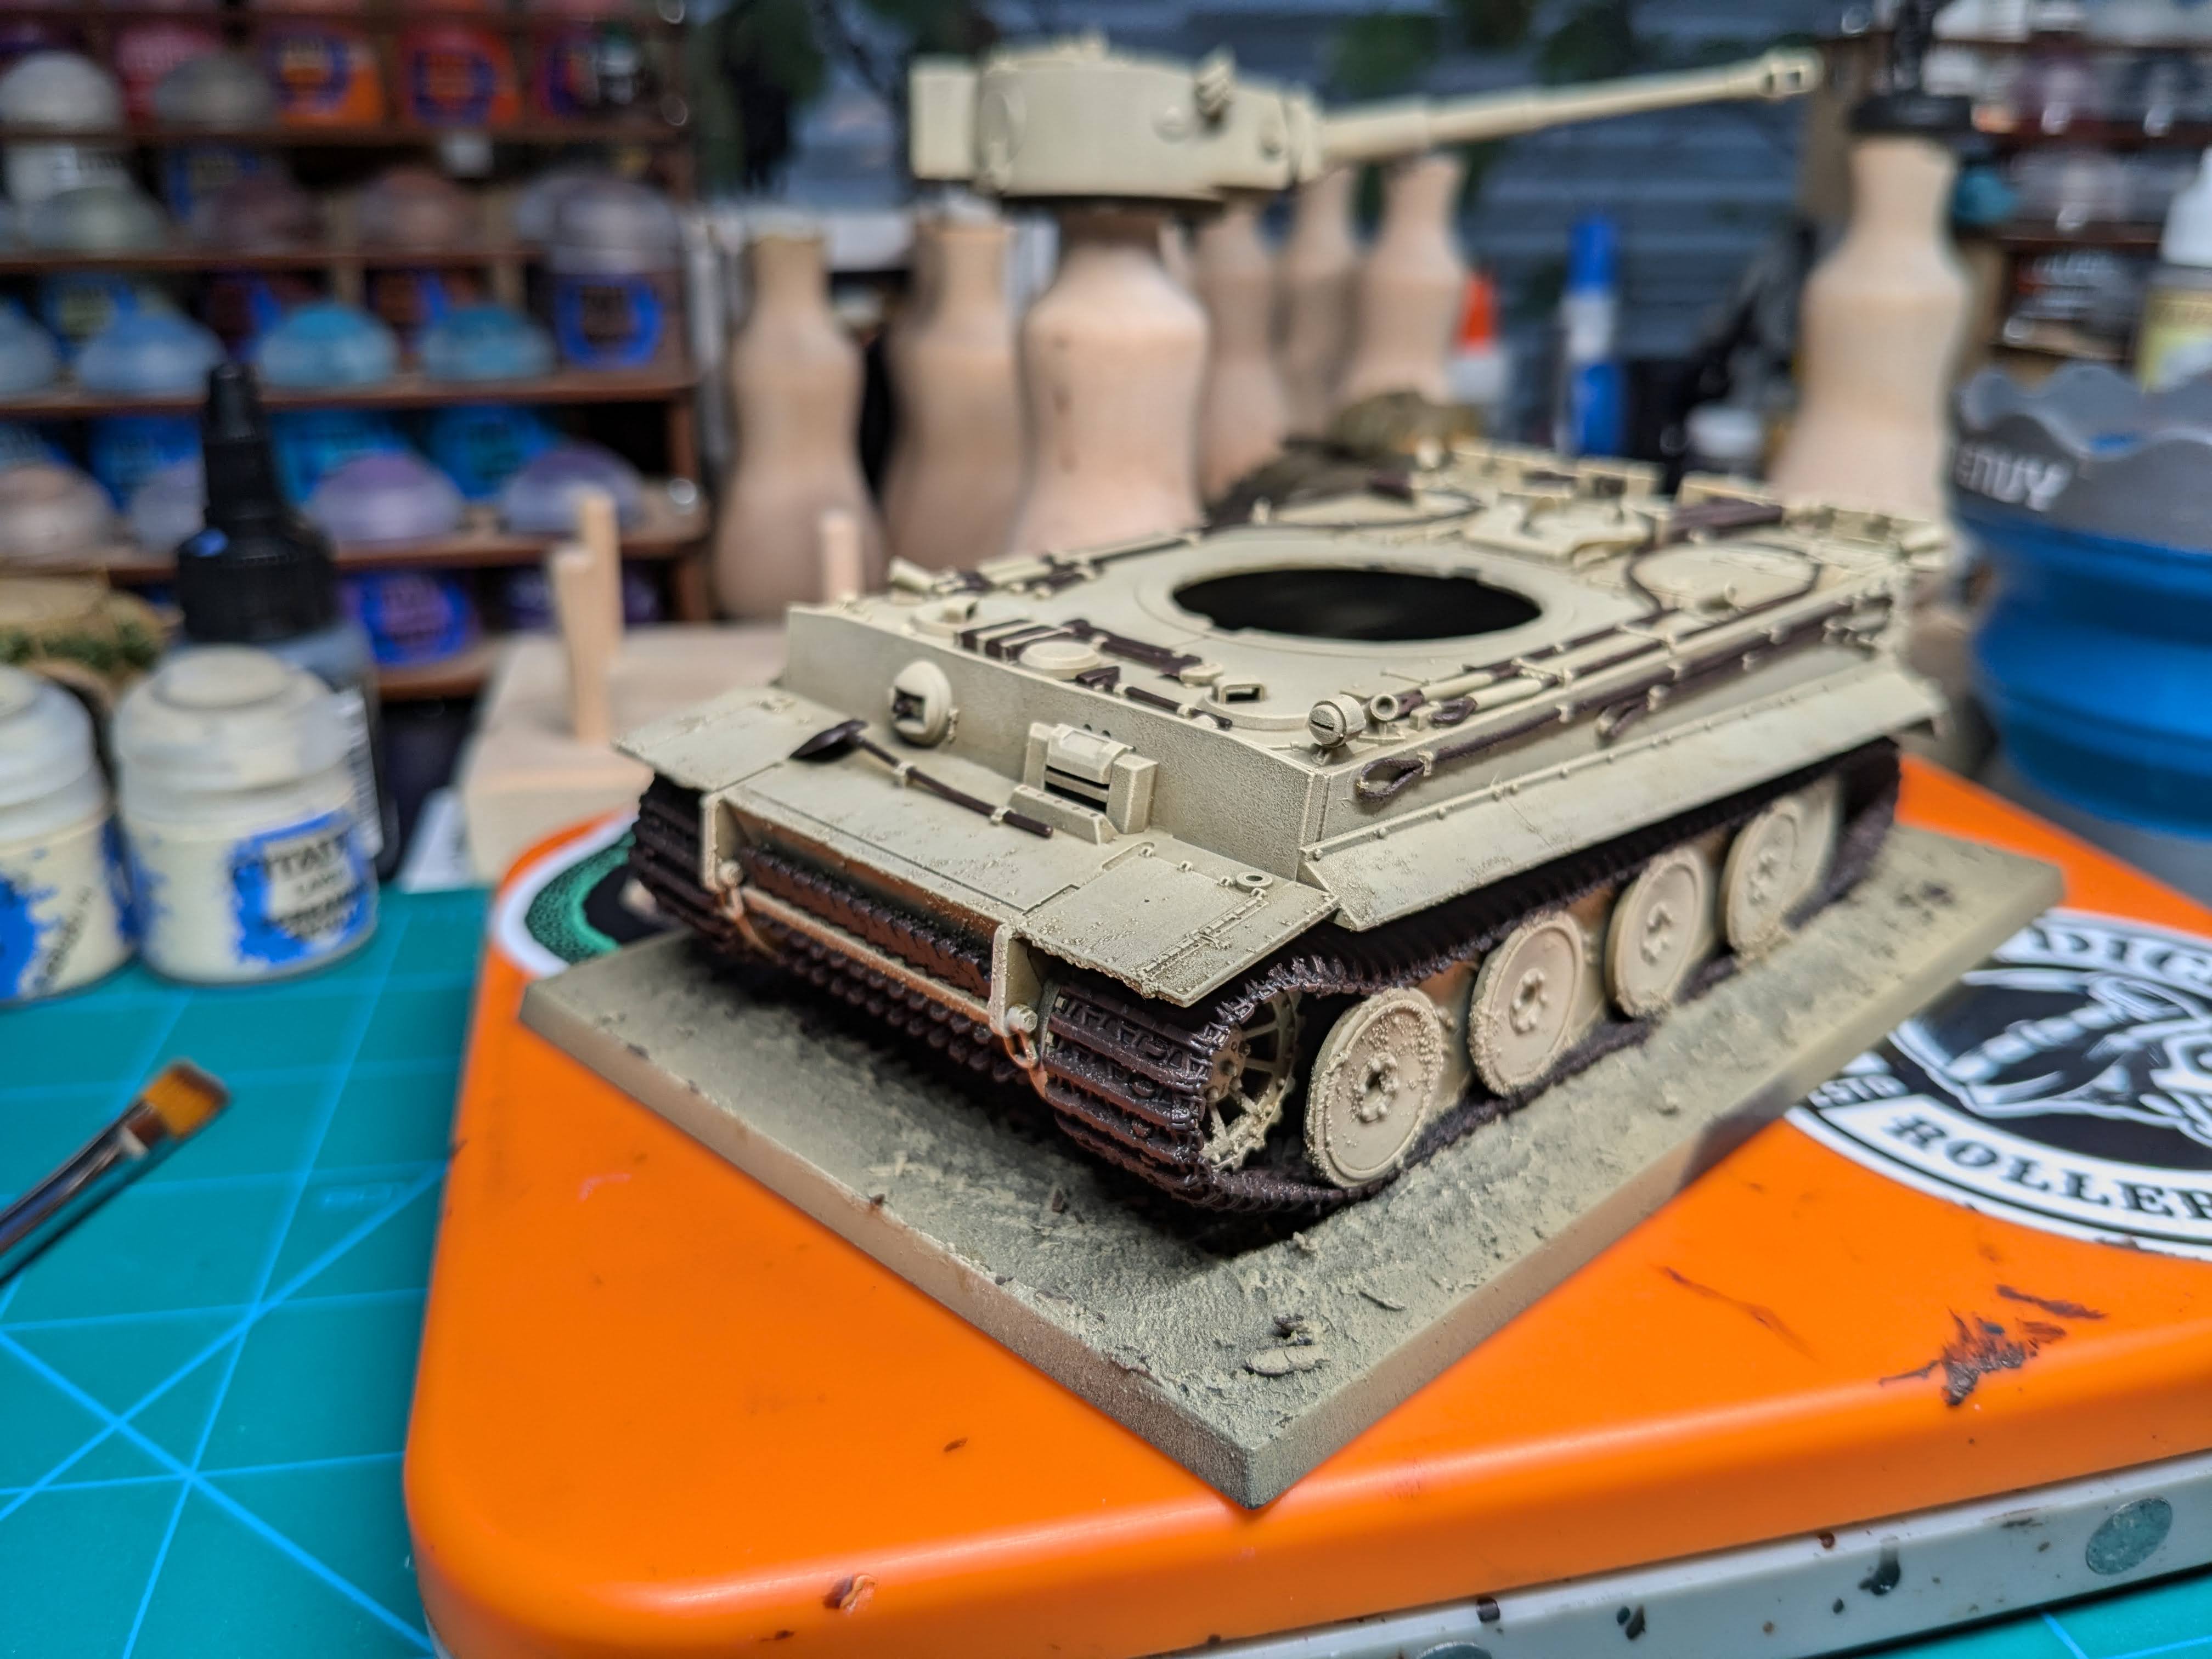
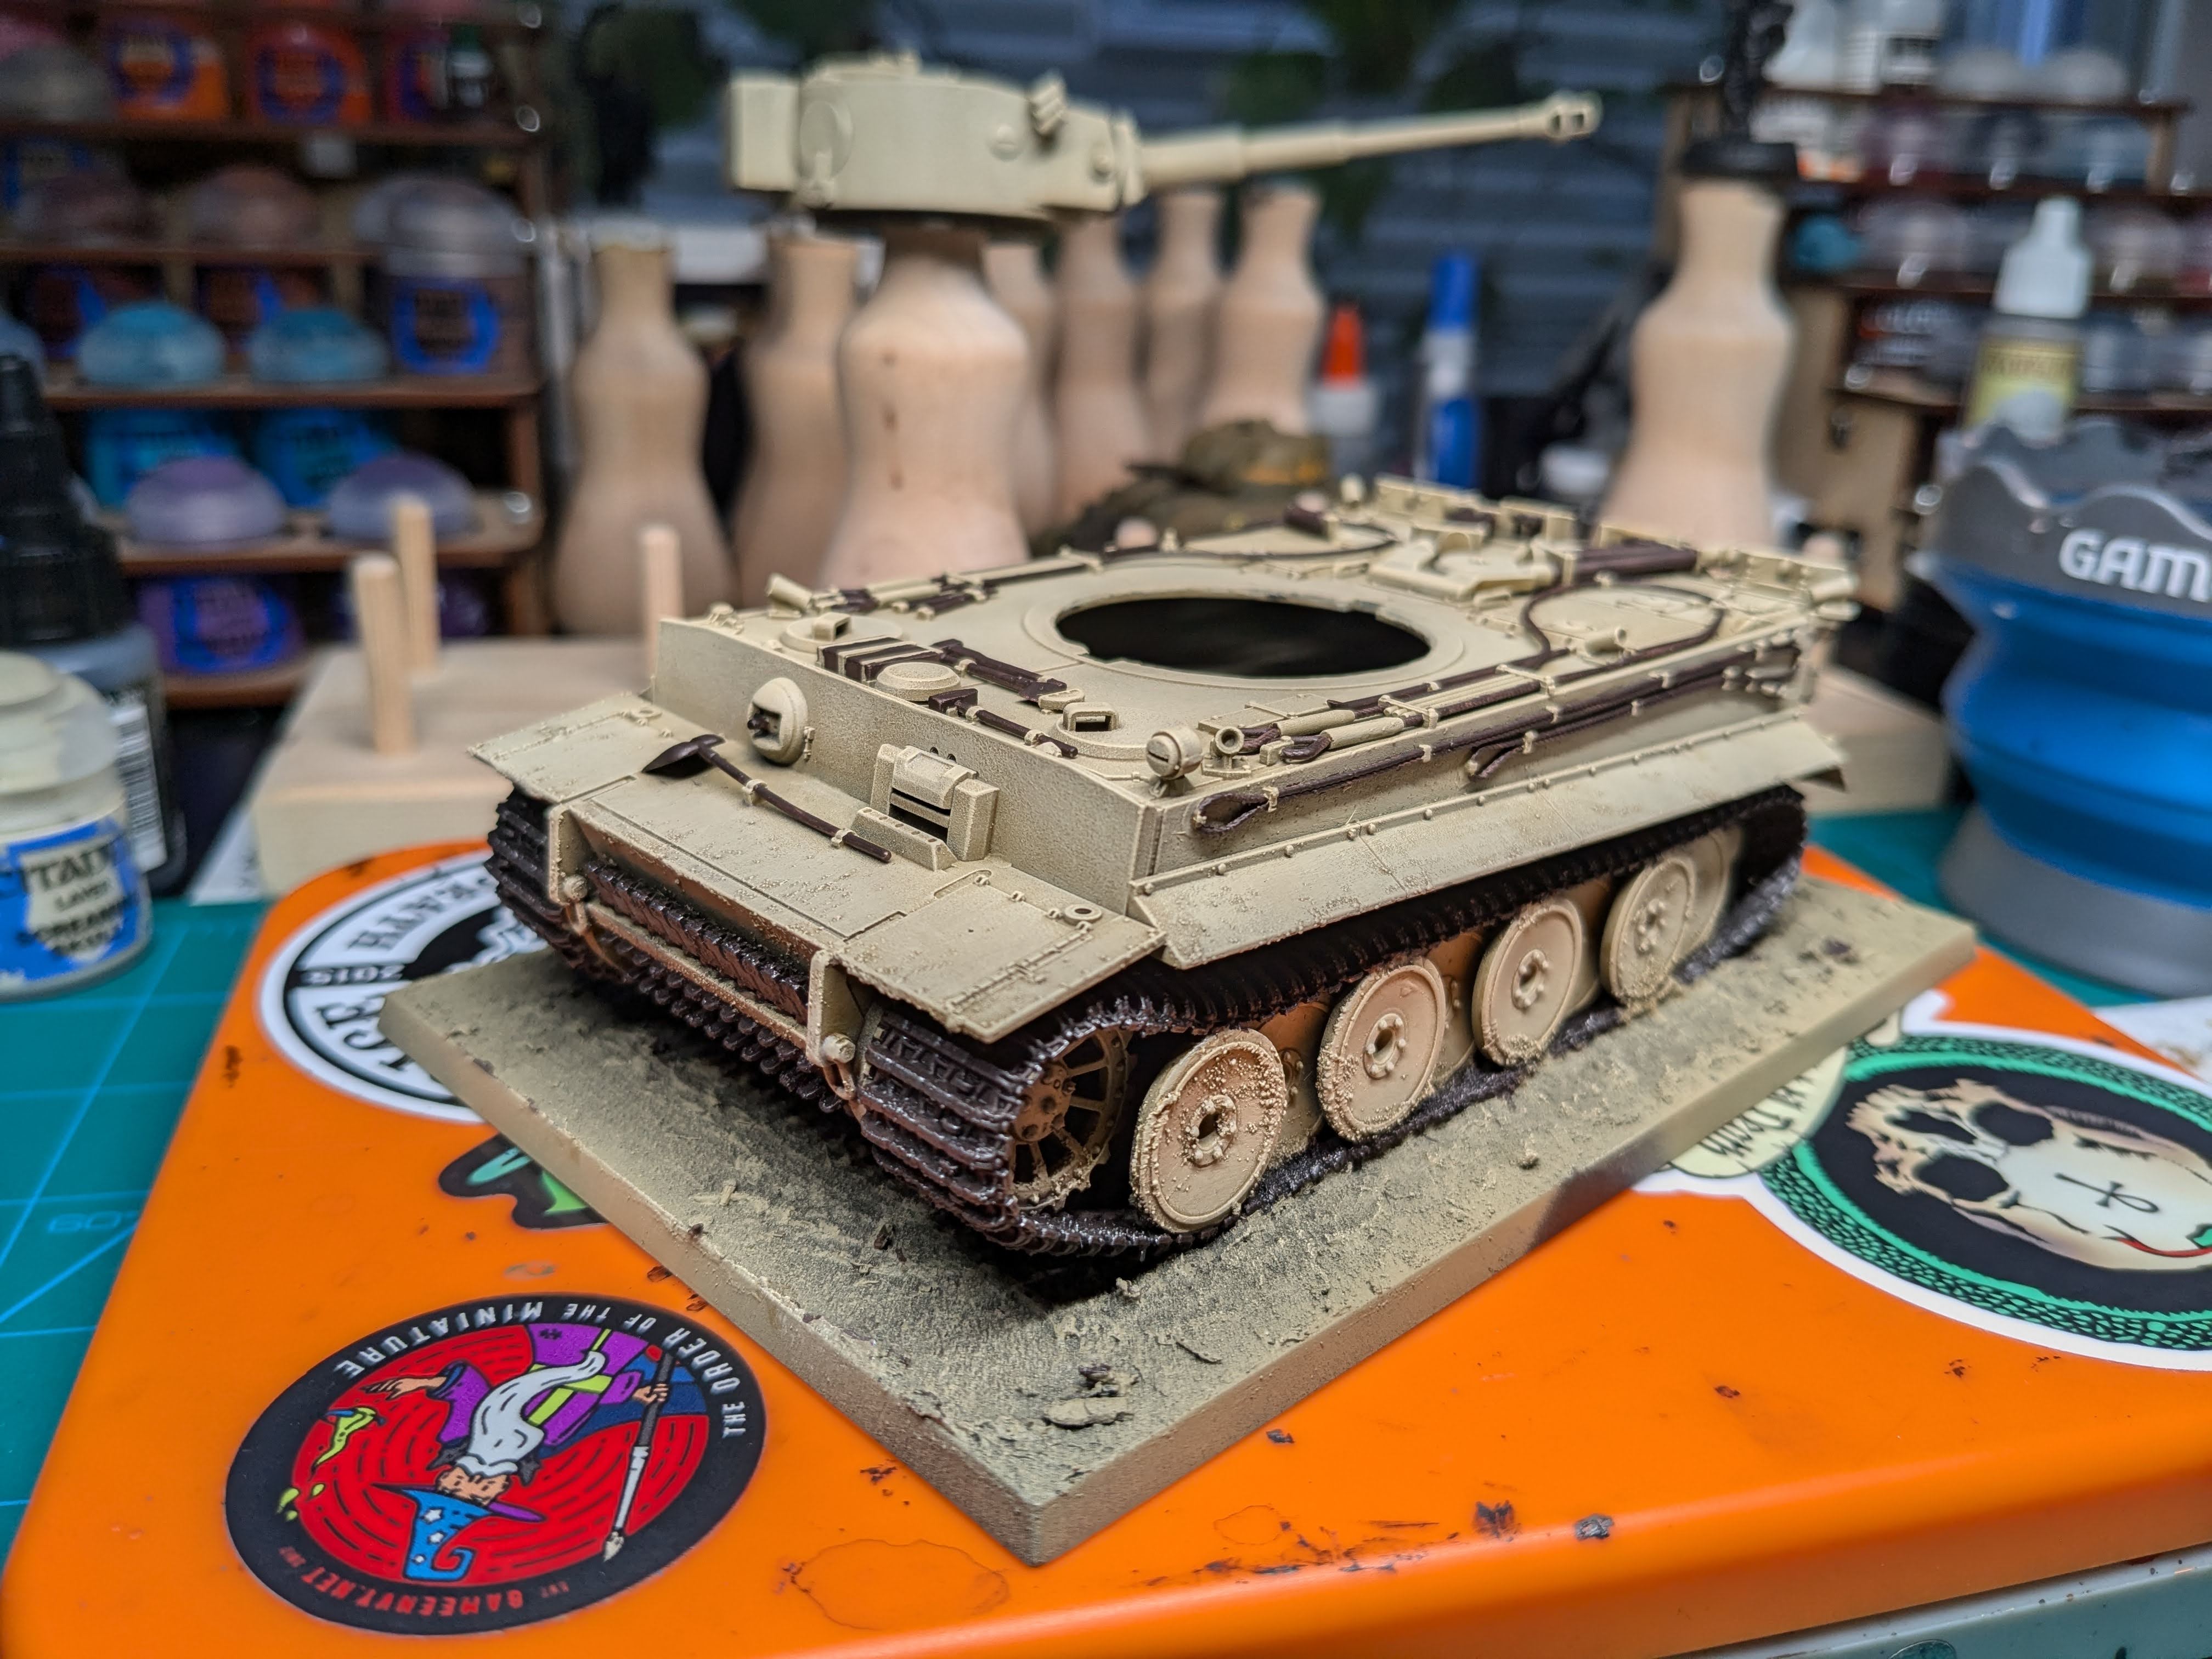
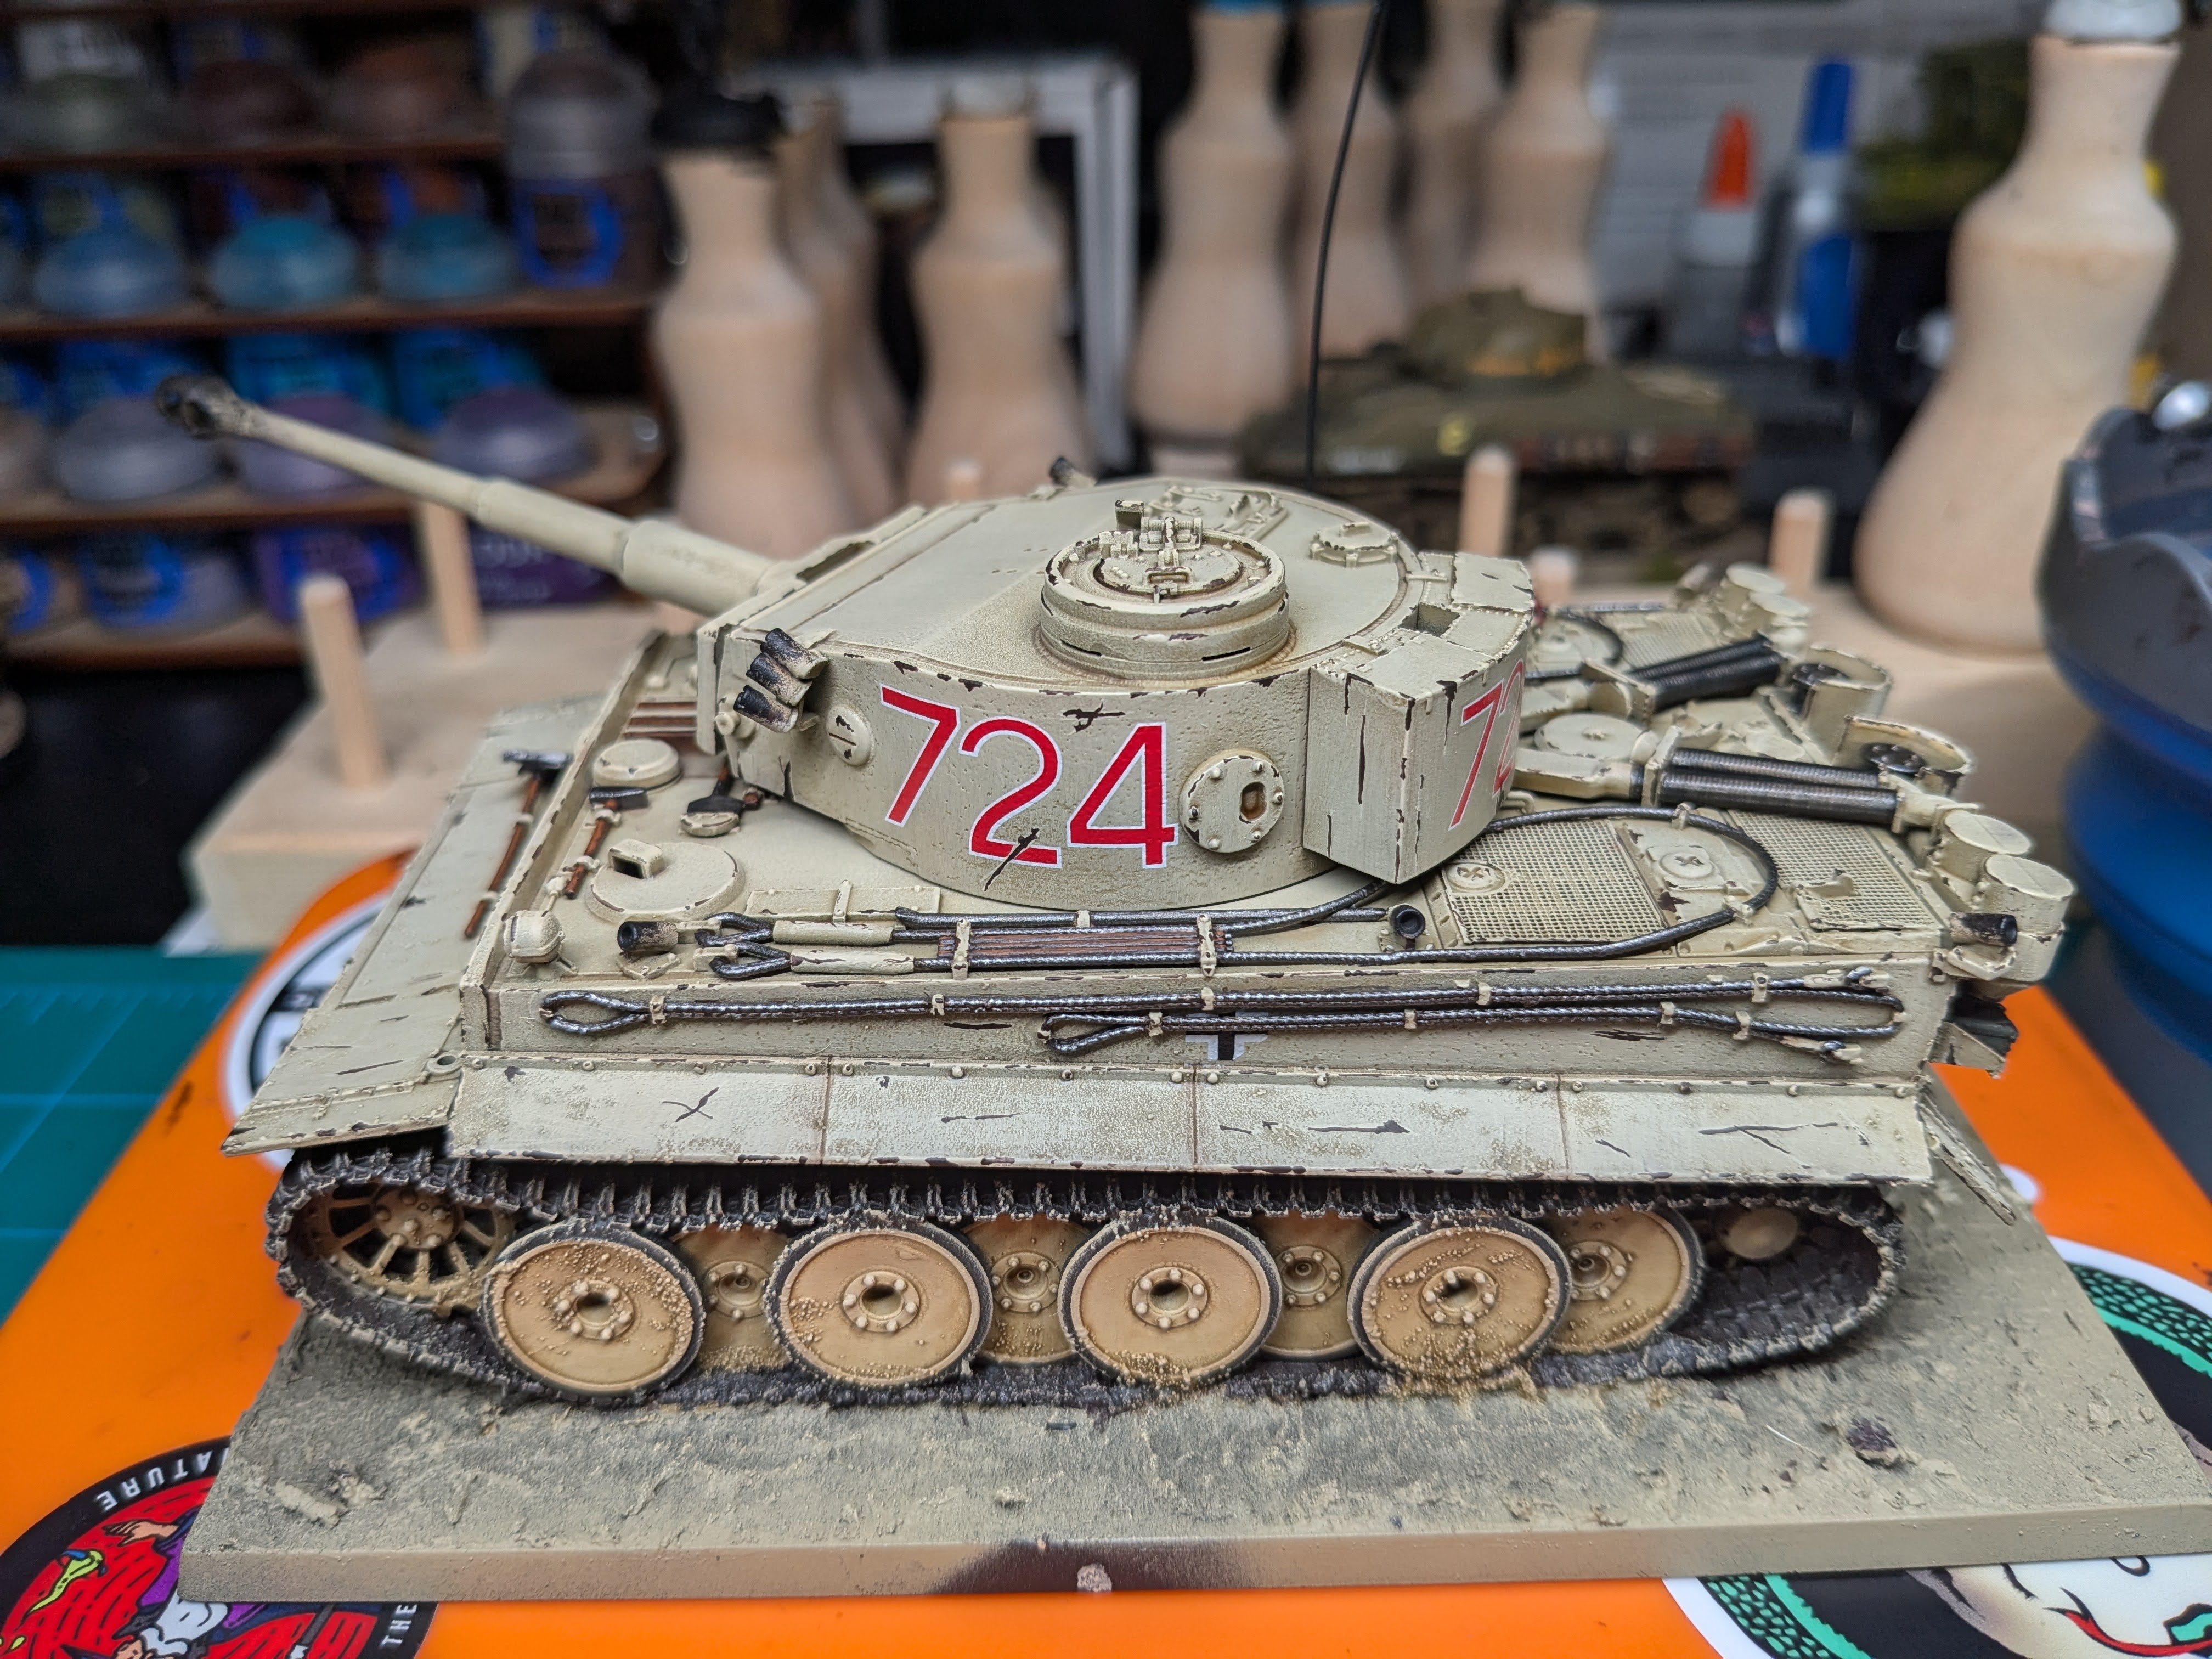
The final addition to my Bolt Action: Second Edition Operation Lehrgang Kreisgmarine Platoon is a Tiger I Early Production from AFV Club. This Tiger I is the capstone to a force I’ve been slowly expanding over the years and will make a perfect final touch.
This guide shows how to paint a tank quickly and without an airbrush. We are going to make use of a Contrast wash and several drybrush highlights. The paints I used are listed below. All paints are Citadel unless otherwise noted.
| Base | Layer | Shade | Contrast |
|---|---|---|---|
| Zandri Dust | Ushabti Bone | Agrax Earthshade | Skeleton Horde |
| Abbadon Black | Screaming Skull | Reikland Fleshshade | Contrast Medium |
| Rhinox Hide | Skrag Brown | Black Wash (Monument) | |
| Iron Warriors | Ironbreaker | ||
| Mechanicus Standard Grey | Dawnstone | ||
| Mournfang Brown | Rubber Black (AK) | ||
| Steel Legion Drab |
Step 1 – Starting with the build, I put my Bolt Action vehicles on bases. I glued down the tracks before applying some Vallejo basing texture – Dark Earth in this case.
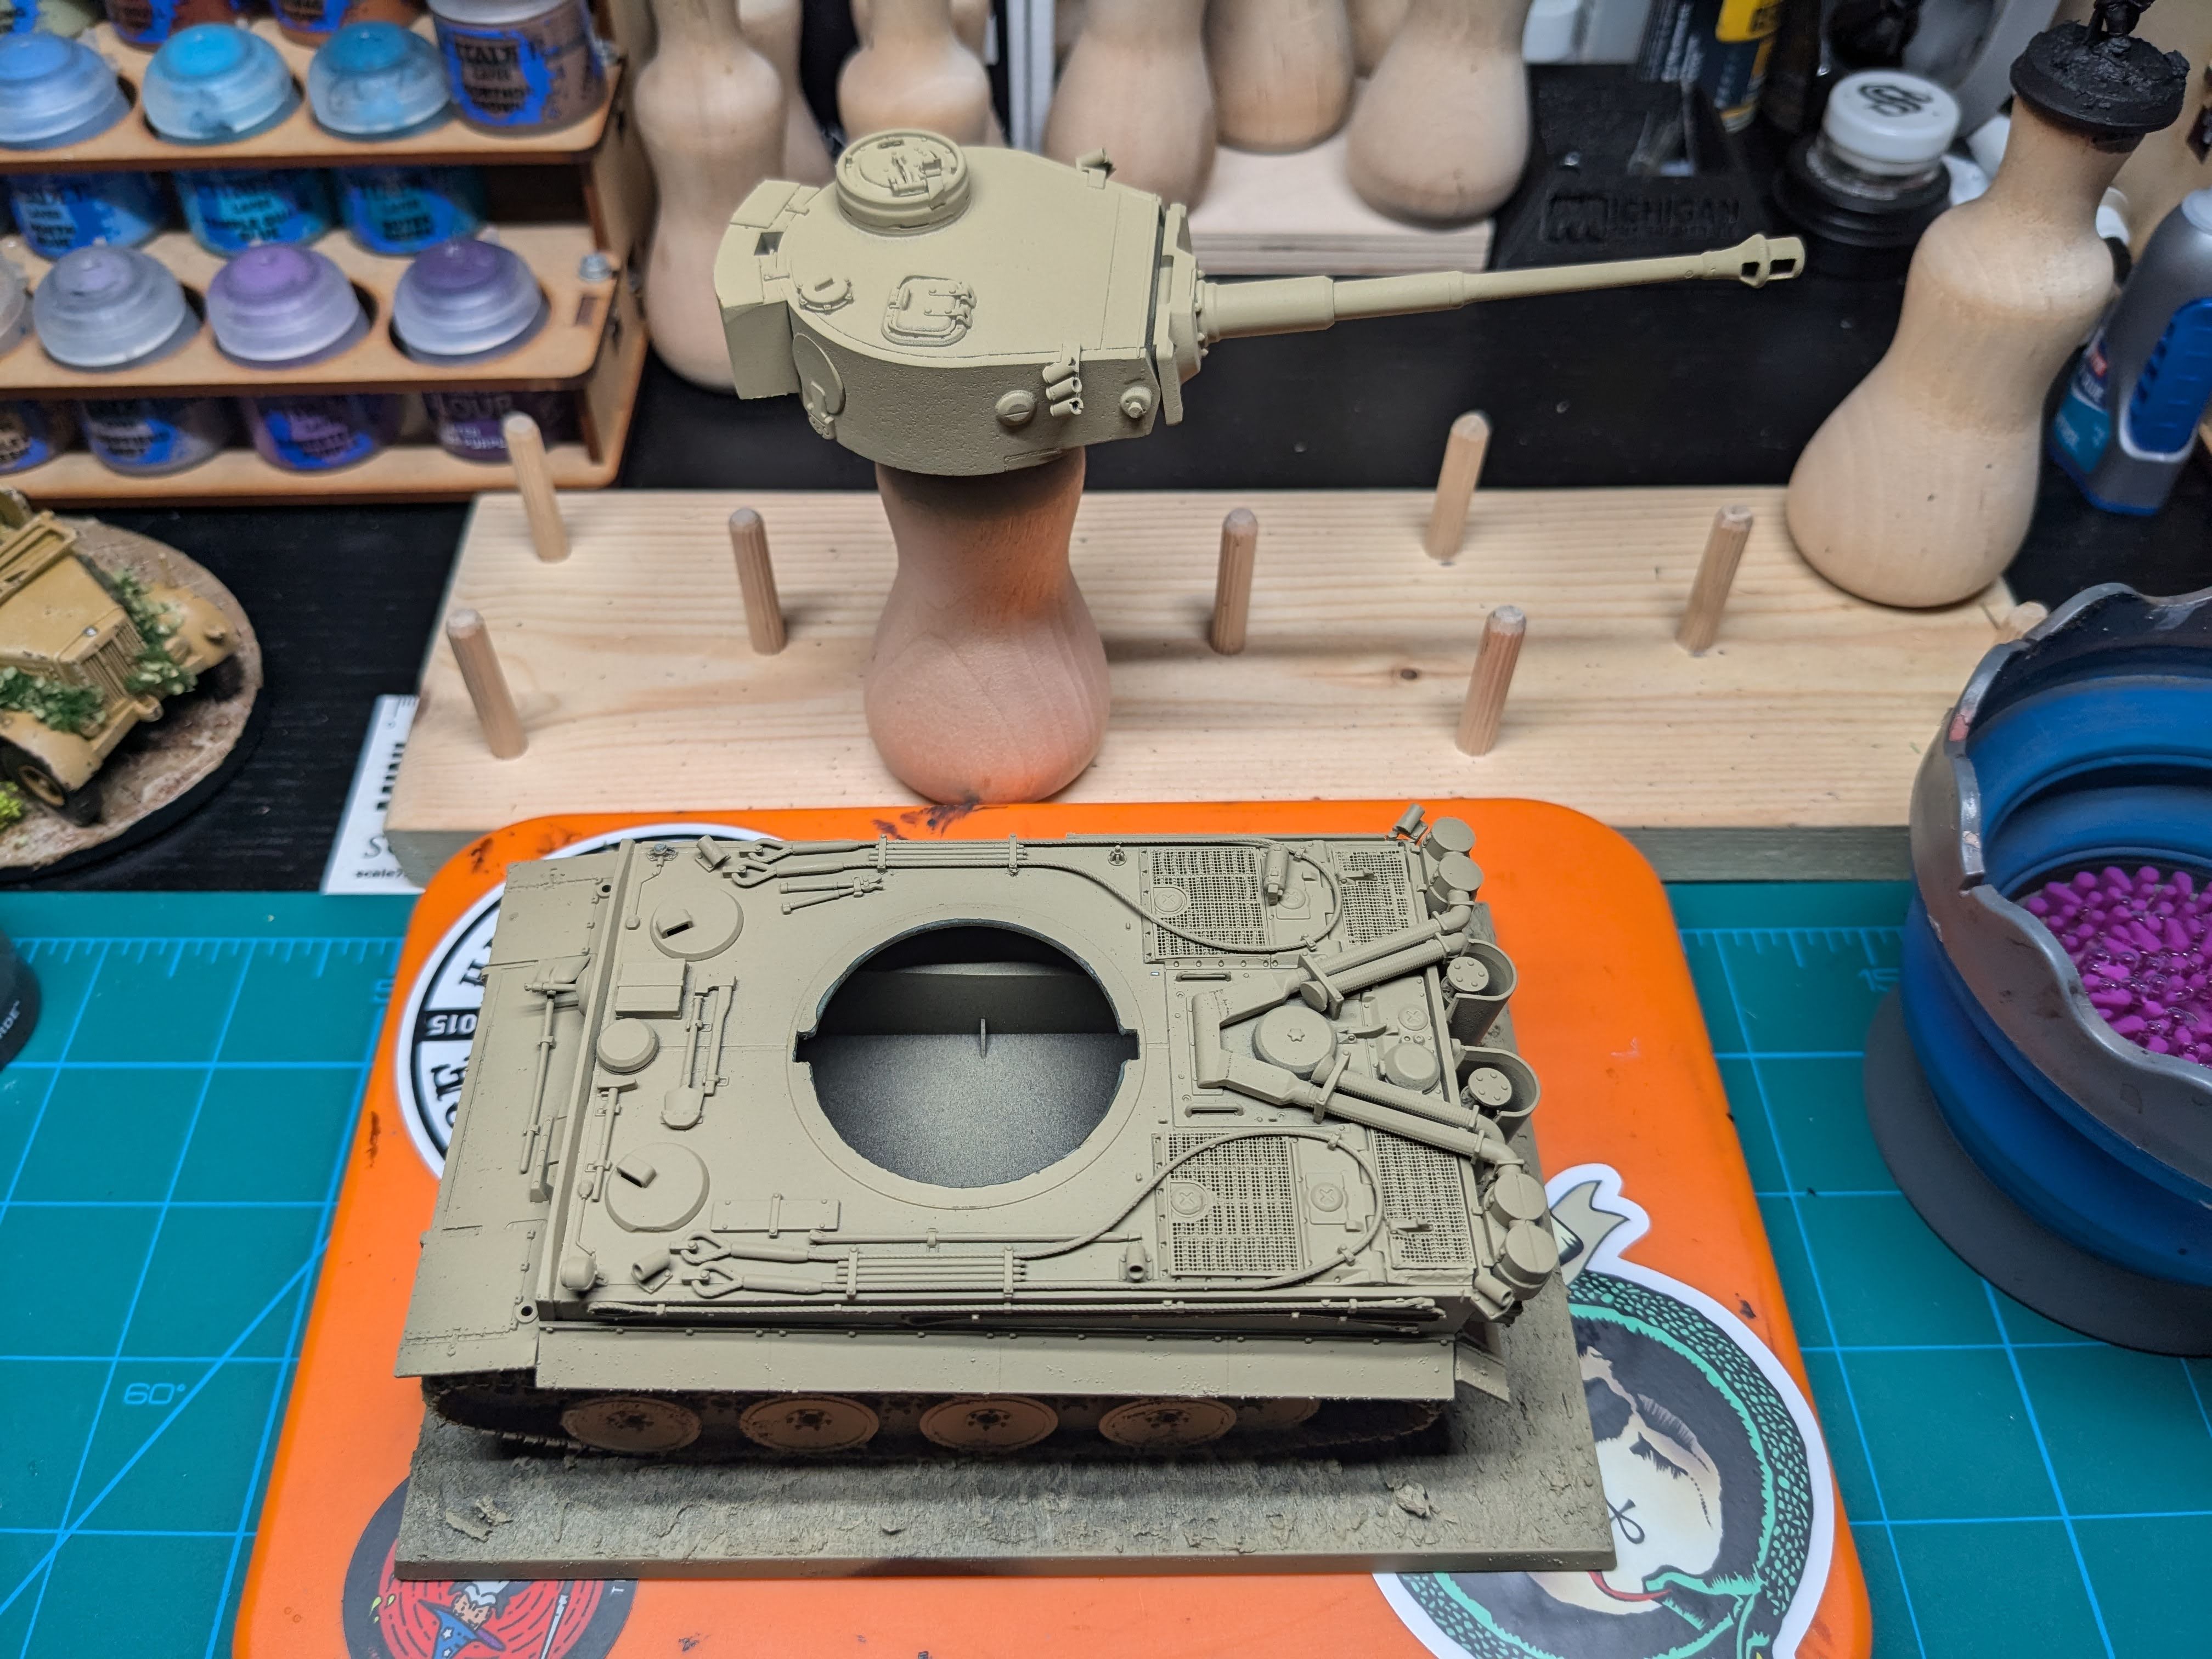
Step 2 – After priming, I laid down a basecoat of Zandri Dust with a rattle can. This could be applied by brush, but you’ll need to work in several thin layers to build up a smooth base. Any sandy color will work, Vallejo Desert Yellow is another great option.

Step 3 – It’s time for our first highlight. Using a soft, round, large brush give the entire model (except the tracks) a heavy drybrush of Ushabti Bone. This step gives the edges some pop and starts to create some definition between the details without having to manually highlight.
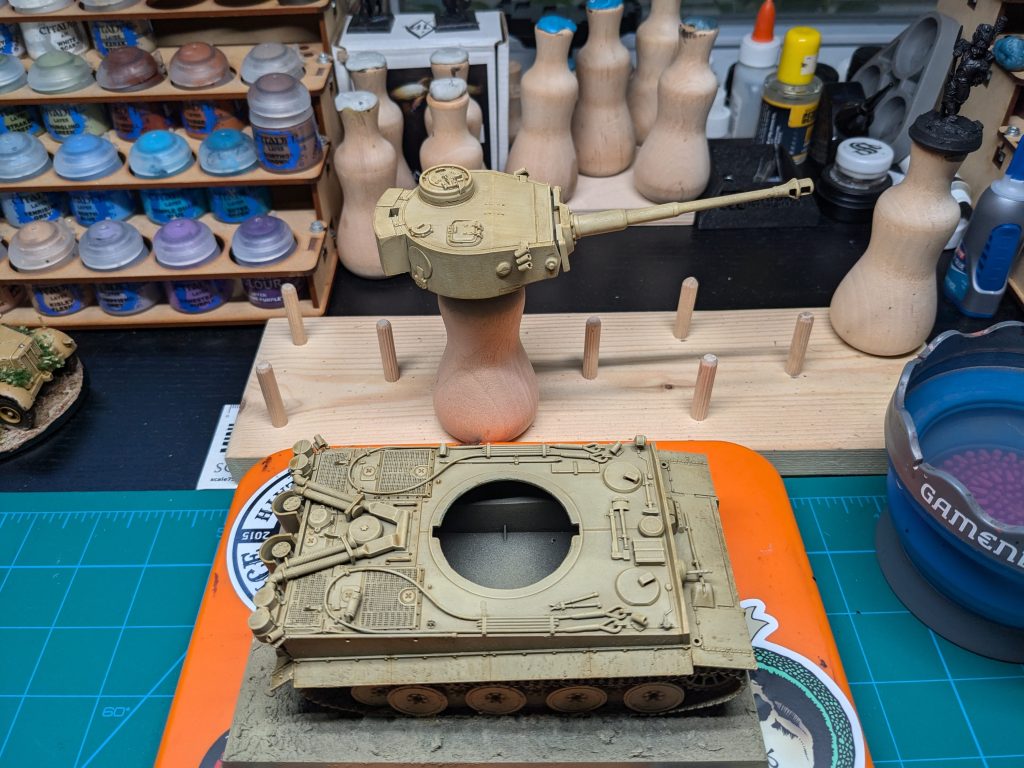

Step 4 – Next we are going to shade/wash the entire model (except the tracks) with a 50/50 mix of Skeleton Horde Contrast and Contrast Medium. This step gives the model depth and adds darkens the shadows. It may look a bit messy, but the next steps will clean that up.

Step 5 – Time to build those highlights. Back to the Ushabti Bone drybrush! Same brush, same method but this time focus a bit more on the edges. We want heavy coverage but not to the same extent as Step 3.


Step 6 – Continue building up the highlights with a second drybrush layer of 70/30 mix of Ushabti Bone and Screaming Skull. Same brush and method but now start to rein back from the flat areas and focus on the edges. If you are not getting enough contrast for your liking, feel free to go heavier. You can always add additional layers.


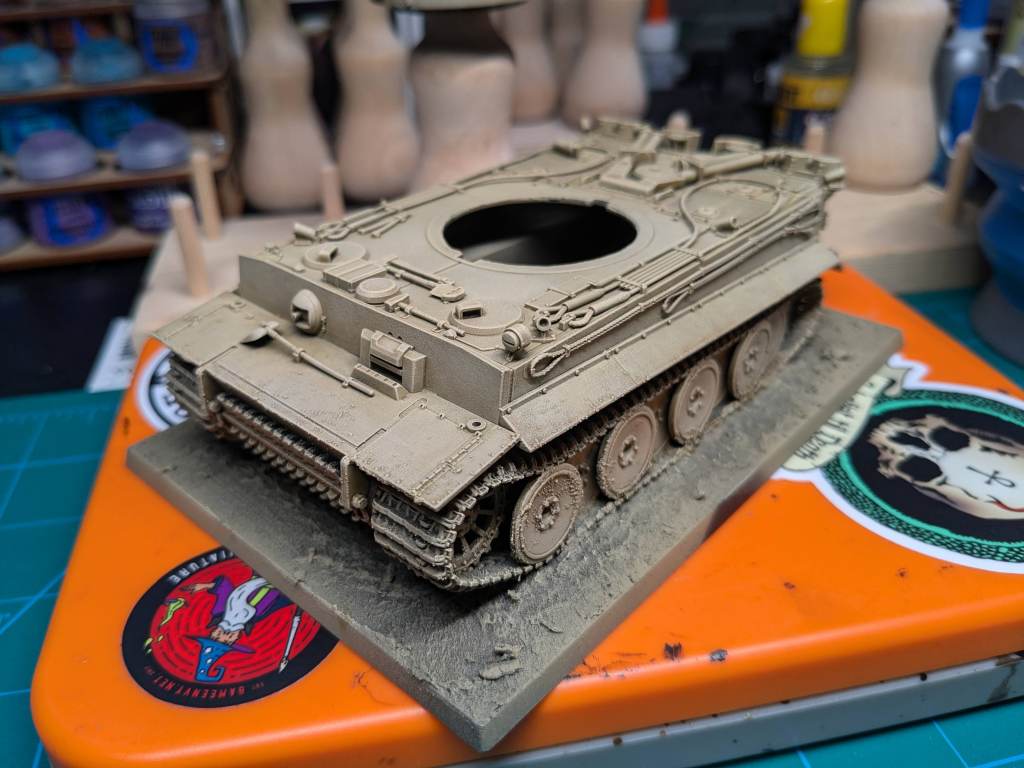
Step 7 – One last highlight. For this third drybrush layer use a 50/50 mix of Ushabti Bone and Screaming Skull. Again, same method as before but really only hit the edges and areas you want to pop. Spots like the lower hull and road wheels should only be lightly touched with this step.

Step 8 – With the hull and turret done it’s time to move onto the tracks. Start with a nice layer of Rhinox Hide over the entire track. We don’t need full coverage as the lighter Zandri Dust showing under can serve as a bit of weathering. But you need to be careful of the hull and the road wheels. Avoid getting Rhinox Hide on those sections. I also basecoated all the metal stowage and tools at this point, also in Rhinox Hide.
Step 9 – Give the tracks a solid wash with any black ink/shade such as Nuln Oil or Black Wash from Monument.
Step 10 – Hit the tracks with a drybrush of 50/50 Leadbelcher and Abbadon Black. Or a dark metal like Iron Warriors.

Step 11 – Be extra careful and paint the rubber on the edges of the road wheels. For this step, I used AK Rubber Black. Then go over the road wheels and the tracks with a wash of 50/50 mix of Skeleton Horde Contrast and Contrast Medium. Just like we did back in Step 4. This extra wash darkens down the road wheels and is a quick way to add some weathering to the tracks.
Step 12 – Let’s finish the tracks and road wheels with a light drybrush of Ushabti Bone just to bring up the contrast a touch. Focus on the raised areas.
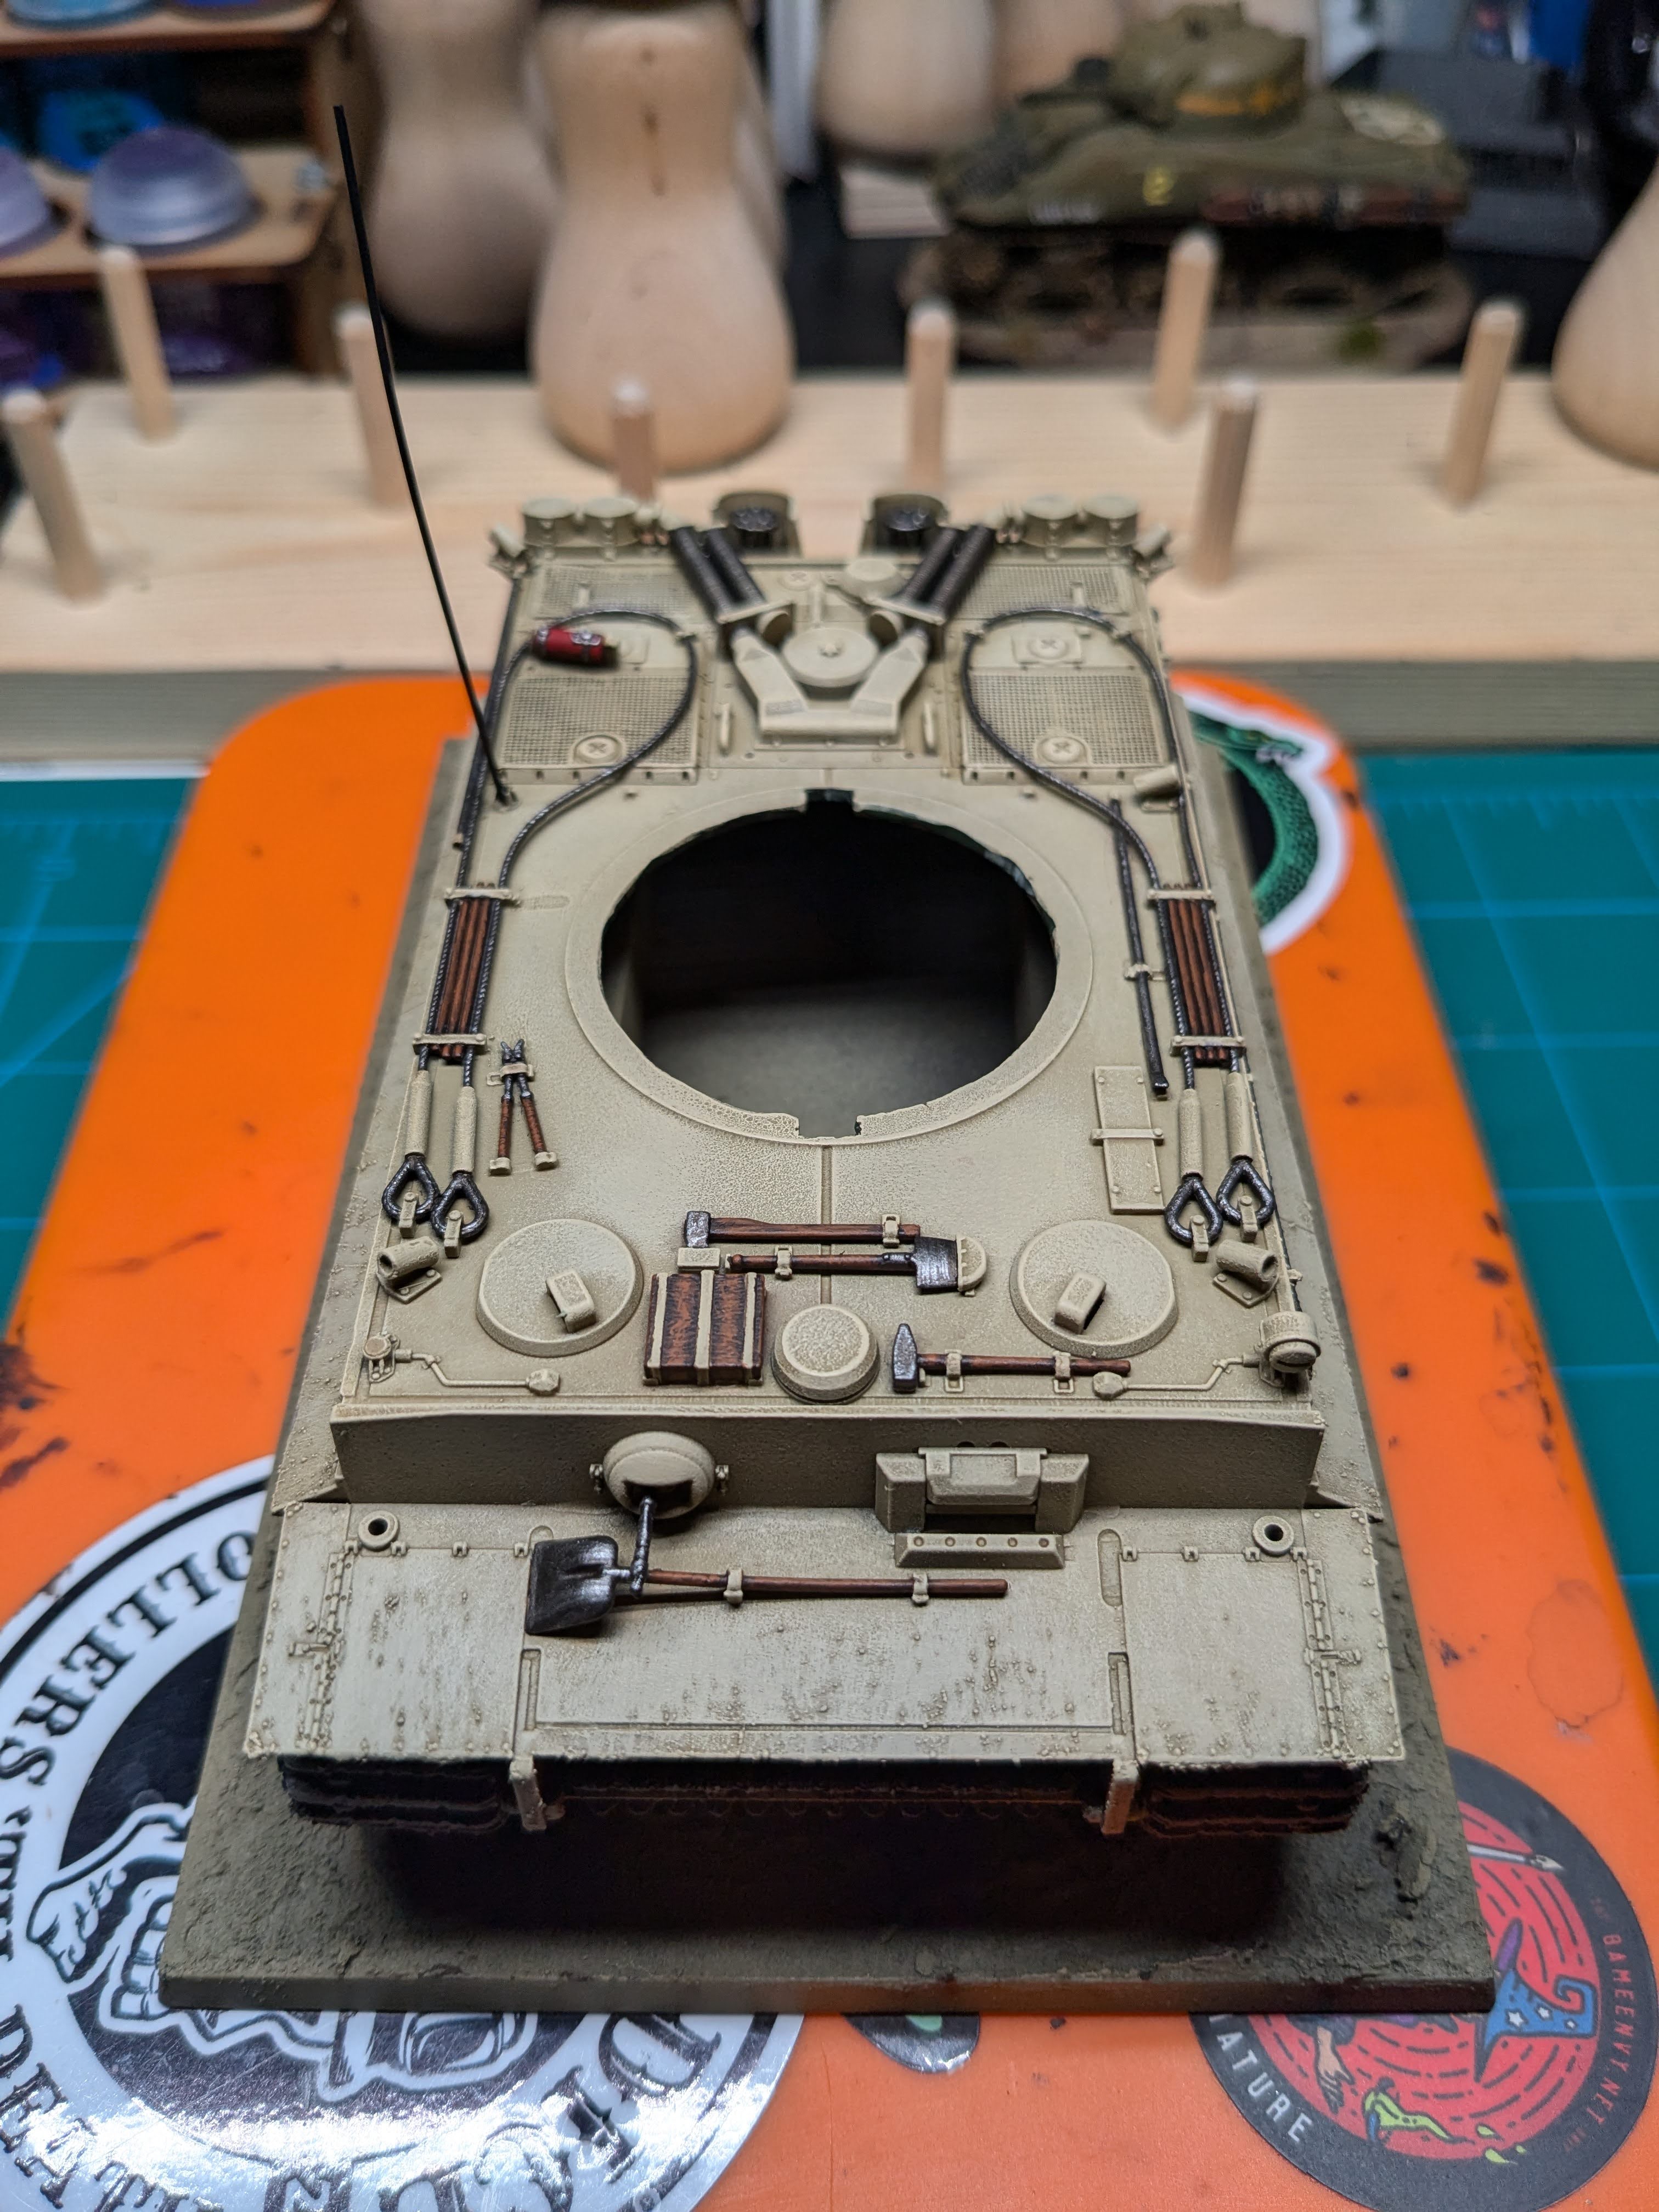
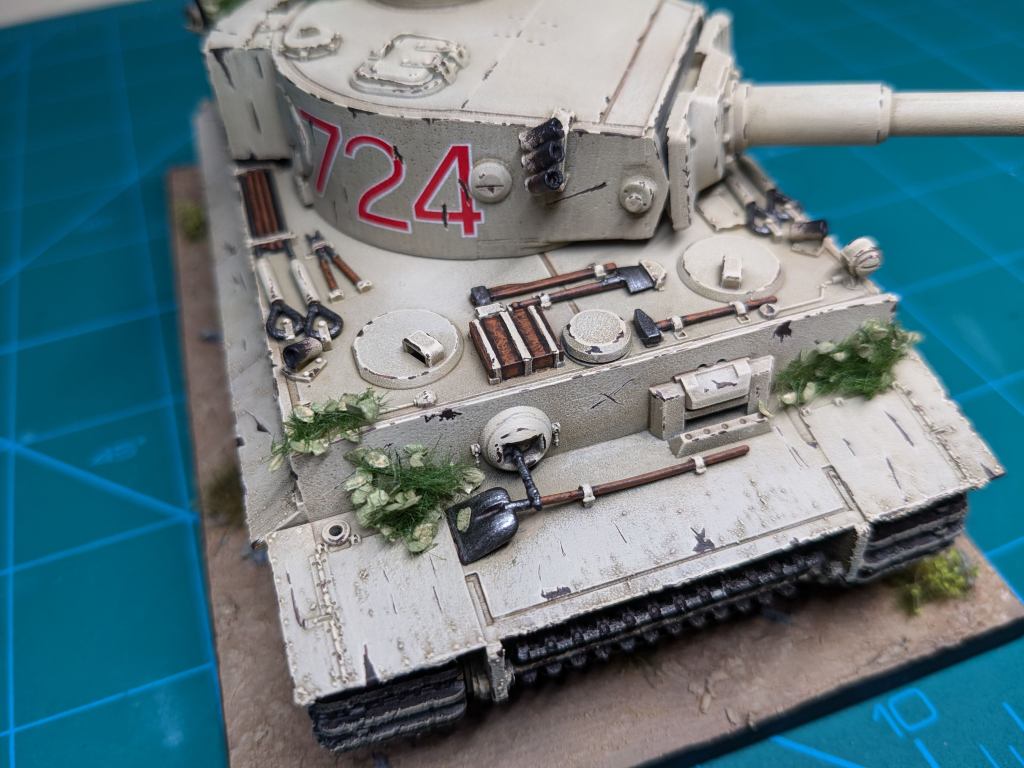
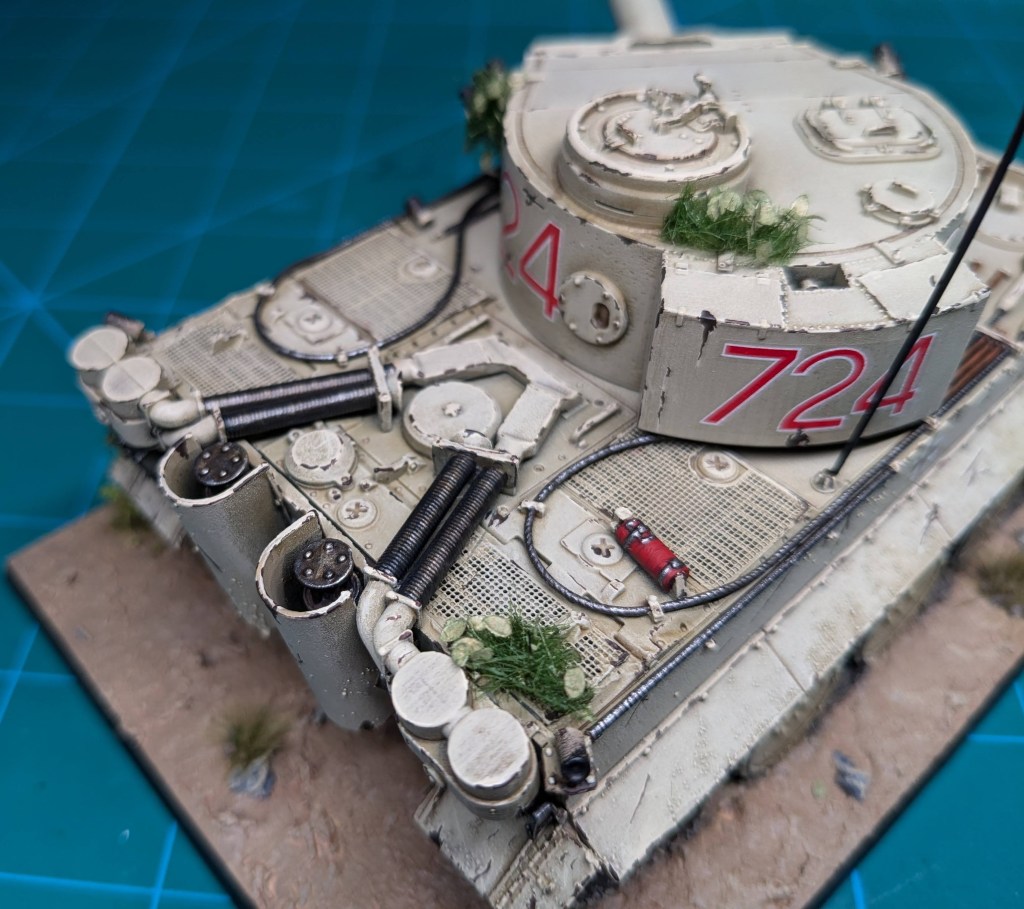
Step 13 – It’s time for the stowage! For this build I did not add an additional stowage, just the items that came within the kit. Mostly tools and various cables. I also painted some soot on the muzzle of the main gun and the smoke launchers.
- For the wooden components I went with:
- Base – Rhinox Hide
- Layer – Mournfang Brown
- Highlight – Skrag Brown
- Wash – Agrax Earthshade
- Final Highlight – Skrag Brown
- For the metal components I went with:
- Base – Iron Warriors
- Wash – Agrax Earthshade
- Final Highlight – Ironbreaker
- The soot effect was:
- Drybrush Rhinox Hide about halfway down the smoke launcher tubes and over the muzzle break of the main gun.
- Drybrush just the front area with Abbadon Black, only going about halfway down the Rhinox area.

Step 14 – Transfer time! With the stowage complete let’s add the transfers before we move on to chipping. I added five transfers, three on the turret and two on the hull per a the guide included with the kit to represent a Tiger I in Tunisia. As always I used MicroSet and MicroSol to get the transfers applied. If you are going to work with transfers, purchase those two products immediately.
Step 15 – Chipping. So much chipping. To add some character to the tank I painted on chips by skipping my brush across the hard edges and adding some short lines to the flat surfaces. The first pass with with Ushabti Bone and then you “fill in” the chips with Rhinox Hide. Be sure you leave the Ushabti still showing around the Rhinox. This gives us a bit of a 3D chipping effect.

Step 16 – Before adding any grass tufts to the base, I painted it with:
- Base – Steel Legion Drab (two coats)
- Layer – Zandri Dust
- Rocks –
- Base – Mechanicus Standard Grey
- Layer – Dawnstone
- Wash – Reikland Fleshshade (avoid the rocks)
- Highlight Drybrush – Ushabti Bone
- Paint the rim of base Black.
- Toss on various tufts of grass for some added pop and flavor.

Step 17 – As a final, thematic step I added some a few clumps of foliage used as camouflage. I went with Beech Foliage Summer from AK.

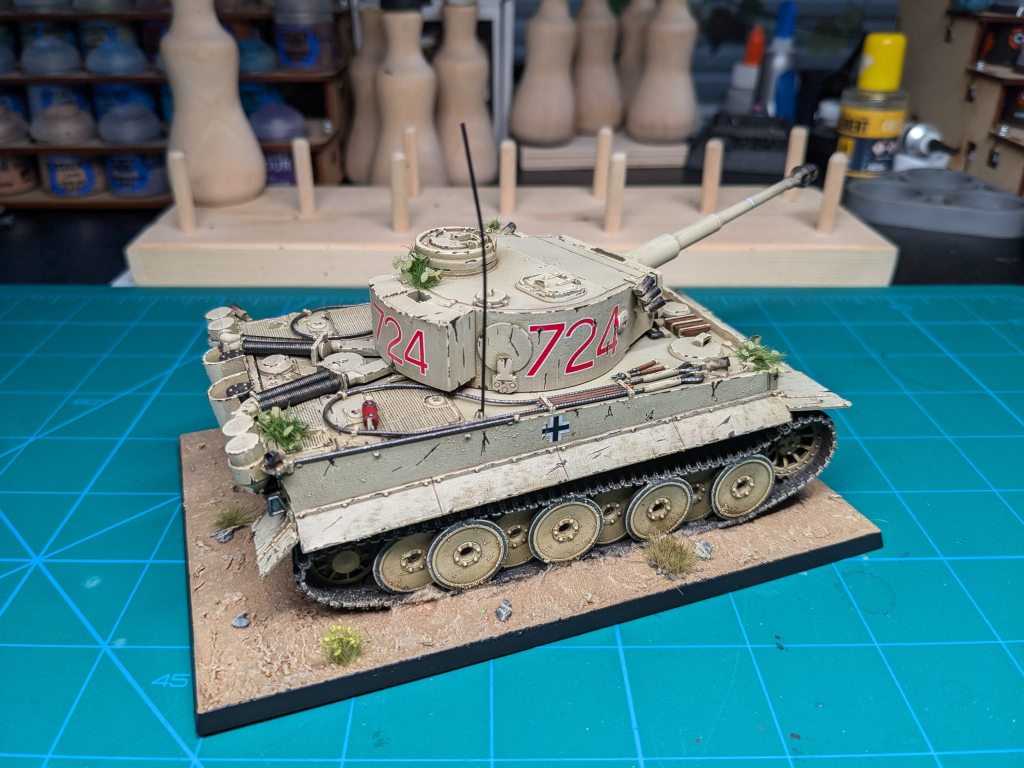
And there she is! I must admit I am simply thrilled with how the Tiger I turned out. I agonized over the process and picking the “correct” colors – but as I look at the result I couldn’t be happier. The build process was rough. This kit was originally produced in 2005 and it shows. I also haven’t built a 1/48 scale model in a long, long time. I didn’t realize the tracks were this rubber/vinyl situation and boy, those were a pain. Locking those tracks down onto a base was an absolute must. Even if I wasn’t in the habit of basing my tanks, I really didn’t have a choice this time around.
But that’s enough complaining about the build – look at the final result! This thing is a monster and towers above everything else on the table. Exactly as intended. Now wish me luck trying to get a Cover Save!

This is uncanny. I just started building my ‘Clash of Steel – Operation Unthinkable’ boxset, although it’s 15mm I can still use this tutorial. Thanks.
LikeLiked by 1 person
Absolutely! I actually took inspiration from some 15mm FoW tutorials I saw haha
LikeLike