

Hi everyone! It’s Jackson back with a Bolt Action battle report. This past Friday, I joined my friend Jason to play at the Fabricator’s Forge in Coraopolis, PA. I’ve been meaning to get a game with him since he started painting up his British, so I figured we could take the fight to Sicily and battle with the mighty forces of Il Duce.
The Mission – Double Envelopment
- Deploy half of your force on the board with the other half in Reserve.
- Victory Points:
- 1 VP for each enemy unit killed.
- 2 VP for each friendly unit that ends the game in the enemy’s deployment zone.
- 3 VP for each friendly unit that exists the enemy table edge.
- Win by 2VP to secure victory, anything else is a draw.
The Table

We battled on a rural train station. Train cars were hard cover. Wheat fields and platforms were soft cover.
The Armies

| Jason’s British – Generic Reinforced Platoon | |
| HQ | |
| 2nd Lt – Reg – 50 x1 Buddy – 10 | 60pts |
| Forward Artillery Observer – Reg – 0 | 0pts |
| Infantry | |
| Commando Section – Vet – 8 men – 112 x8 SMGs – 24 Tough Fighters Behind Enemy Lines | 136pts |
| Commando Section – Vet – 8 men – 112 x8 SMGs – 24 Tough Fighters Behind Enemy Lines | 136pts |
| Regular Infantry Section – Reg – 5 men – 65 x1 LMG – 20 | 85pts |
| Regular Infantry Section – Reg – 5 men – 65 x1 LMG – 20 | 85pts |
| Med. Mortar Team – Reg – 50 Spotter – 10 | 60pts |
| PIAT Team – Vet – 52 | 52pts |
| Armored Car | |
| Humber Mk 2 – Reg – 95 Light Autocannon w/ coax MMG Armor 7 Recce | 95pts |
| Tank | |
| M10 Wolverine – Reg – 175 Heavy AT Gun Pintle HMG – 25 Armor 8 Open-topped | 200pts |
| Transport | |
| Bedford QLT – Reg – 39 MMG – 15 QLT – 34 Armor 6 | 88pts |
| Total – 11 Order Dice | 1,024pts |
I’ve been waiting to play Jackson for a while now. This will be my second game of Bolt Action and I just painted up my M10. Let’s see if it can take on the Italians. I am going to pile into the Bedford with my large Commando squads, the Lt, the PIAT, and the Artillery Observer. It’s a huge gamble and I’m hoping to envelop Jackson with my army. Good luck! – Jason
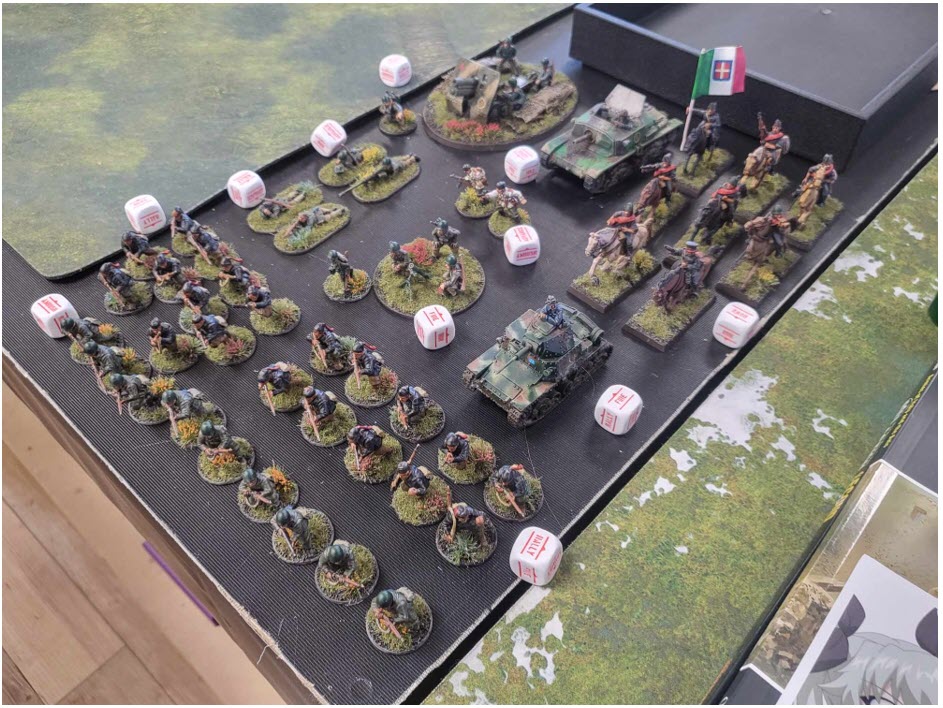
| Jackson’s Italians – Generic Reinforced Platoon | |
| HQ | |
| 1st Lt – Reg – 75 x1 Buddy – 10 | 85pts |
| Infantry | |
| Cavalry Section – Vet – 8 men – 120 Horses | 120pts |
| Camice Nere (Blackshirts) Militia – Reg – 10 men – 100 Non Testati | 100pts |
| Camice Nere (Blackshirts) Militia – Reg – 10 men – 100 Non Testati | 100pts |
| Camice Nere (Blackshirts) Militia – Reg – 9 men – 90 Non Testati | 90pts |
| Med. Mortar Team – Reg – 50 Spotter – 10 | 60pts |
| Sniper Team – Reg – 50 | 50pts |
| ATR Team – Reg – 30 | 30pts |
| Artillery | |
| Med. Howitzer – Reg – 75 Gun Sheild Spotter – 10 | 85pts |
| Armored Car | |
| L6/40 – Reg – 95 Light Autocannon w/ coax MMG Armor 8 Recce Vulnerable One-Man Turret | 95pts |
| Tank | |
| Somovente 75/18 – Reg – 170 Hull-mounted Med. AT Gun Pintle MMG – 15 Armor 9 Vulnerable | 185pts |
| Total – 11 Order Dice | 1000pts |
It’s been a while since I busted out my Italians and will be my first game with Jason. I’m bringing the Blackshirts and hope my Non Testati rolls can come in strong. Lots of riflemen as a core with my cavalry as a backup should be able to hold off his advance. – Jackson
The Game
Turn 1


We both start the game cagey on Turn 1 – forcing units to shoot into hard cover leaves little damage being done after the first turn.
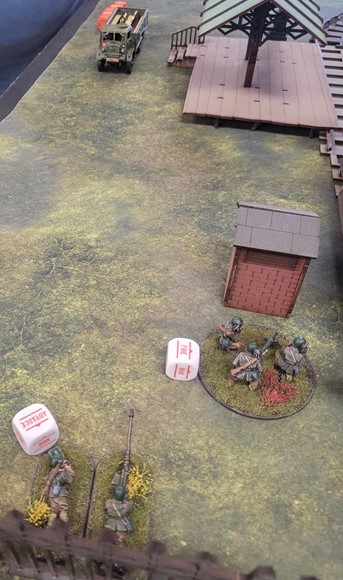
The Blackshirts run up to start the offensive early, but the Humber behind the bridge takes advantage of their recklessness and blasts them with machine gun fire killing three. The Non Testati roll comes up as a 5 and the squad becomes Fanatics! Three men was a steep price to pay early, but Fanatical Blackshirts are now commanding the center.
The Commandos on the flank see the Humber go in and want to join the fun. Blasting the squad again with a Bren LMG and rifles, they kill three more. The Blackshirts are now down to four men and with a few Pins on them, they regret their decision to take the board up early.
Turn 2
The M10 fires HE at the Italian Med. Artillery and scores two kills and three Pins! The artillery crew hold their nerve and pass their Morale Check on a 6.
The Semovente wants payback, so it unloads into an enemy Commando squad with it’s 75mm shell and MMG rounds and wipes the unit with some lucky rolls.
After the big guns fire, Jason springs into action with his Bedford. Carrying a whopping 400 points of men and equipment, this is his major push. He opts to Run with the Bedford into the center of the board hoping to get a lucky Turn 3 pull and claim an early victory with envelopment. That truck could deliver 18 VPs for Jason if he exits the board, I had to think quickly to counter it. Enter… the Solothurn AT Rifle…
With a crack, the 20mm shell flies into the moving truck and scores a direct hit on the engine block sending gasoline and cast iron shrapnel flying, exploding the truck and forced the men aboard to hastily disembark, but not before delivering six hits to each squad!
The explosion claims two Commandos from each squad, as well as the lone Artillery Observer! Both the Lieutenant and PIAT Team emerge unscathed, even after suffering six hits.
Woah! What a shot from the AT rifle and way to go! Though, now I need to worry about all these angry Commandos in my back line. Let’s see if the cavalry can hold them off in Turn 3.

Turn 3
The British have the first Order Die, and Jason wastes no time with a key Snap-To-Action from his Lieutenant. The Commandos shake their Pin easily and fire 12 SMG shots on the Italian Cavalry. I quickly opt to recce away from the oncoming fire and the cavalry flee to safety … for now.
The Commandos target the Mortar with their six Sten guns, but fail to kill any! The Mortar is shaken, but glad to be alive. The PIAT advances …
They spy the hull of the Semovente through the boxcar and opt to take a shot. Needing Super-6’s, the PIAT team rolls their single shot … and they hit! The vulnerable hull and the PIAT’s shaped charge rule make for an easy pen, but Jason adds insult to injury by rolling another 6, dealing Massive Damage and two rolls on the Damage Results table. Another 6 turns the Semovente into a burning wreck!
Both of us, jaws agape: What a moment! A miracle shot from the PIAT smoked the Semovente and blew it to smithereens! That has to be the craziest moment and Jason found that suitable revenge for blowing up his Bedford.
The M10 continues to pin down my Artillery and L6/40 on the left side, now the Italians are beginning to sweat, as both of the Blackshirts squads in Reserve fail to arrive! I need these squads here before the Commandos can claim more kills and exit the board!
Turn 4
Italians have the first dice. Charge! The Cavalry charge into the five remaining Commandos with their SMGs … Tough Fighter Vets vs Tough Fighter Vets. Let’s see if I can get the drop on them.

Round 1 of combat and some abysmal dice on both our parts leads to tie combat … one kill a piece. Round 2 sees the Commandos destroyed, but not before bringing down three more Cavalry. The squad of Commandos on the platform counter-charge the remaining Cavalry. Another tied round sees Jason’s Commandos wipe my Cavalry and secure the flank after taking three casualties themselves.
The British 2nd Lt shoots the Italian ATR, killing one of the two-man team and forces a Morale Check, the lone ATR operator passes the check and stands his ground.
The Blackshirt reinforcements finally enter the table to stem the bleeding on the right flank, but do little damage with their rifles.
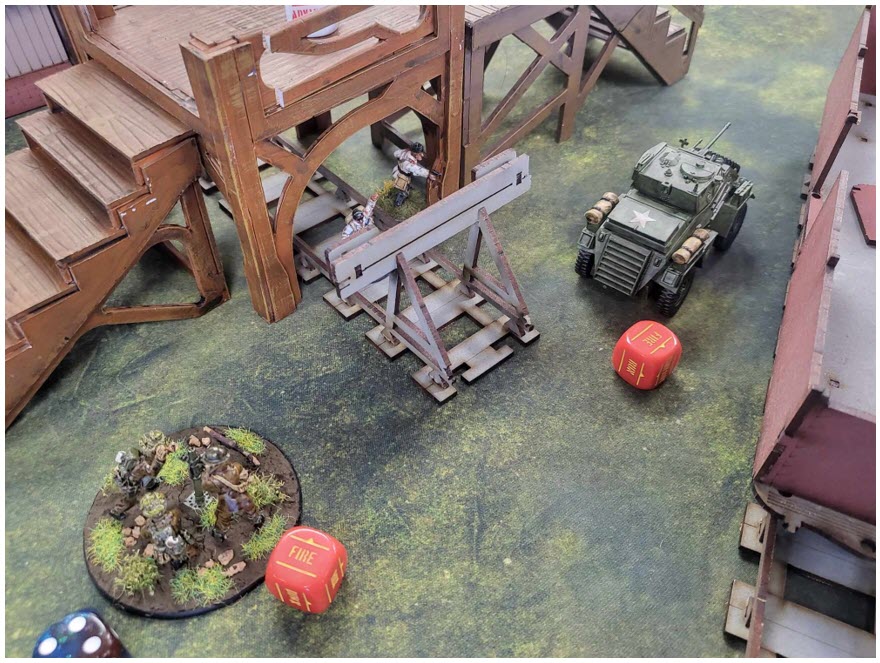
On the left, the M10 takes a shot and knocks out the L6/40. The Commando team with the Bren Gun finish off the Medium Howitzer, leaving the left flank entirely empty of Italian forces! Save for a lone Sniper guarding the raised bridge in my deployment zone.
Turn 5
The Blackshirts charge the PIAT Team. A quick reaction fire from the PIAT sees one Blackshirt gutted by the shell and the Non Testati check comes up a 1! This turns the Blackshirts into Shirkers … not what I needed at this stage in the game. The Italians wipe the PIAT Team as revenge for their burning hulk of a Semovente.
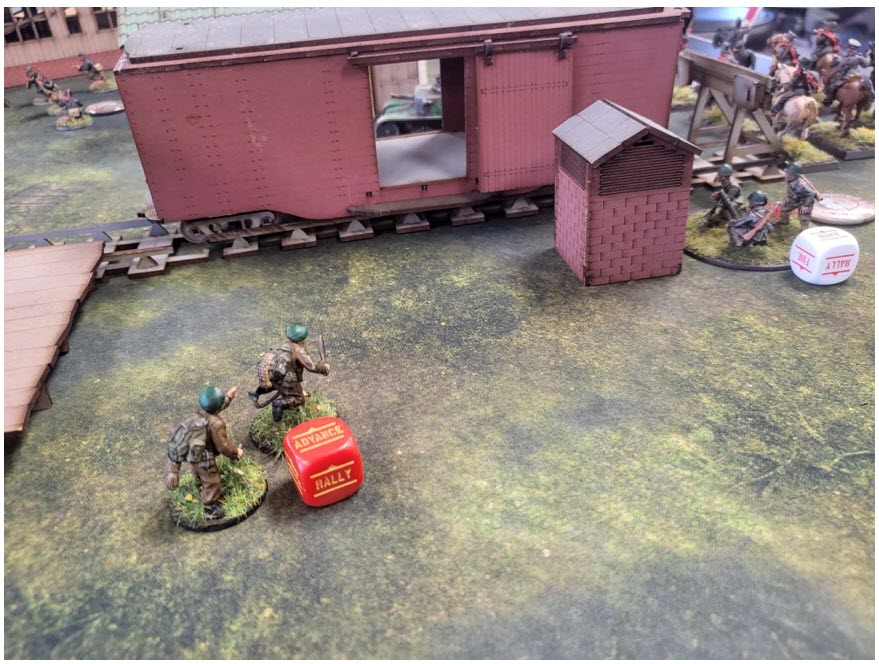
My Italian 1st Lieutenant, in an attempt to sneak his way through the chaos and exit the table finds himself under the enemy rail bridge. Let’s see if I can get lucky and get a Turn 6 dice to exit the table!
Turn 6
British get the first Order Die and Jason catches onto my sneaky attempt … The Humber Mk II fires its MMG point blank, but I need the Lt to stay up in order to have a prayer of winning this game, so I valiantly choose not to issue a Down Order. Five MMG shots kill my Lt’s assistant and forces a Morale Check. The gallant commander holds and exits the table on the subsequent pull of an Italian Order Die.
Jason follows suit and exits the table with his Lieutenant, evening the score.
The remaining Commandos charge the Shirker Blackshirts near the platform. With a crazy whiff of his dice, the Commandos score no kills! The Blackshirts take three of the Commandos and wipe the unit. Talk about a crazy recovery! The Blackshirts in the center kill a single Commando.

We roll to see if the game continues, and Jason rolls a 2, no Turn 7. Game over! Let’s count up the dice!
Jason killed five of my units and had one unit exit the table, netting him 8 VPs.
I killed six of his units and had one unit exit the table, netting me 9 VPs.
9-8 results a draw! (We had a win by 2 VP required for victory.)
The Post-Game
The Italian Conclusion
Wow! What a game! I for sure thought I was toast with all those Commandos bearing down on me, and the miracle shot from the PIAT team on my Semovente? Sheesh … these are the moments we live for as players, and even when my own tanks are blowing up left and right, it is still awesome to see what can happen with Hail Mary attempts, haha.
I wanted to leverage the potential assault capability of fanatical Blackshirts if I could get lucky dice, but the fact that they are Reg really killed me … seems like every time I was shot, I was taking models off!
That being said, the star of the show had to be that ATR and my Cavalry holding down the left flank and stopping Jason’s bid for a party bus envelopment. Truly a fun game, and I can’t wait to fight Jason again. – Jackson
The British Conclusion
Yeah, sadly the party bus went out with a bang, and I learned my lesson the hard way of sticking my Artillery Observer in the transport, at least until he tries to call down the thunder. Though the rest of the survivors, including the PIAT Team got out and made one hell of a mess for the Italians before the last guy was put down… fun times!
The M10 was a total menace. It blew up Jackson’s L6/40 and kept pummeling his artillery. The HMG also put in a surprising amount of work. It took out a few guys and I don’t regret having it on there. Overall, I’m very pleased with how my boys did. It was quite a good game and I’d like to do it again sometime. – Jason

That looked liked a really good game and I am so pleased to see someone using Italians. I am so tempted to get my own Italian force, but it always seemed like a difficult army to learn.
LikeLiked by 2 people
As it turns out, Jackson actually started his Italians after seeing mine! Italy has become more popular in Bolt Action over the years and now with both Campaign: Italy books in addition to The Western Desert there really are a lot of interesting ways to build your force.
I wouldn’t say it’s a difficult army to learn. But you just have to be alright not having any Army Special Rules! It came sometimes feel like you are fighting with one arm tied behind your back haha
LikeLiked by 1 person