

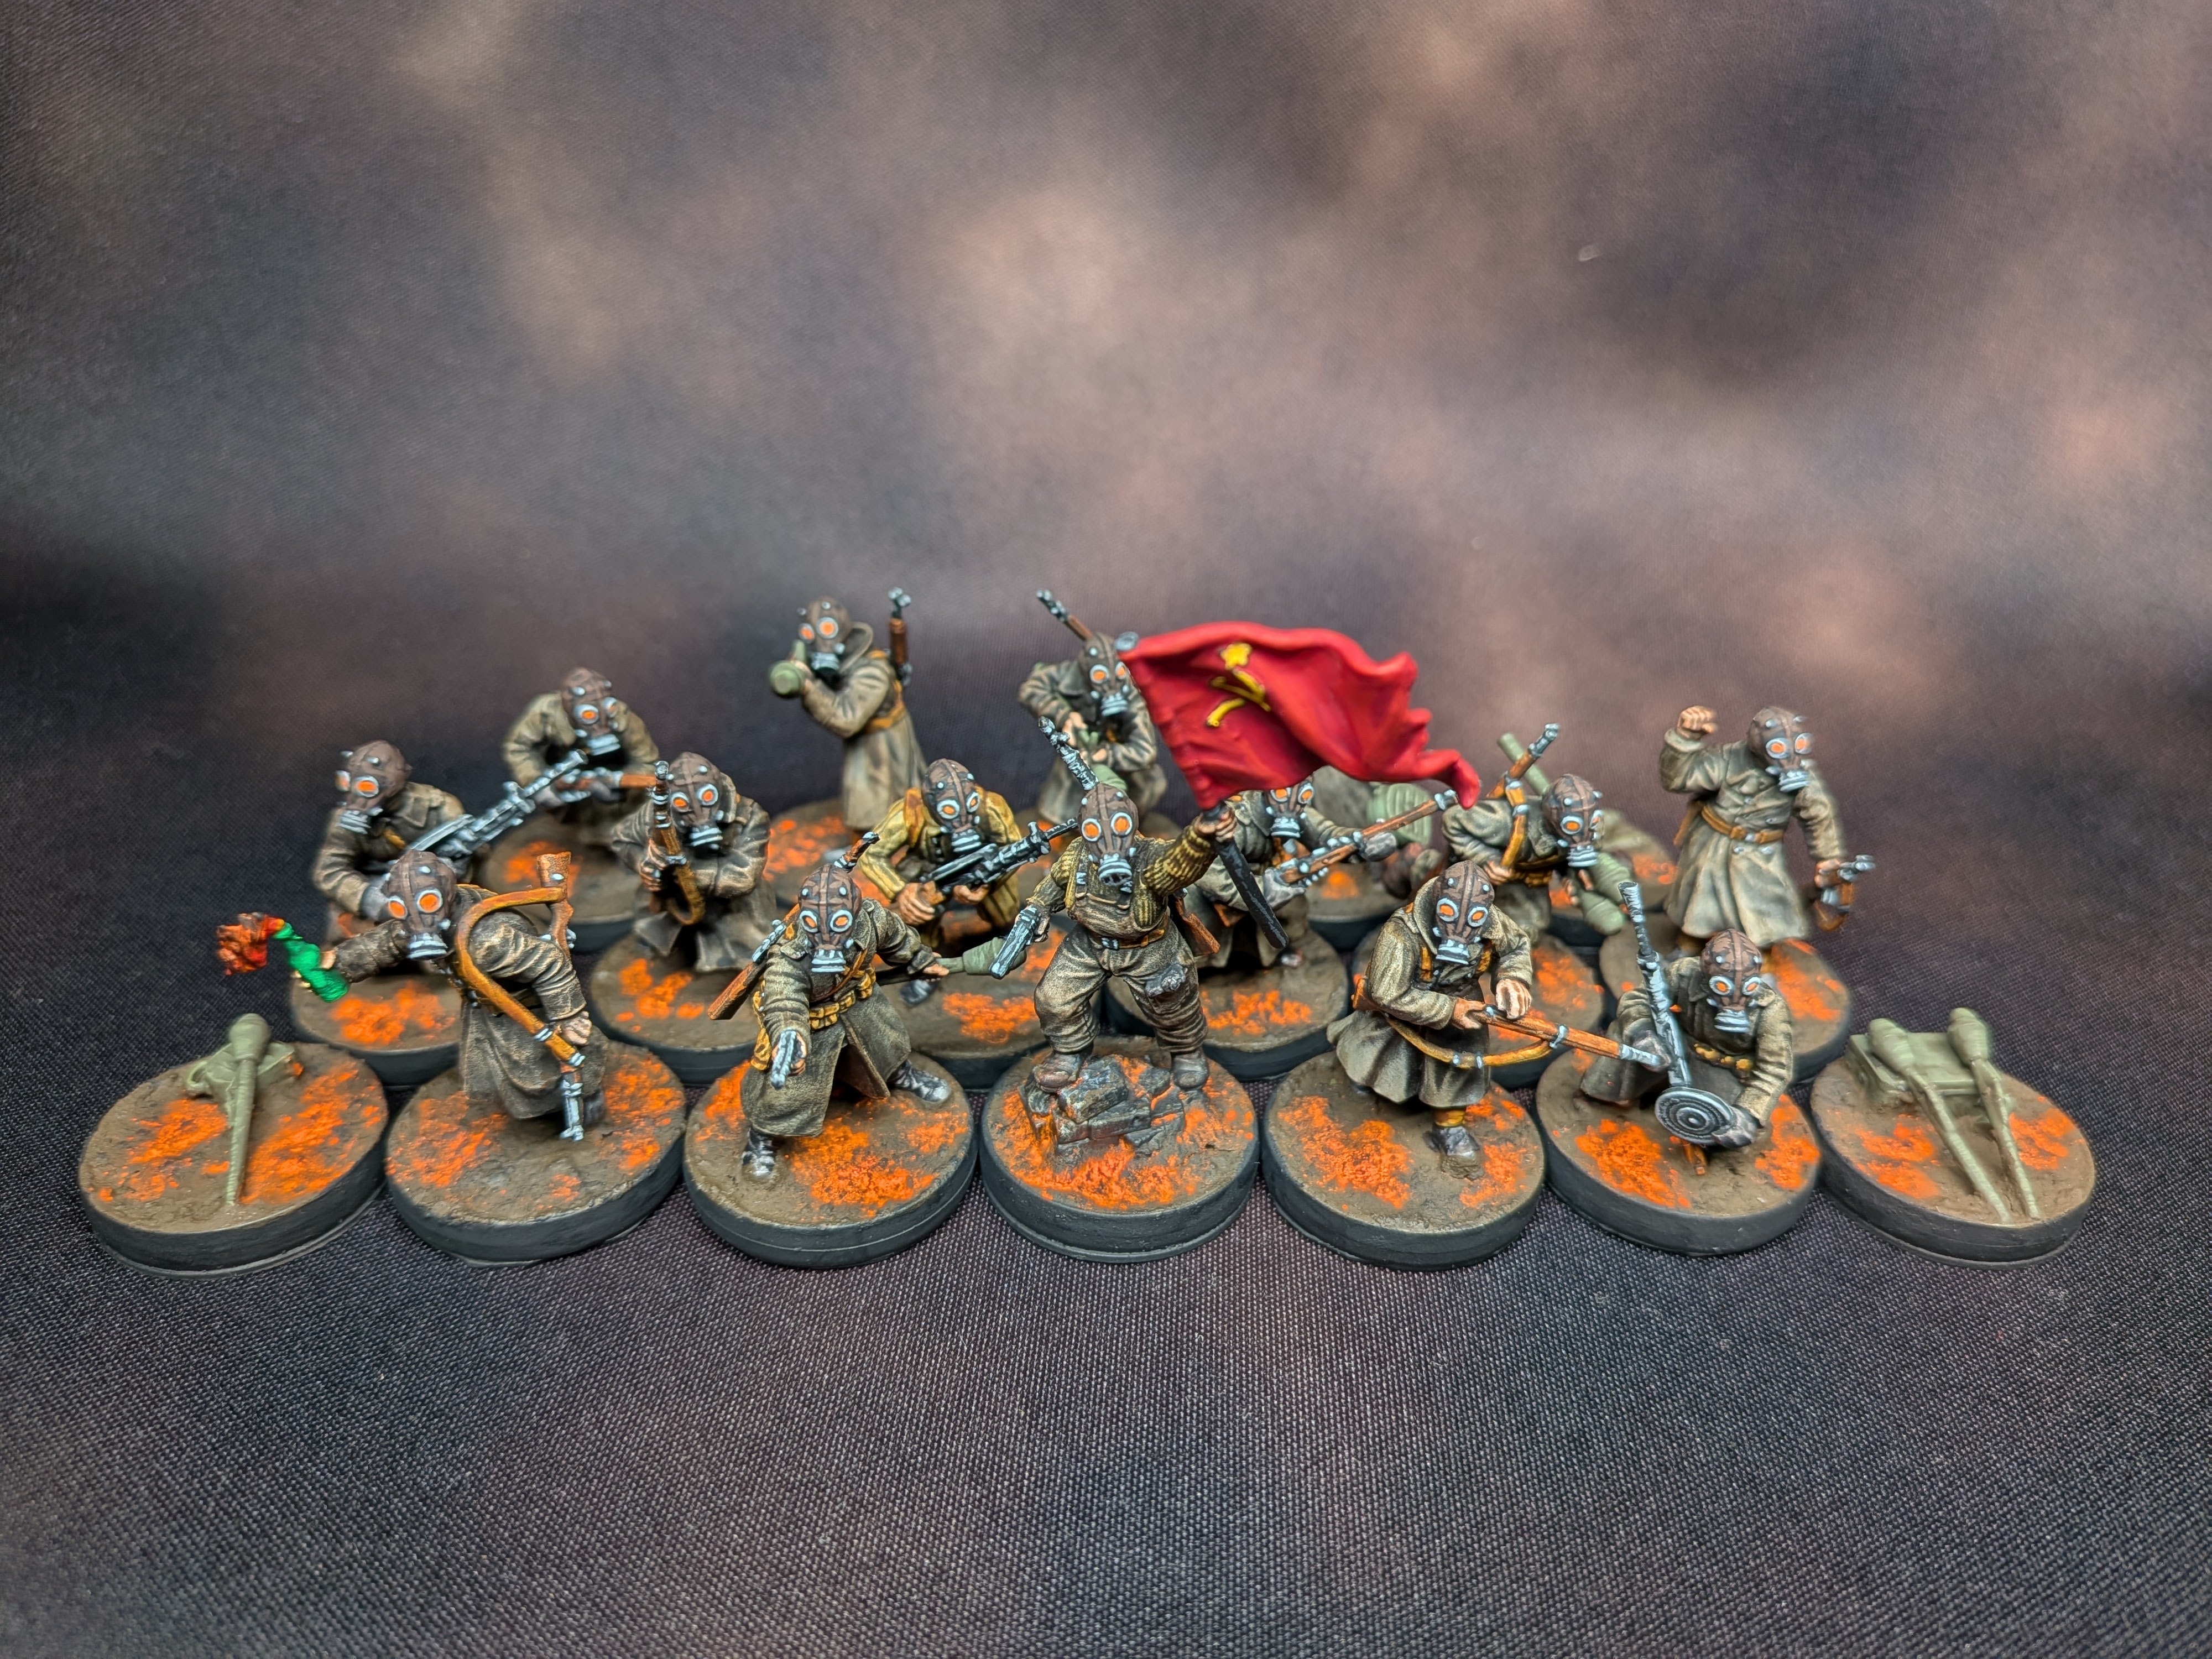
Following the same format as my previous Chicago Dice Paints article for Wargames Atlantic BEF, I wanted to take a stab at Soviet Bloc infantry using a speed paint / slap chop method. Painting models like this is difficult for me, as it’s such a different approach than what I’m used to. It’s a mindset change to skip over details, to trust the process, and be ok with “yup, that’s good enough.” That being said, I did use traditional layer + highlights for the gas masks and used the Lieutenant and Dog painting guide from Bite the Bullet.
The models are a mix of Winter Soviets, Winter US, and Winter German plastic kits from Warlord Games. The Gas Mask Heads are prints from Victoria Miniatures provided by The Prince of Prints.
Worth noting, except for the gas mask heads, this scheme also works for Bolt Action Soviet Union Infantry. It’s possibly darker and grimier than you would typically see, but pop a standard WWII head on these models, and I think it would work great for any Late War Soviet Infantry.
0. Prime and Prep
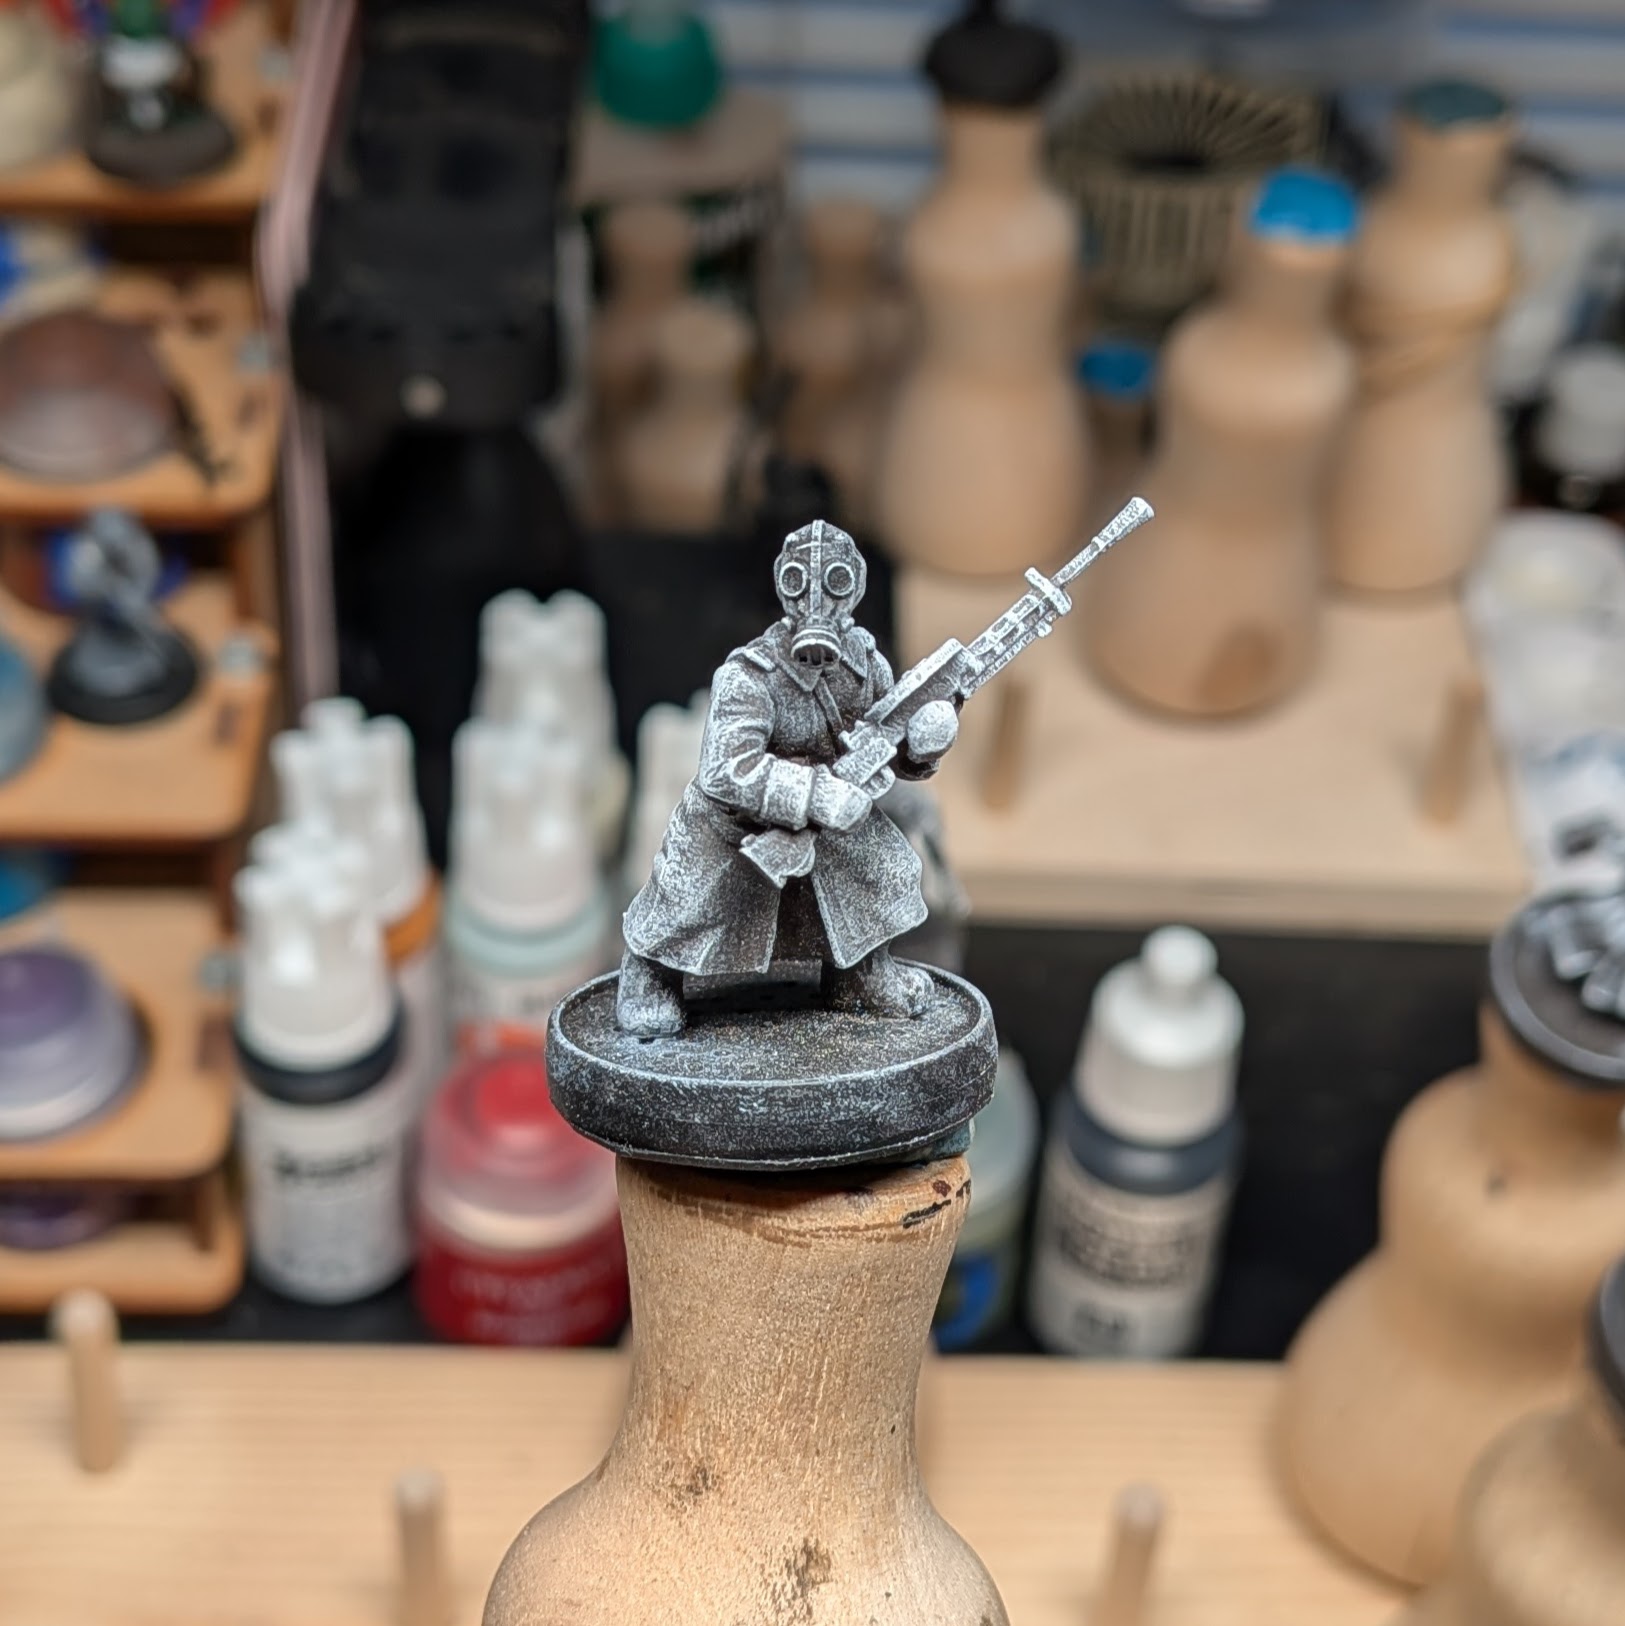
- Prime Dark Brown.
- Following Shane’s approach to USMC, apply a Zenithal Drybrush to the model with a mid-grey. I used MSP Rainy Grey. Work the drybrush from a downward angle.
- Apply a second Zenithal Drybrush with white. I used MSP Pure White. Again, work the drybrush from a downward angle.
1. Basecoats
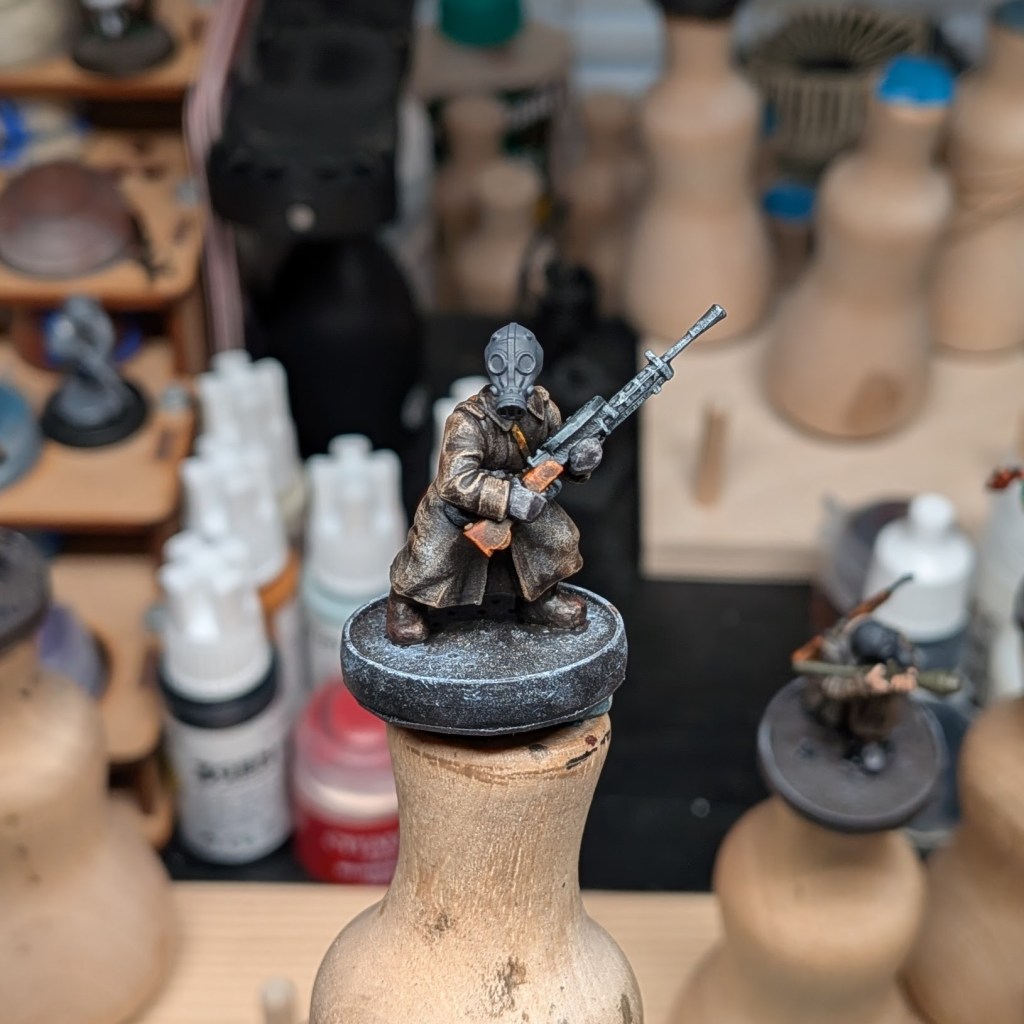
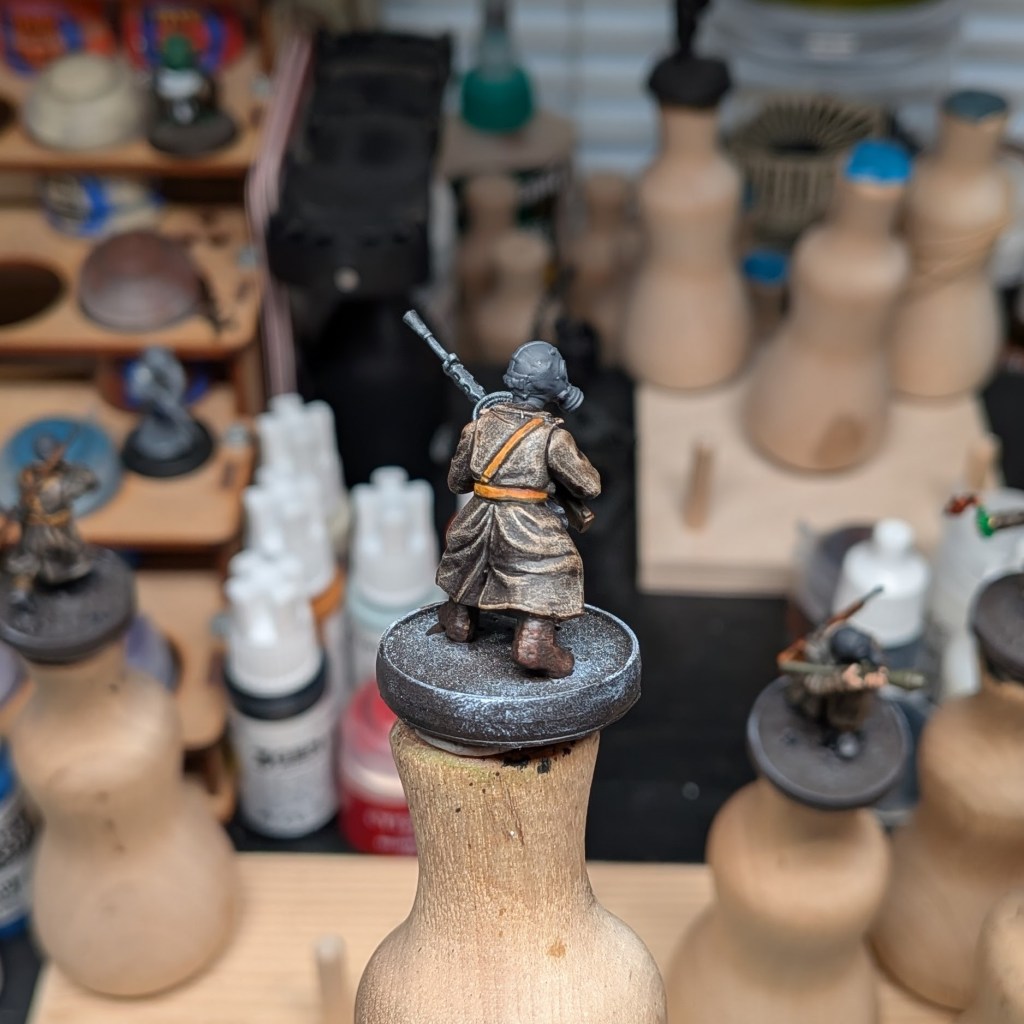
As with any Contrast / Speed Paints / Xpress, because we cannot “layer” these paints, you need to be careful not to get the paint onto other parts of the model. So, when painting the greatcoats, do what you can to keep the paint off the webbing, the hands, and the weapons. When painting the hands / mittens, do what you can to keep the paint off the weapon, etc.
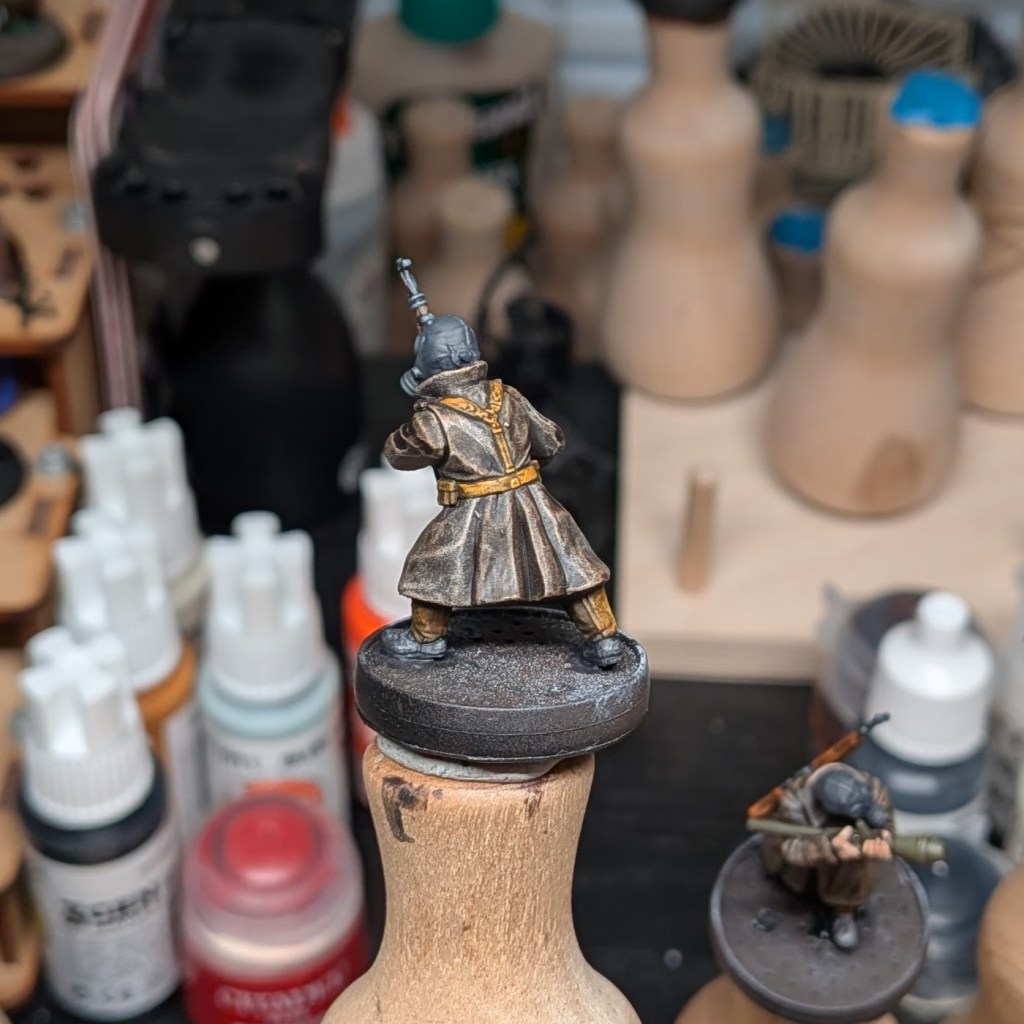
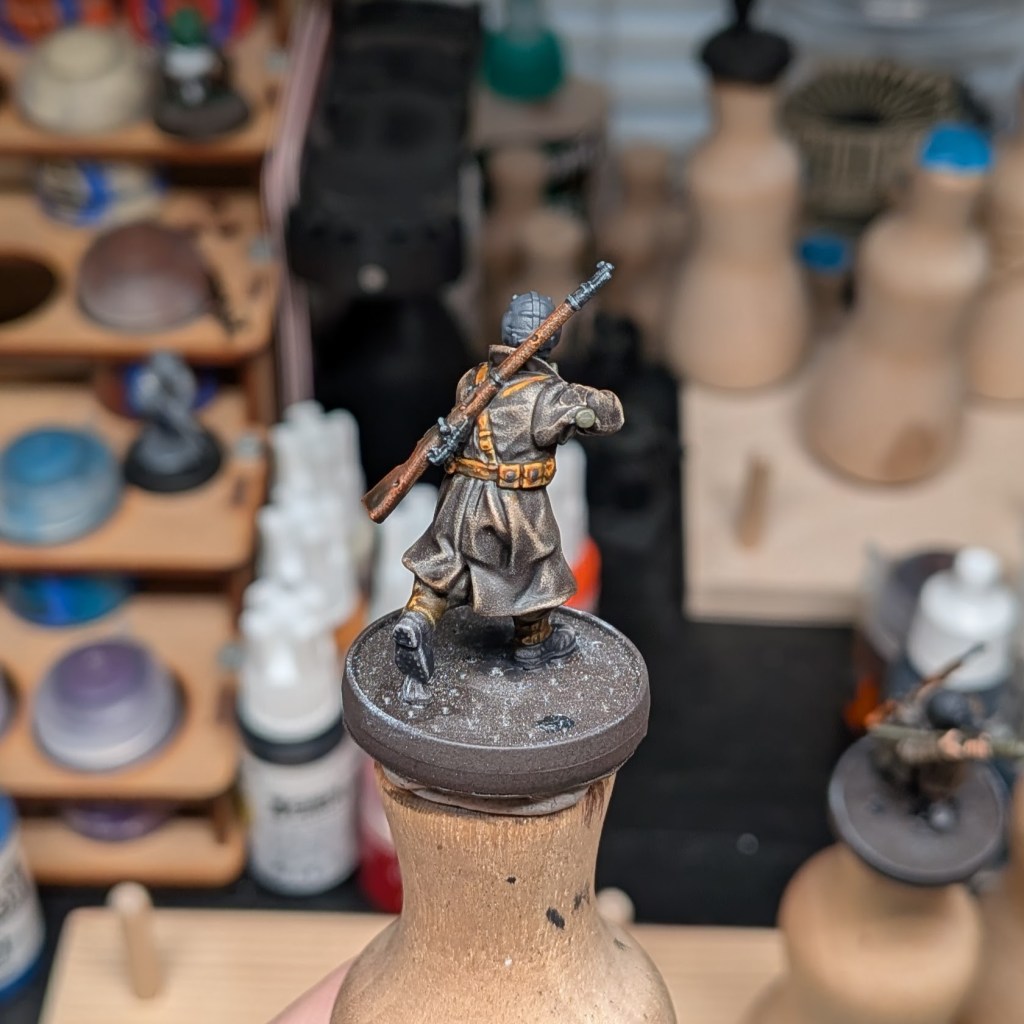
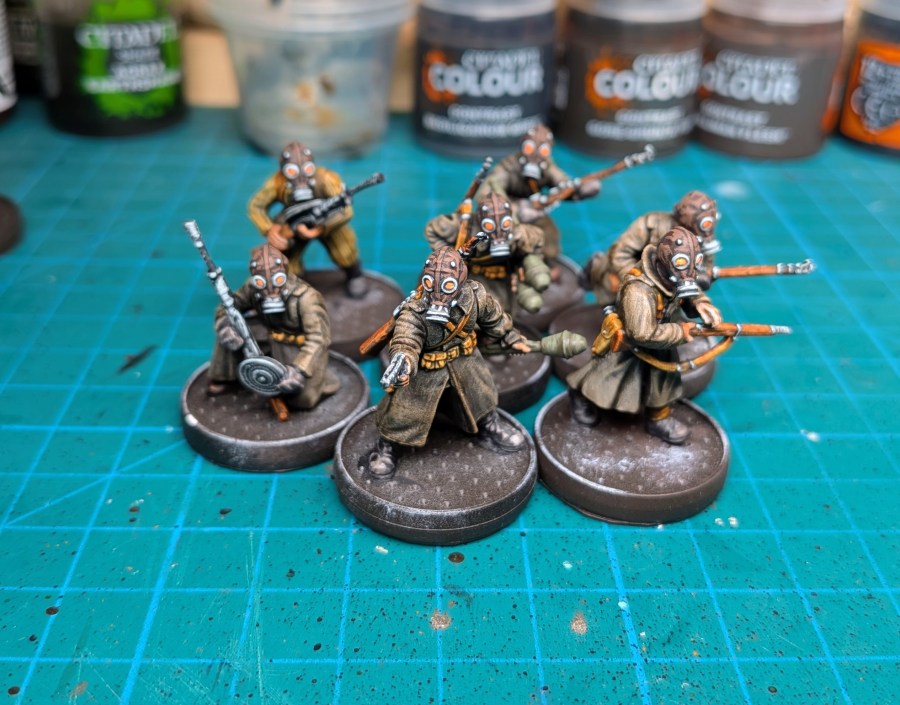
The photos above show the completed basecoats on three different models, front and back.
- Greatcoats
- Basecoat the greatcoats with Army Painter Speed Paint Satchel Brown : Vallejo Xpress Plague Green : Medium in a 2:3:1 ratio.
- Padded Jackets / Pants
- Basecoat any models with a padded jacket or pants with Contrast Aggros Dunes.
- Webbing, gators, backpacks, belts, rifle slings
- Basecoat with a mix of Valljeo Xpress Wasteland Brown : Medium in a 2:1 ratio.
- Allow the first coat to fully dry. Apply a second coat.
- Wooden rifle stocks
- Basecoat with Contrast Goregrunta Fur.
- Boots
- Basecoat with either Contrast Cygor Brown or Contrast Bacilicanum Grey.
- Metal
- Basecoat with Contrast Black Templar : Medium in 1:1 a ratio.
- Gloves / Mittens
- Basecoat with Contrast Basilicanum Grey.
- Skin (for these models, it’s just hands)
- Basecoat with Contrast Guilliman Flesh.
- Gas masks, buttons, small metal details
- Basecoat with Vallejo German Grey.
- Ammo boxes and Panzerfausts
- Basecoat with Vallejo US Olive Drab.
2. Shade
The only wash we are doing is for the ammo boxes (held by the LMG teams) and the Panzerfausts. It’s a quick wash, and I missed the photo.
- Ammo boxes and Panzerfausts
- Wash with Citadel Agrax Earthshade.
3. Layers and Highlights
- Ammo boxes and Panzerfausts
- Layer with Vallejo US Olive Drab.
- Highlight with Citadel Straken Green.
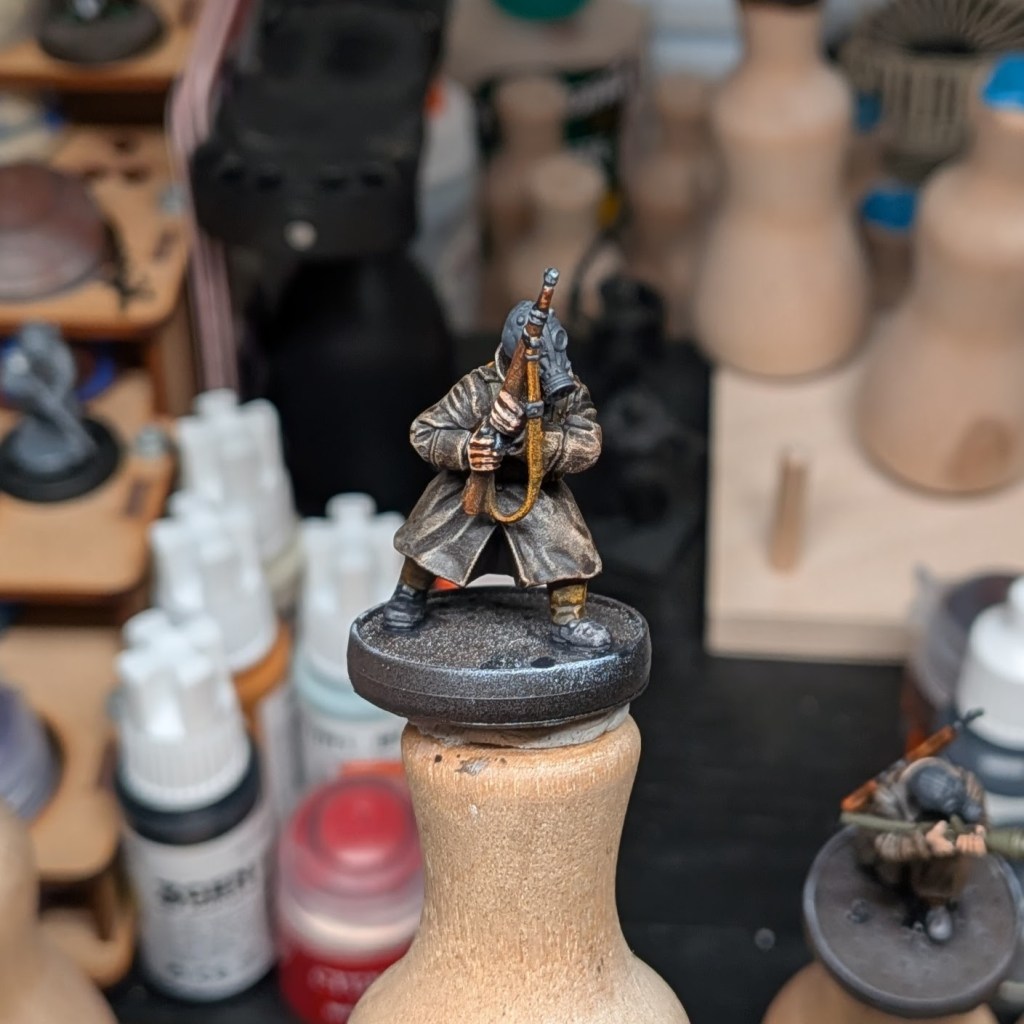
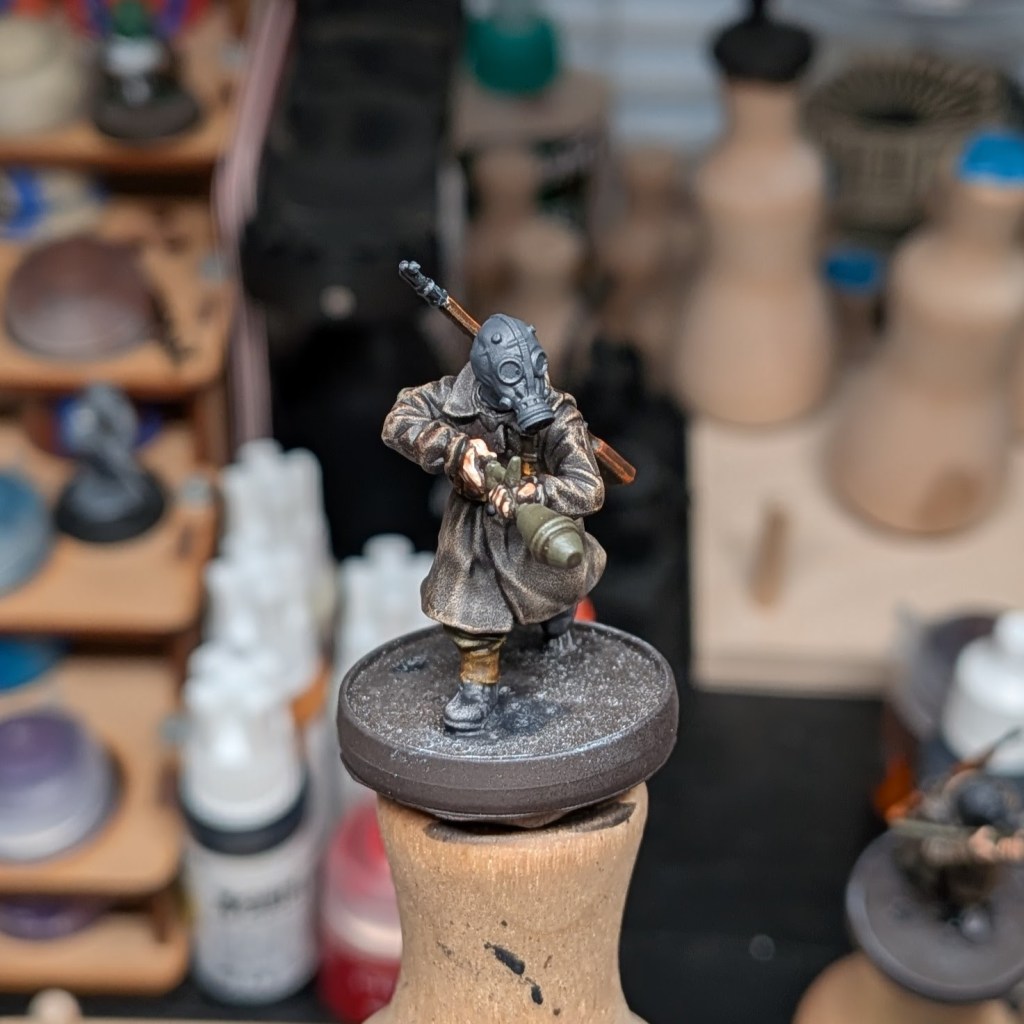
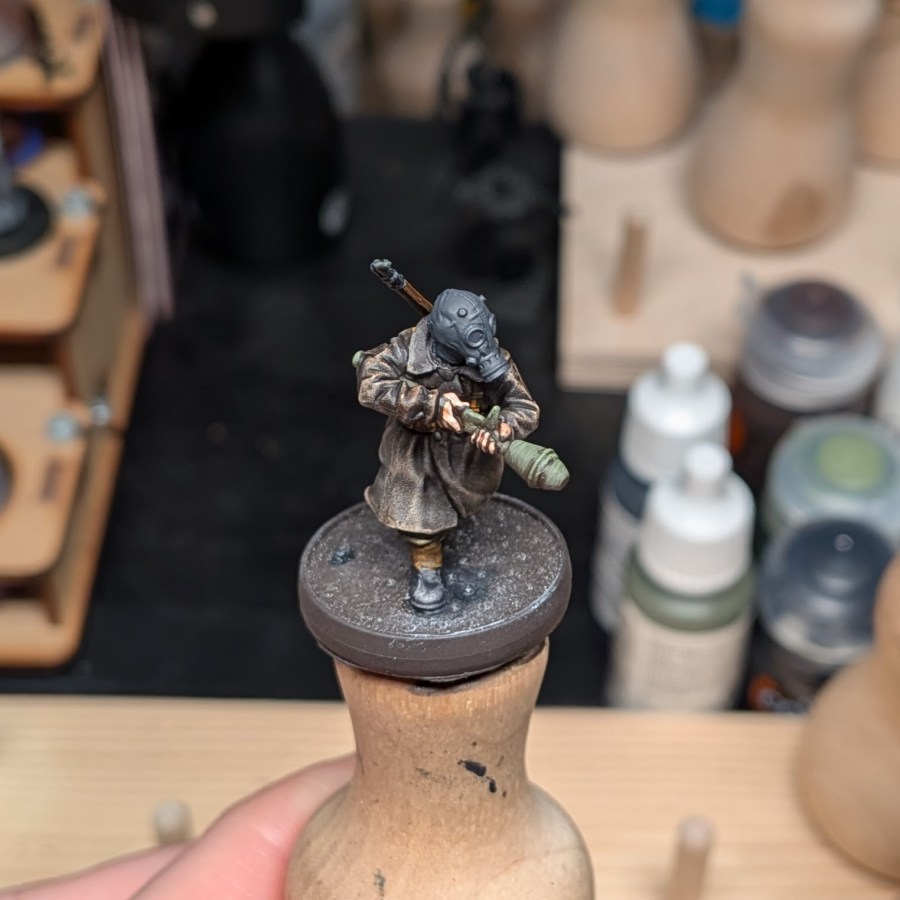
4. Gas masks and metals
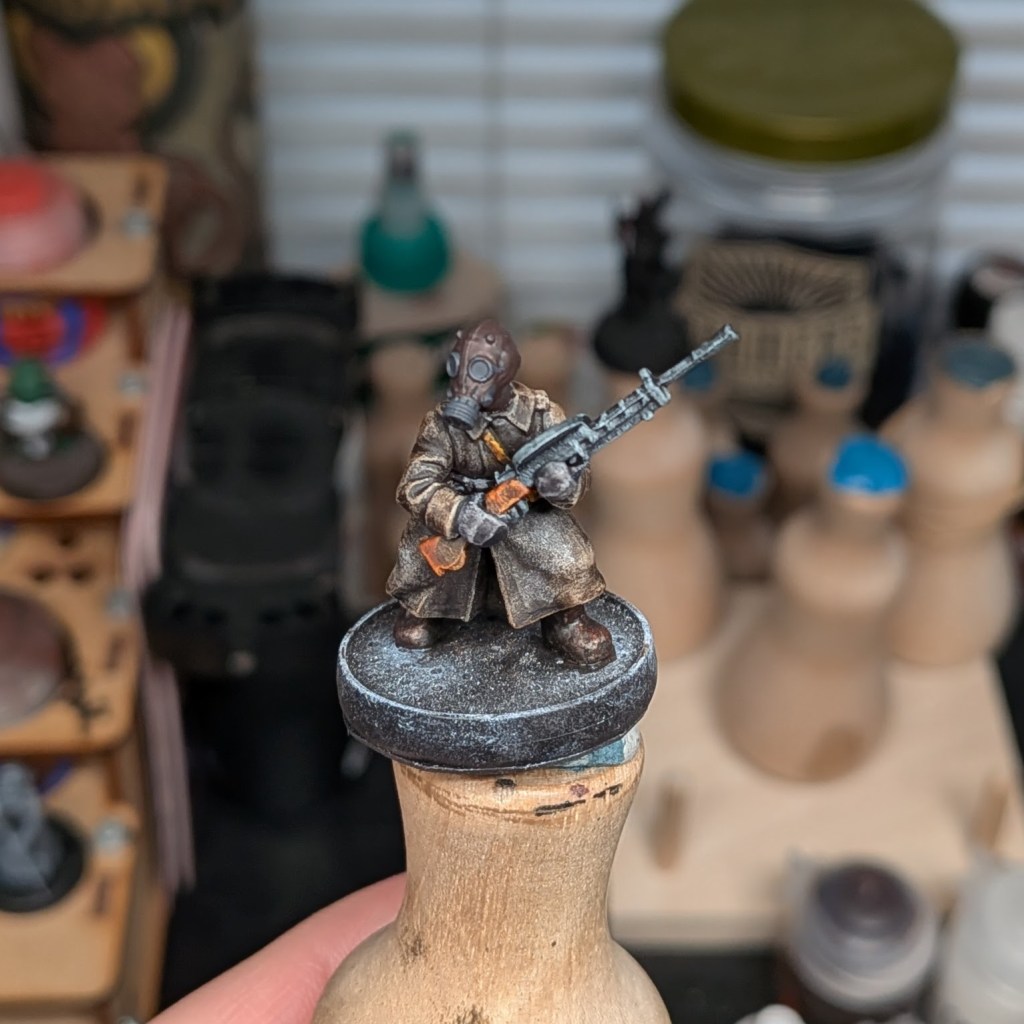
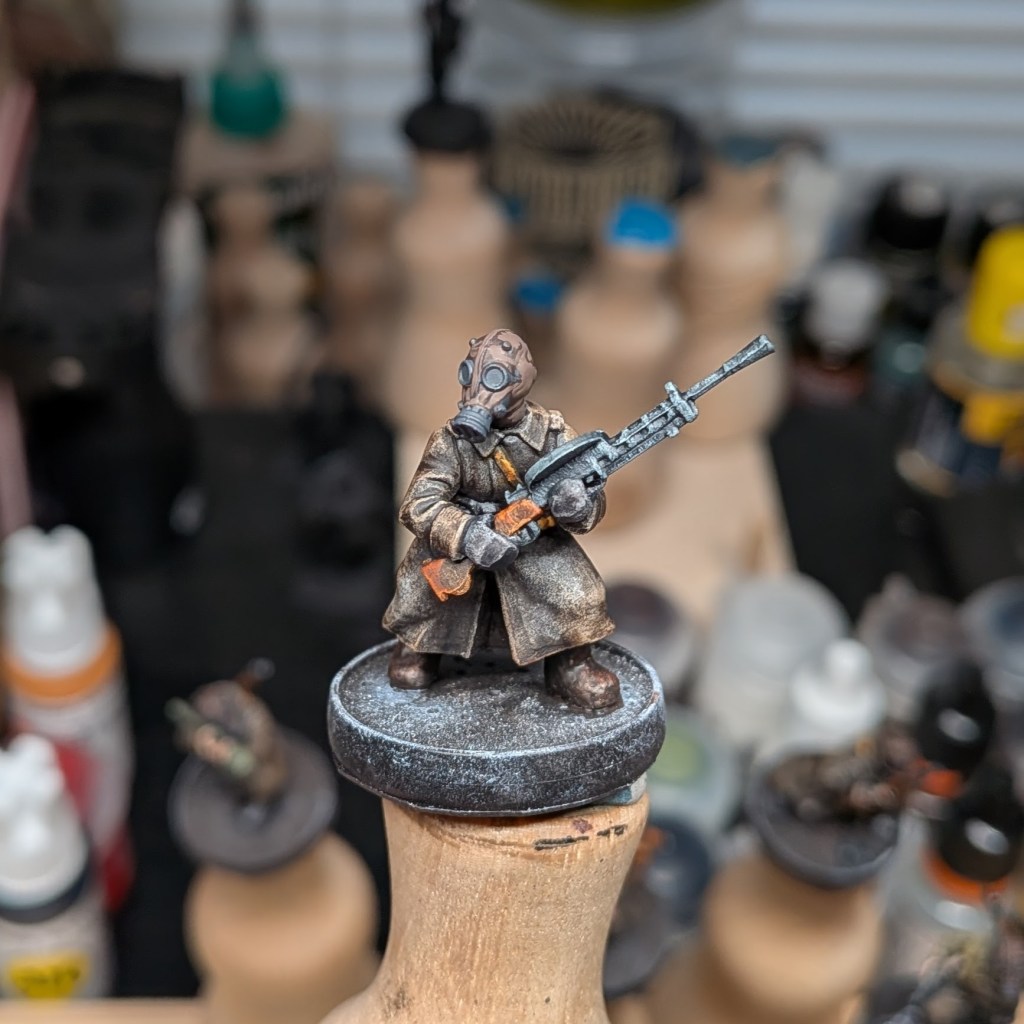
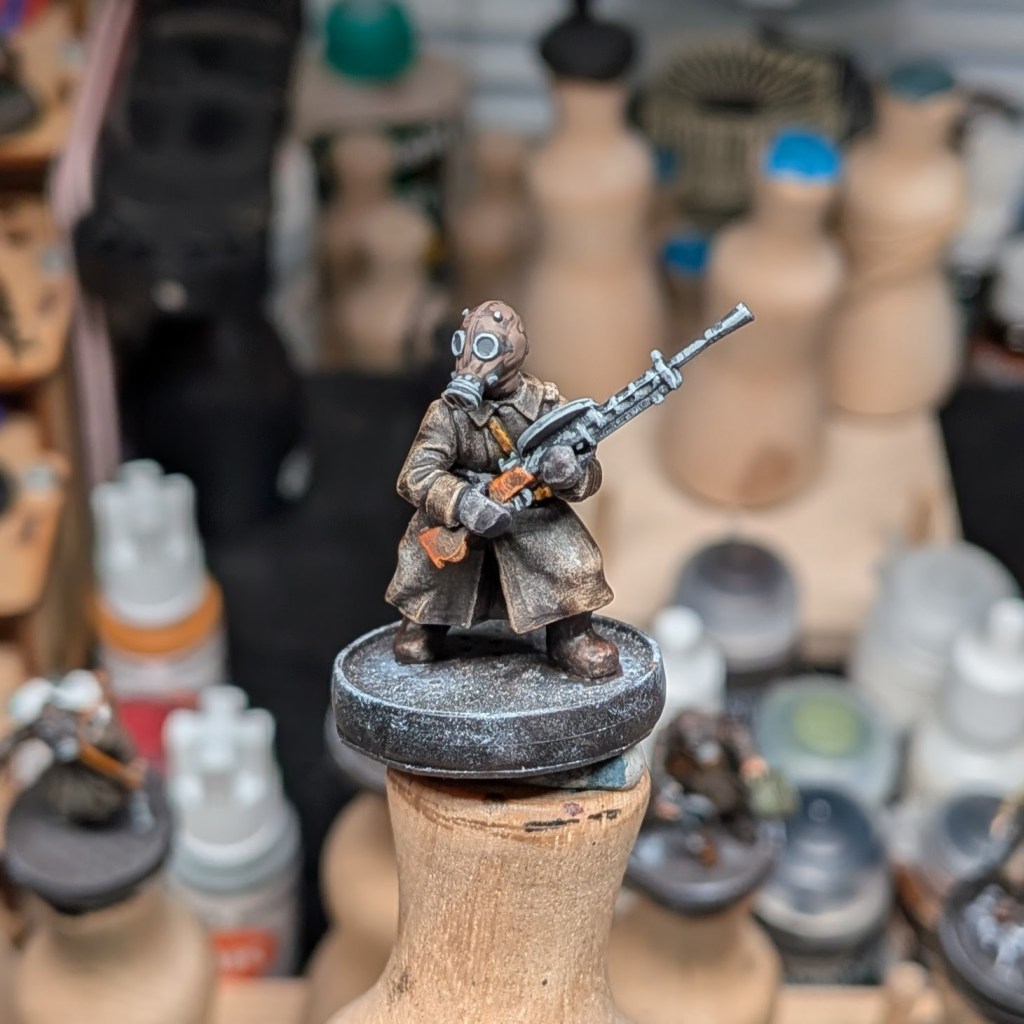


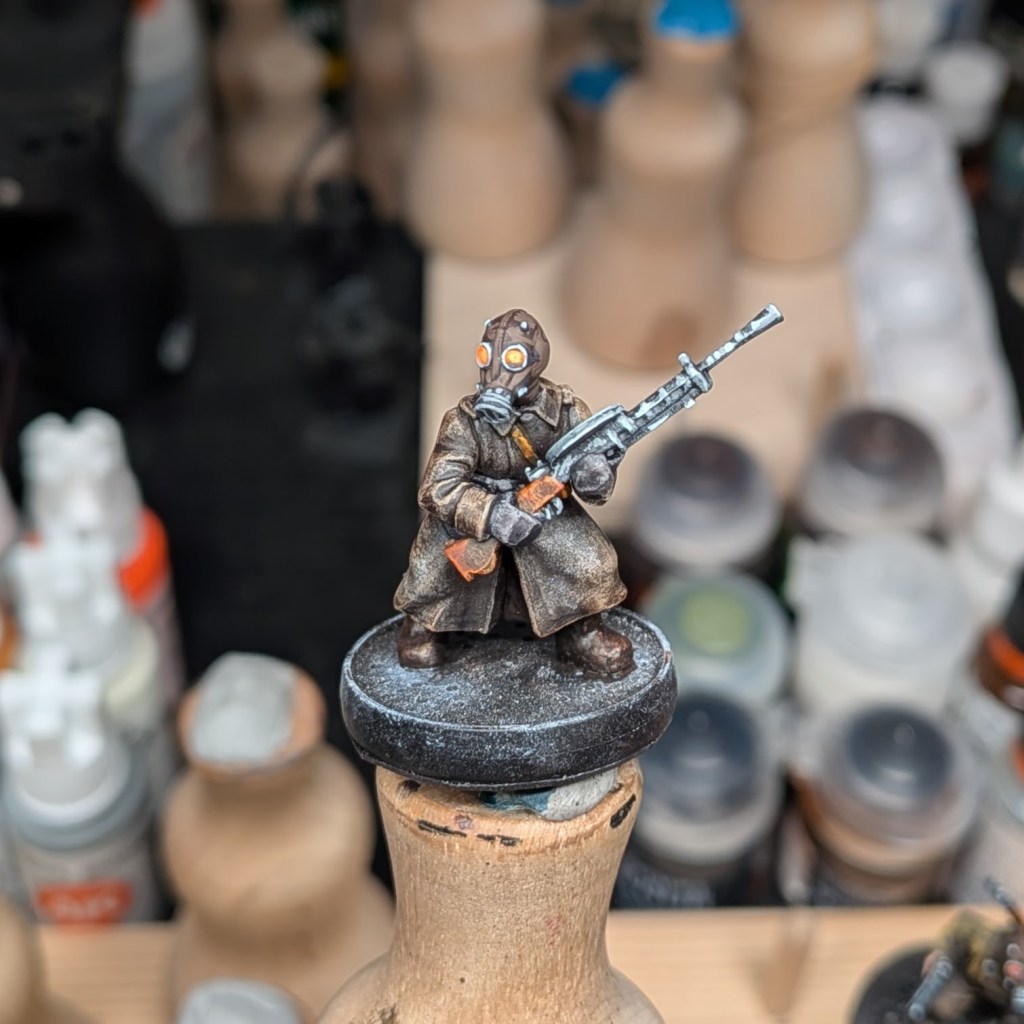
As the gas mask head is the focal point of the model, we will spend some extra time on it. I went with a traditional approach instead of slap chop. Above are photos of each of the six steps, in order from left to right.
- Layer the leather parts of the mask with a mix of Citadel Mephiston Red : AK Black in a 60/40 ratio.
- Leave some of the Vallejo German Grey showing in the recesses.
- Highlight the same sections by adding AK Orange Brown into the existing mix.
- Again, leave some of the previous layer showing.
- Layer the metal parts on the mask, the metal on the guns, and any other metal bits with AK Graphite.
- Highlight anything metallic with AK Blue Grey.
- Paint the inside of the eye lenses with AK Ivory.
- Don’t go all the way to the edge. Leave some of the Vallejo German Grey showing around the edges.
- Wash the inside of the eye lens with AK Fluorescent Orange.
5. Varnish
- Varnish the model with AK Ultra Matte Varnish.
- Brush on directly from a dry palette or cup.
6. Basing
Base the mini however you’d like! I went with:
- Cover the base in AK Terrain Dark Earth. Let it fully dry.
- Add a few spots here and there of Orange Flour Pigment from Green Stuff World.
- Apply AK Pigment Fixer onto the Orange Flour. Let it fully dry.
- Drybush some flat black onto the Orange Flour to add a bit of depth.
- Paint the base rim black.
The photo above fails to capture how bright the Orange Flour Pigment is. The effect is pretty striking if I do say so myself. Especially against the dark mud bases and it ties together nicely with the orange gasmask lenses. Again, they look much better on the table than in the photo!
And here they are! A squad of seven Veteran Soviet Bloc Infantry for Konflikt ’47 – quick and easy! One aspect of this paint scheme and approach that is difficult to capture is just how quick it is. I painted these seven in a week, and that is a blistering pace for me. A typical batch of five infantry usually takes me twice as long. Considering how fast these came together, I am thrilled with how they turned out.
